In this guide, we'll go through the installation of a Windows OS on any of our VMs.
We do not provide ready-made images for Windows, and some Linux distributions. Our team will only support Linux distributions that are within their support lifespan, any other OS will be available for installation with an ISO and the customer is free to perform it manually, these are the steps to install Windows.
DISCLAIMER: We do not provide Windows licenses, the customer is fully responsible for it, you are required to buy one, and insert it into the server for proper production usage.
Preparing the VM
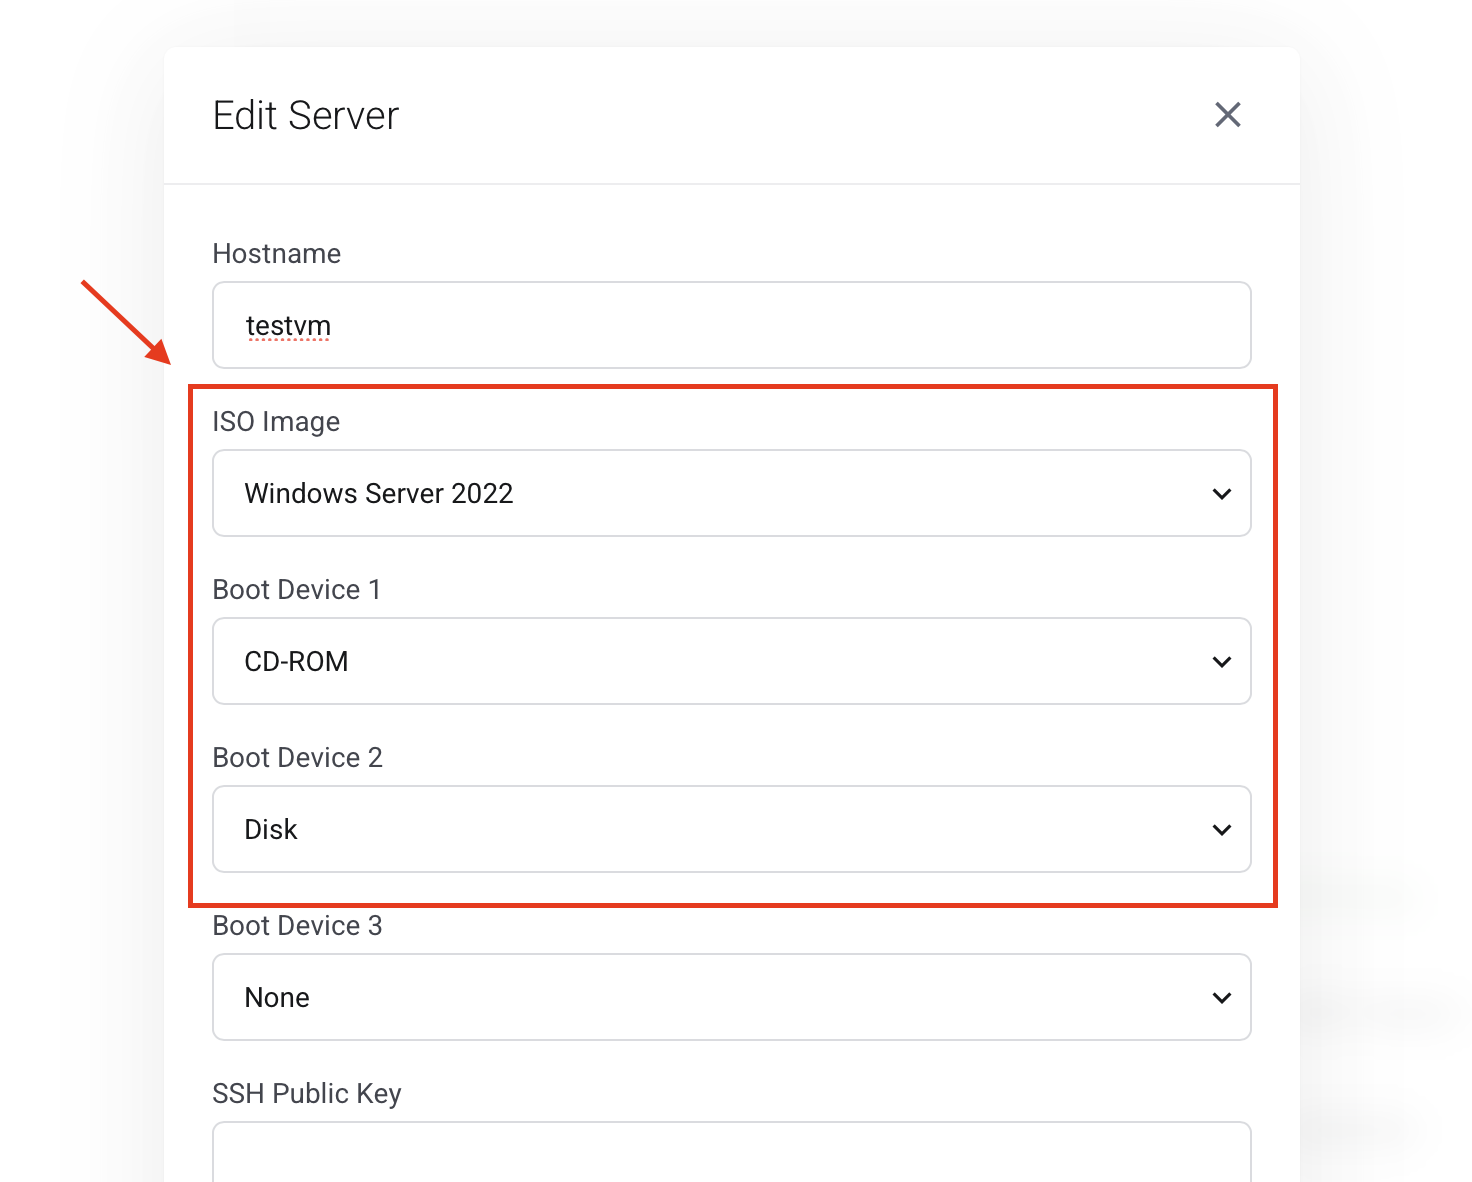
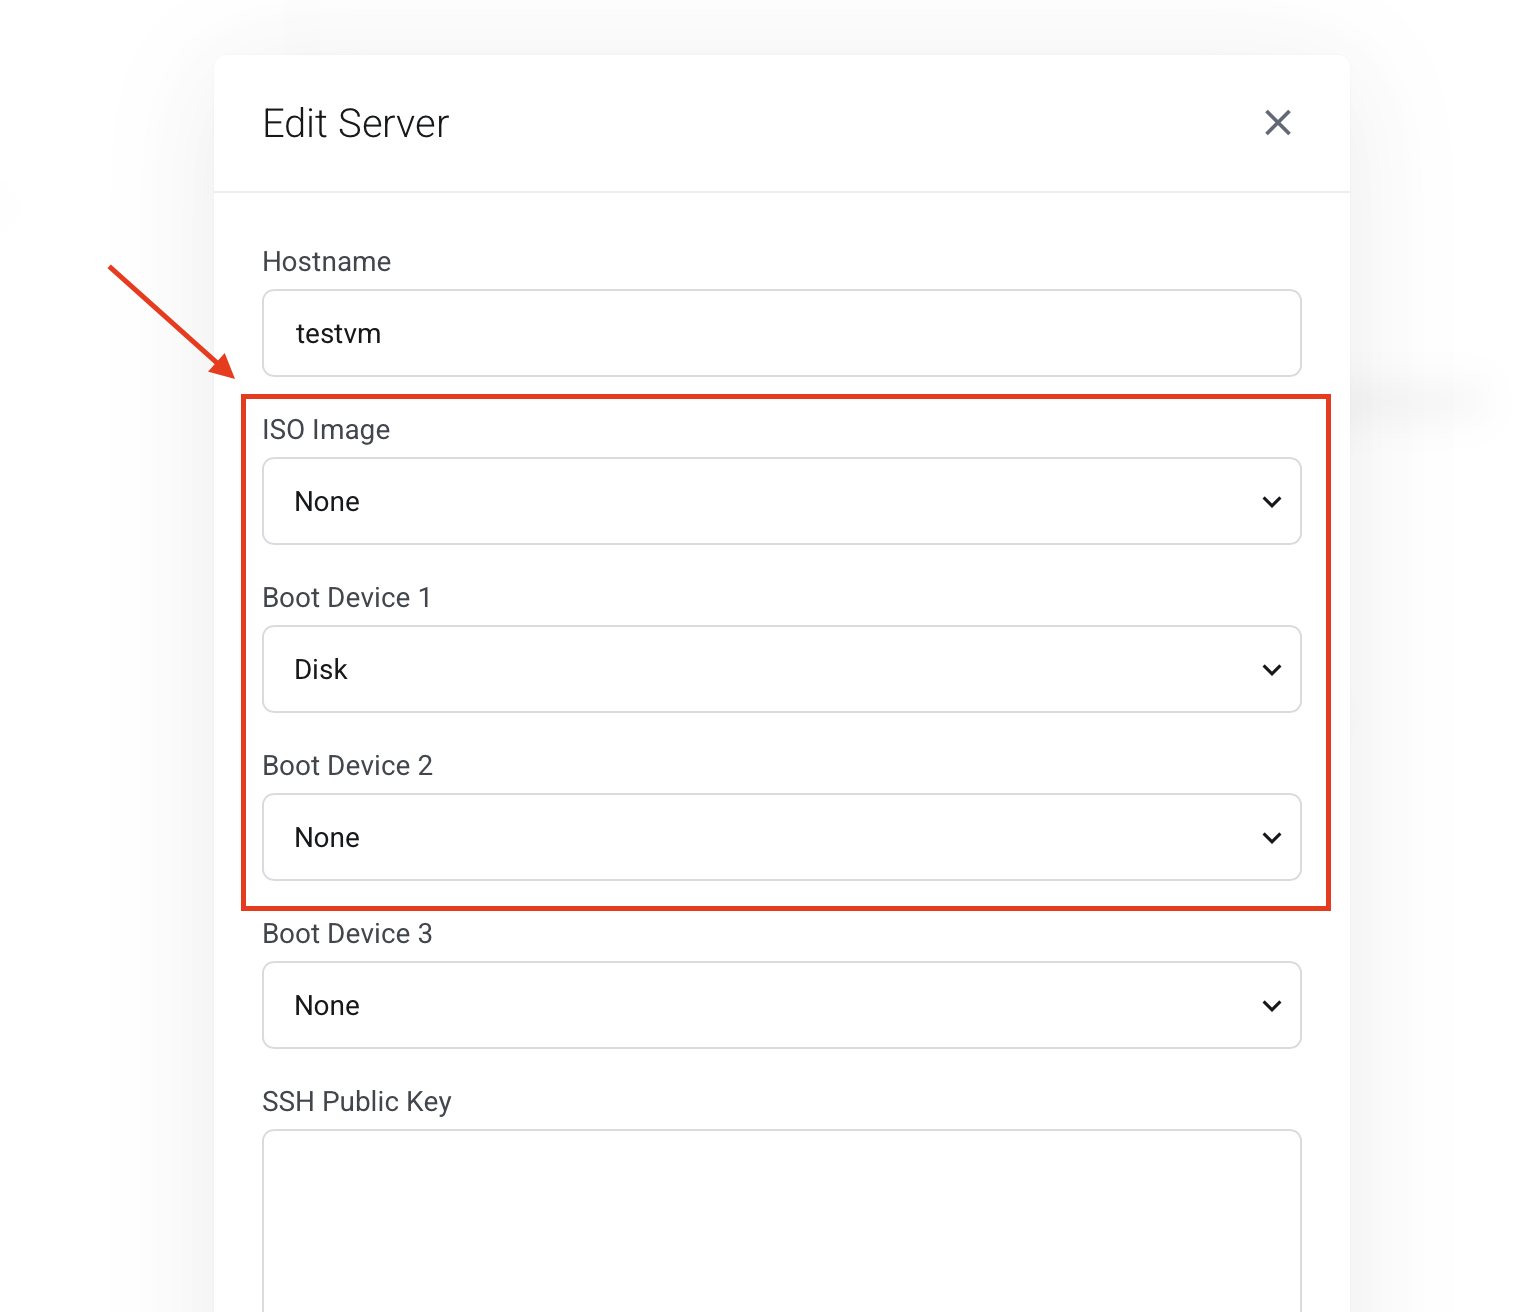
Before proceeding, you'll need to configure your VM to boot from the Windows ISO of your liking, then also update the boot order to have the CD-ROM as first device, and the Disk as secondary.
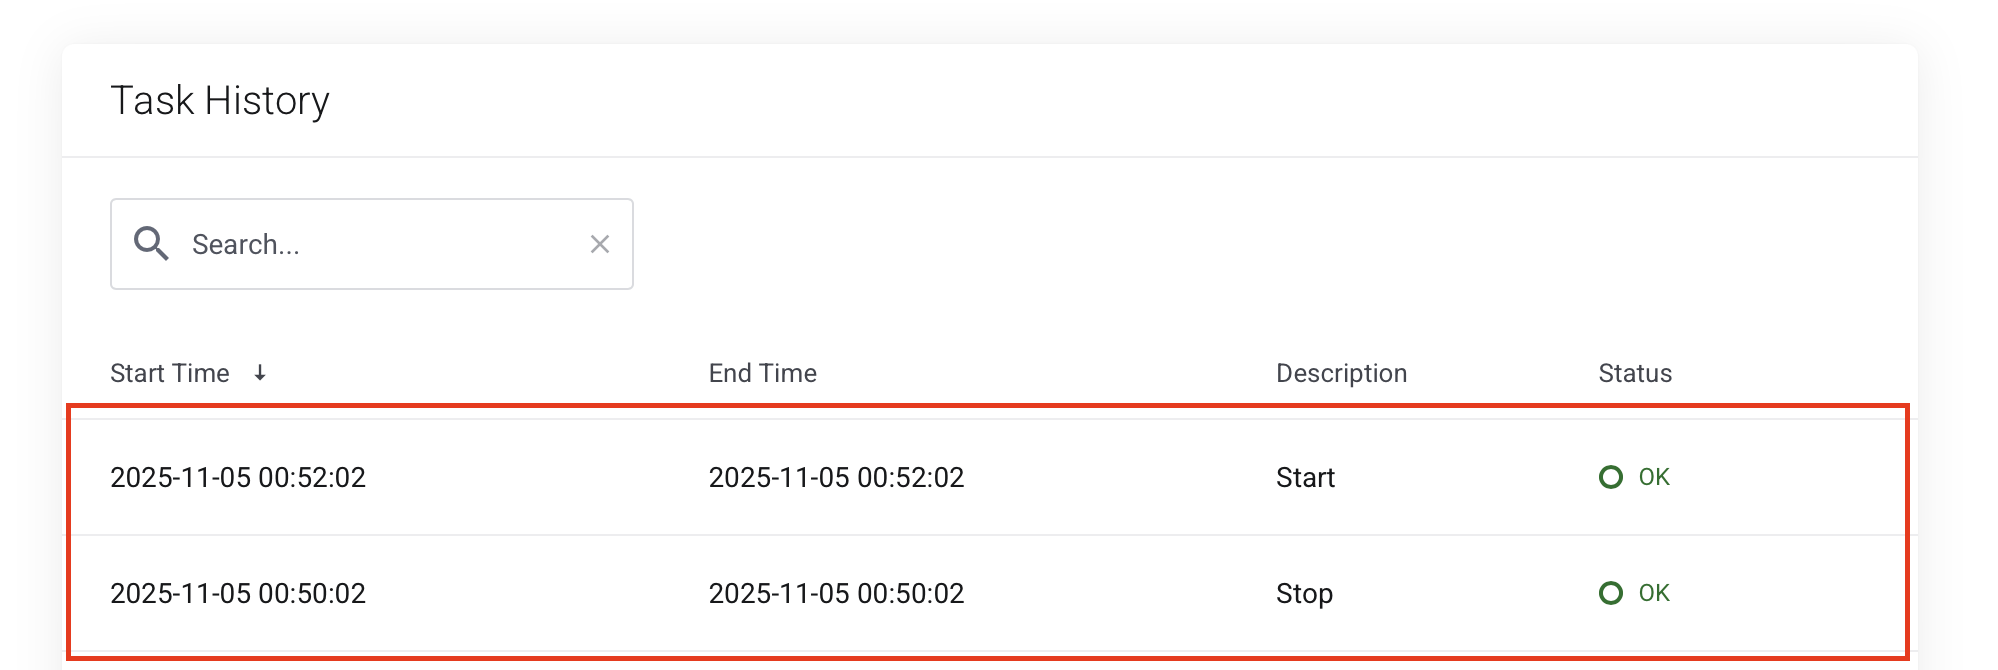
After hitting confirm, the VM will now reboot itself, this process may take up to 3 minutes so please be patient and do not perform any further actions until it has rebooted, if you want to be extra sure about when exactly this process is completed, you can take a look at the Task History page, and you'll see two independent task, one for the Stop action, and one for the Start action, as shown here
Windows Installer
After the VM has booted itself, you can now open the noVNC console, and you'll be presented with this screen
(if it doesn't properly boot directly into it, please check again the VM settings and see if the boot order was applied properly, if not, just give that another spin. In some rare occasions the hypervisor may not be able to properly lock your VM due to other tasks being in progress and this could fail, so worth mentioning for the sake of this guide)
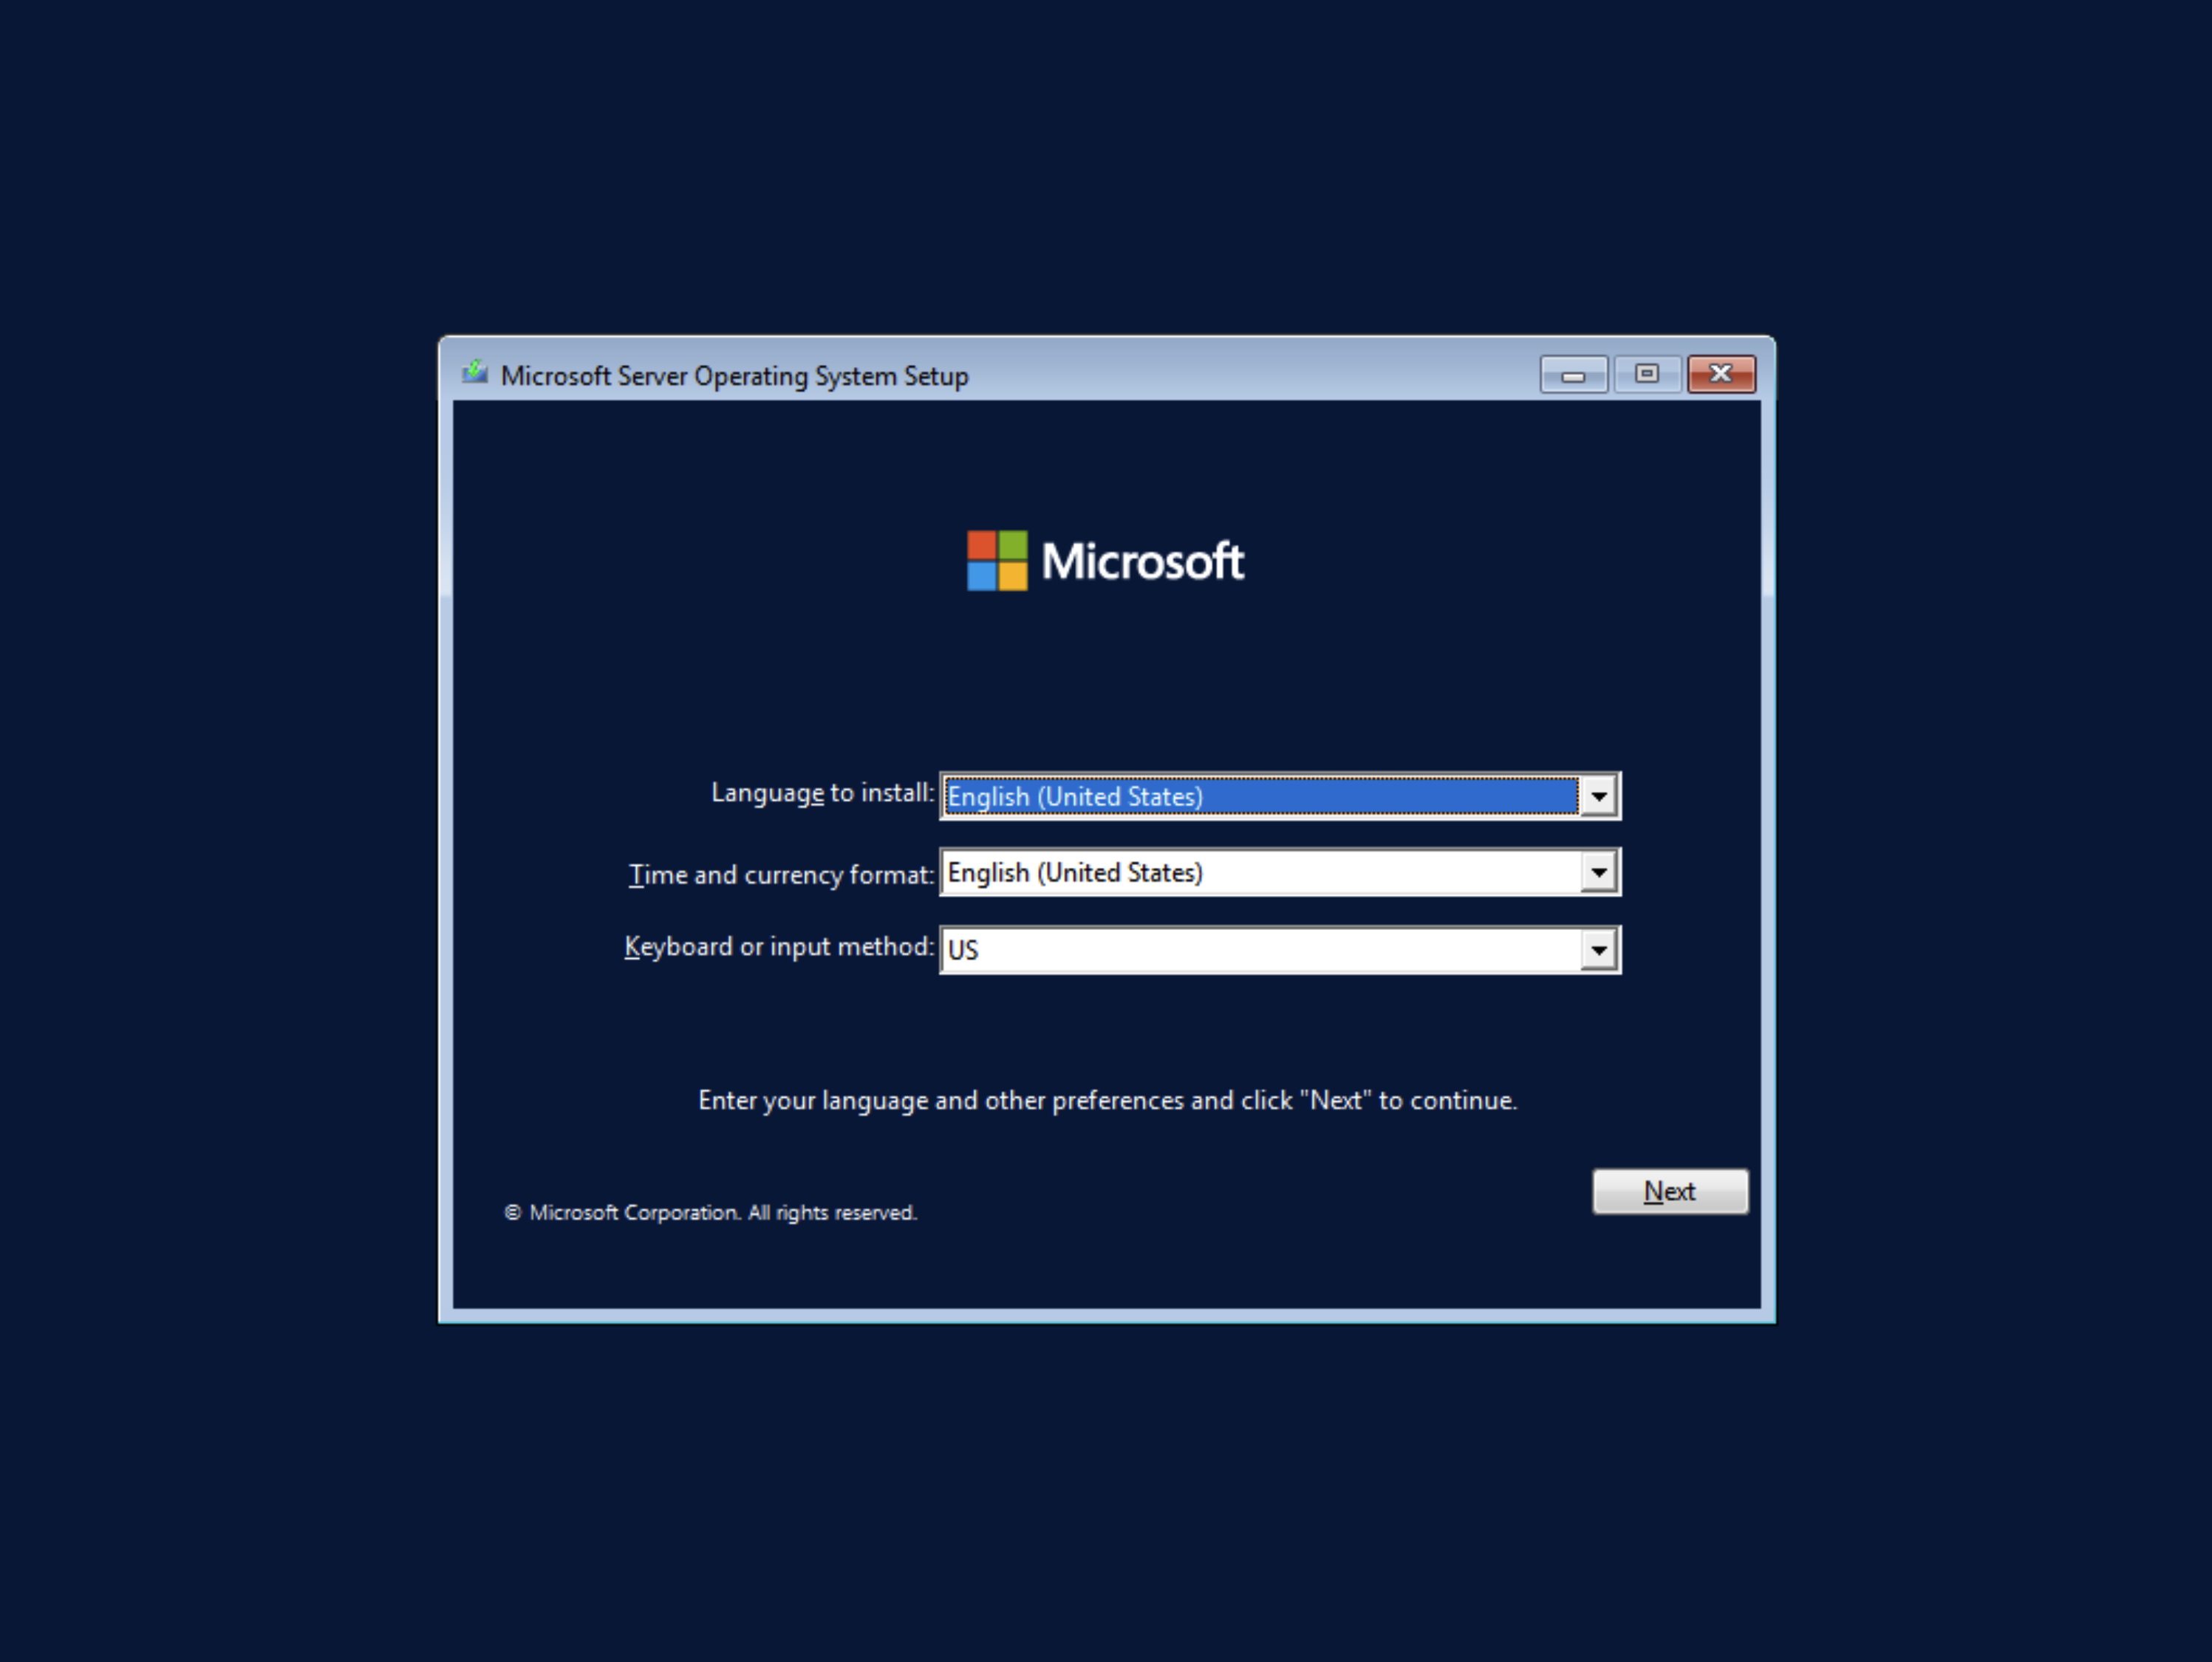
Here, you can change the Time and currency format as well as the keyboard or input method if you'd like, then click next and start the installation.
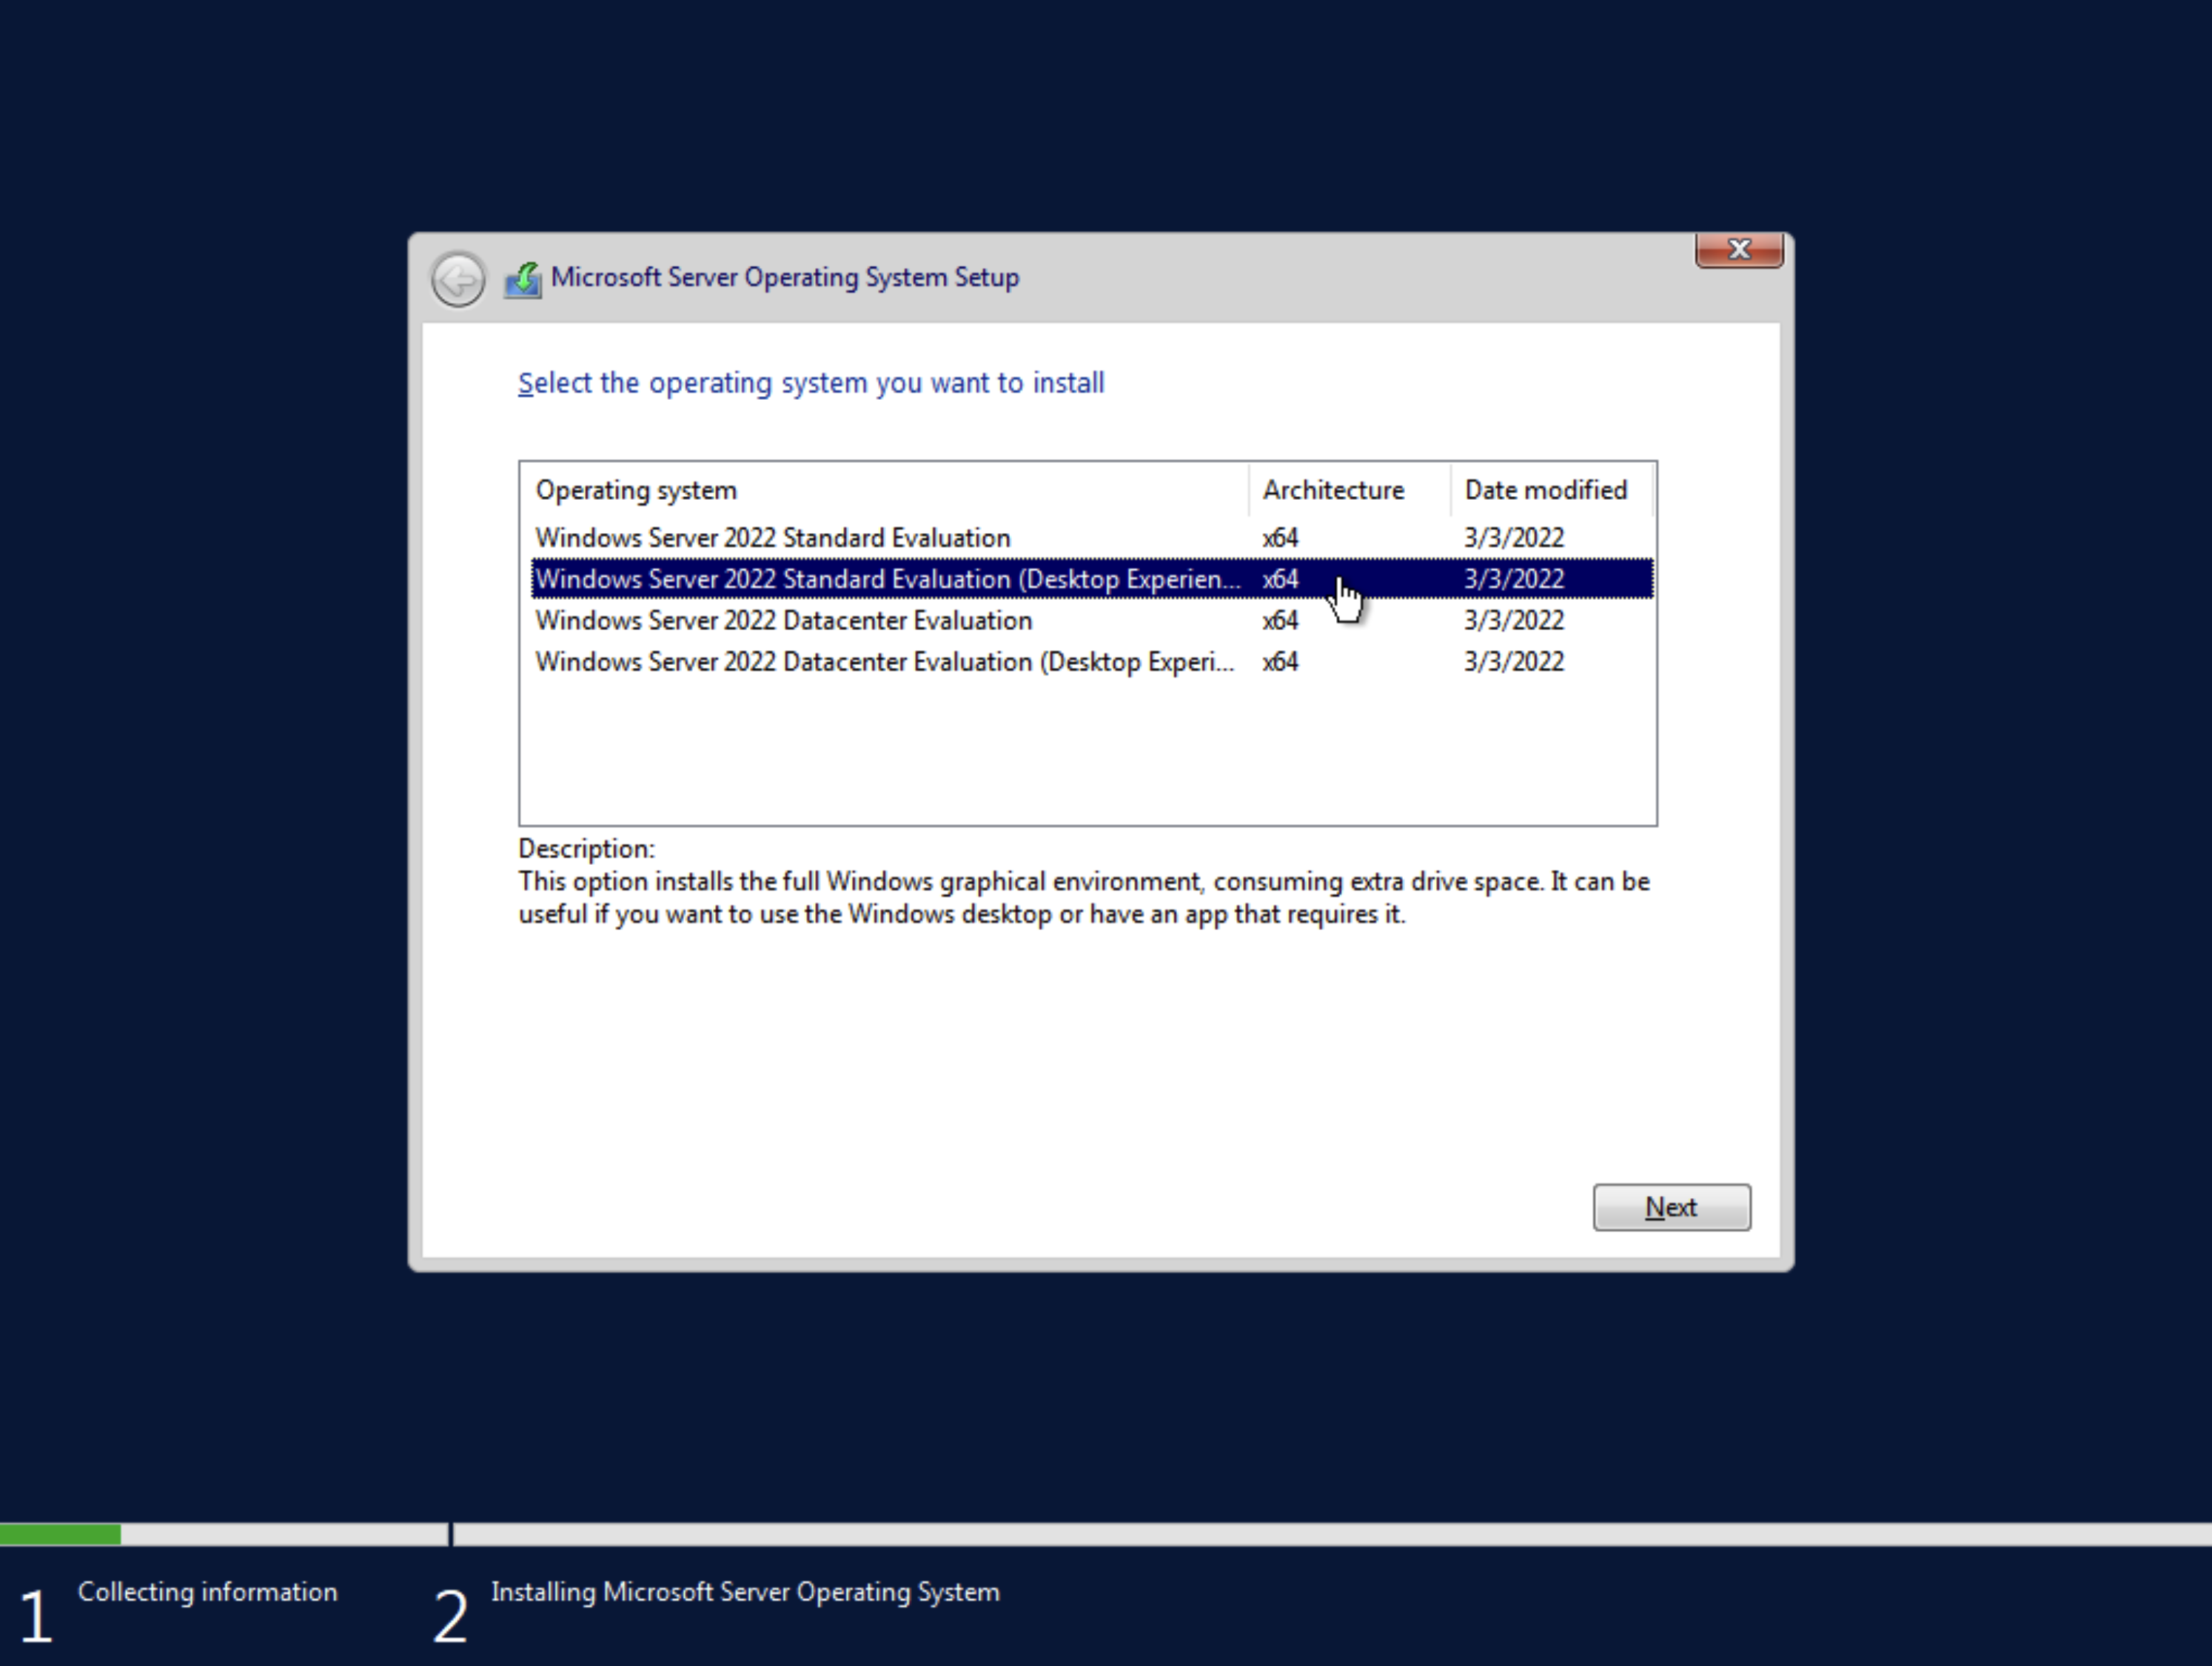
Once the installation has started, you'll be presented with a new screen where you're asked to select the Windows option that you'd like to install, here just select the 2nd one which is Windows Server 2022 Standard (Desktop Experience), this will be your usual run of the mill Windows Server installation, with the Desktop, and all of the usual stuff you may already know.
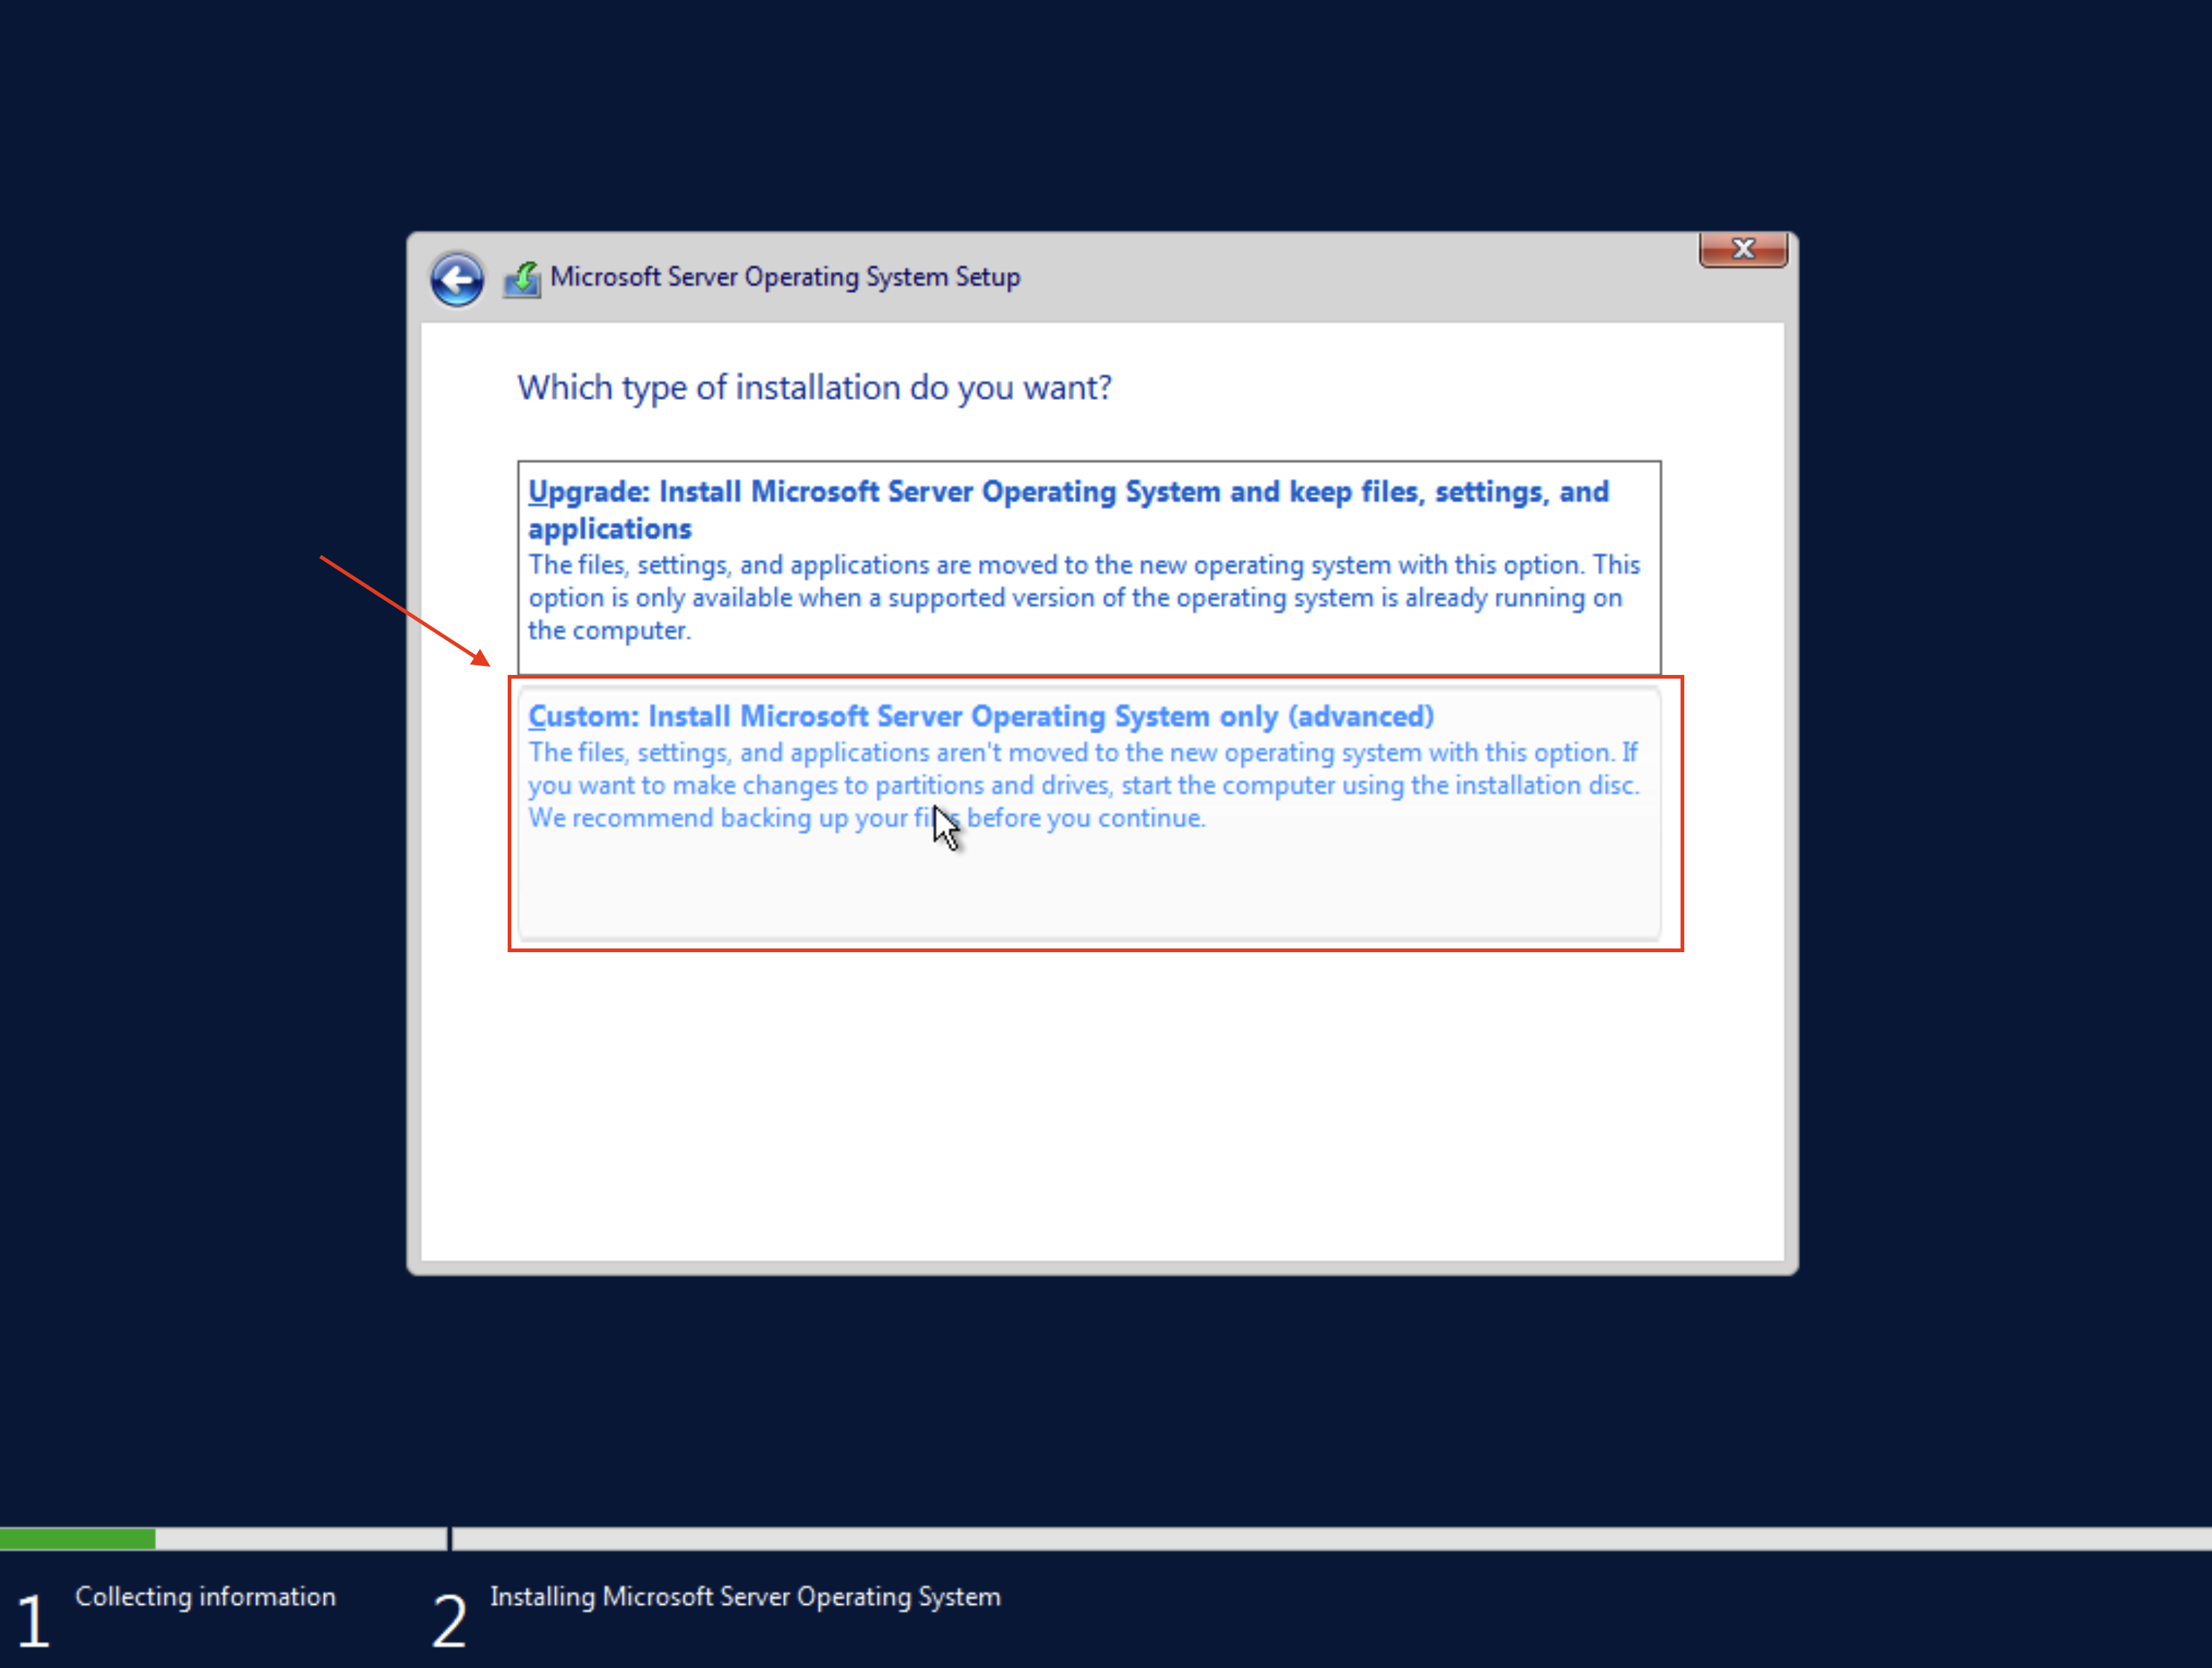
The next few steps are fairly straightforward, also don't forget to select the "Custom" installation, as we want to have control over what we're doing.
VirtIO Drives installation
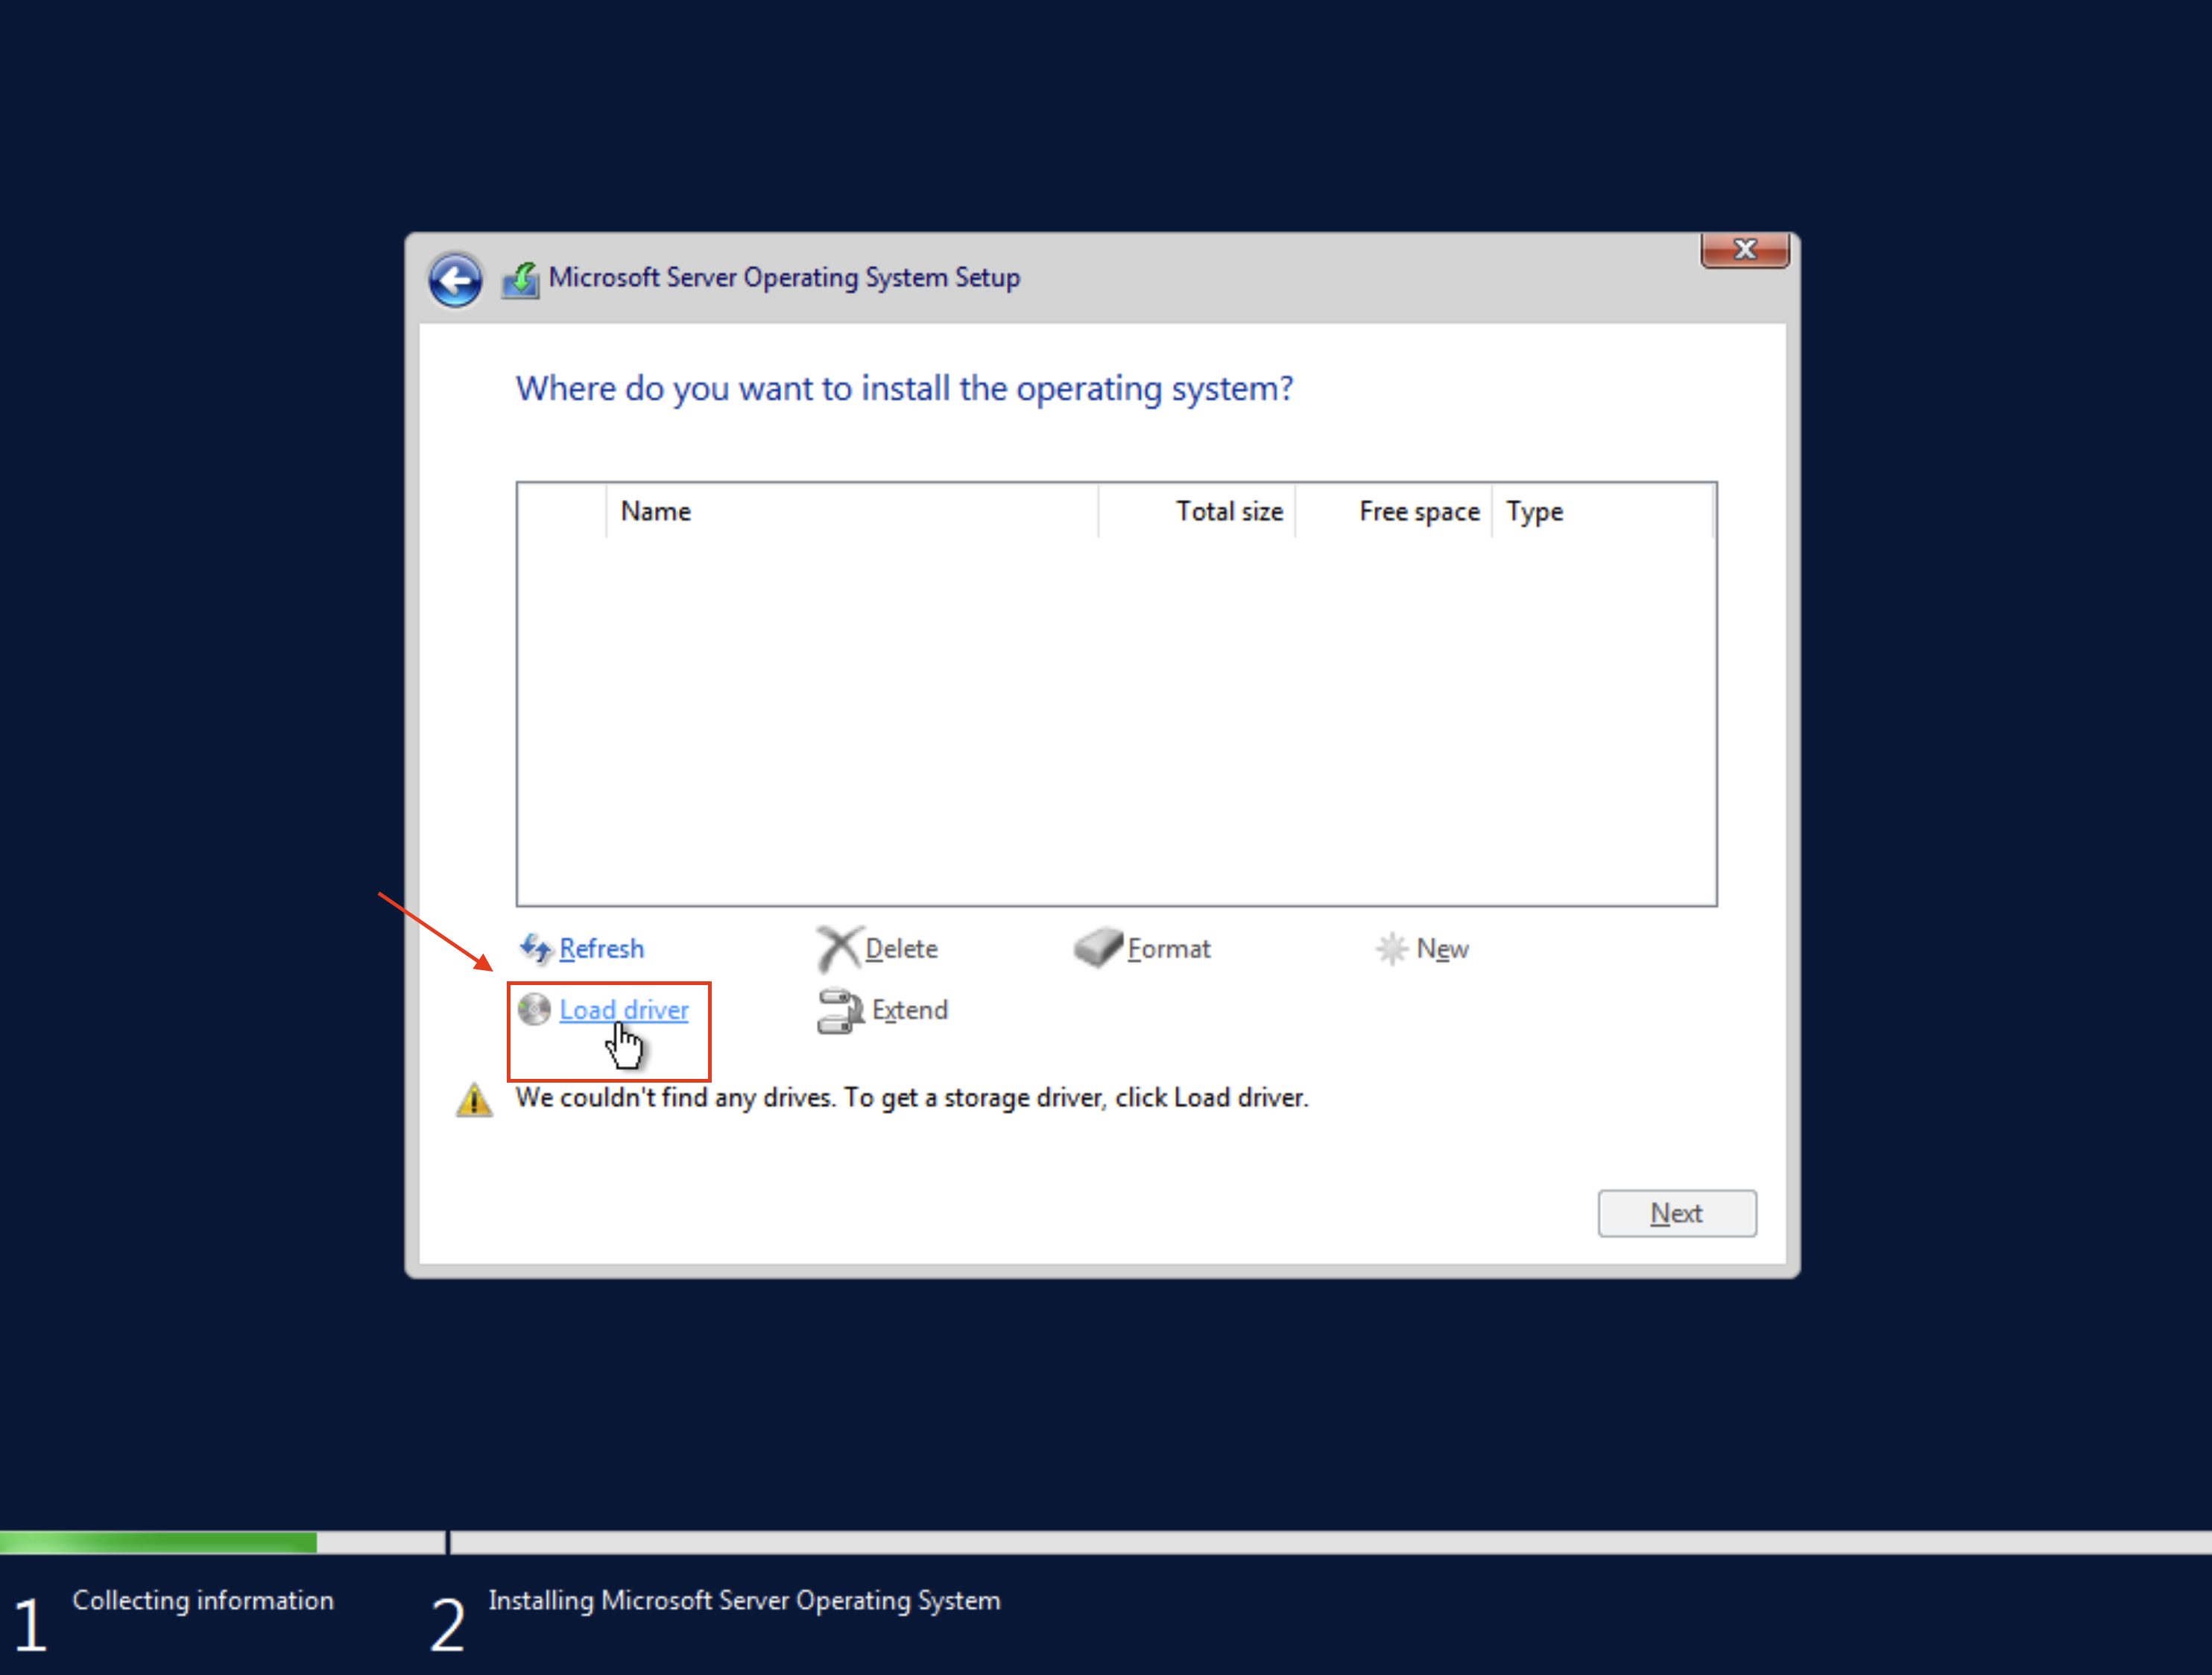
And now, you'll see that this ISO does not contain the driver for the VirtIO blocks.
To give a brief explanation for the uninitiated, VirtIO is a paravirtualization interface, which basically means that the Virtual Machine gets essentially direct access to the storage blocks, or other interfaces (such as PCIe, Network, etc...) to avoid the performance penalties of being virtualized.
VirtIO is not available on Windows by default, but there are Open Source drivers which are also properly signed that we can very easily install here to make all of this performance goodness available to us.
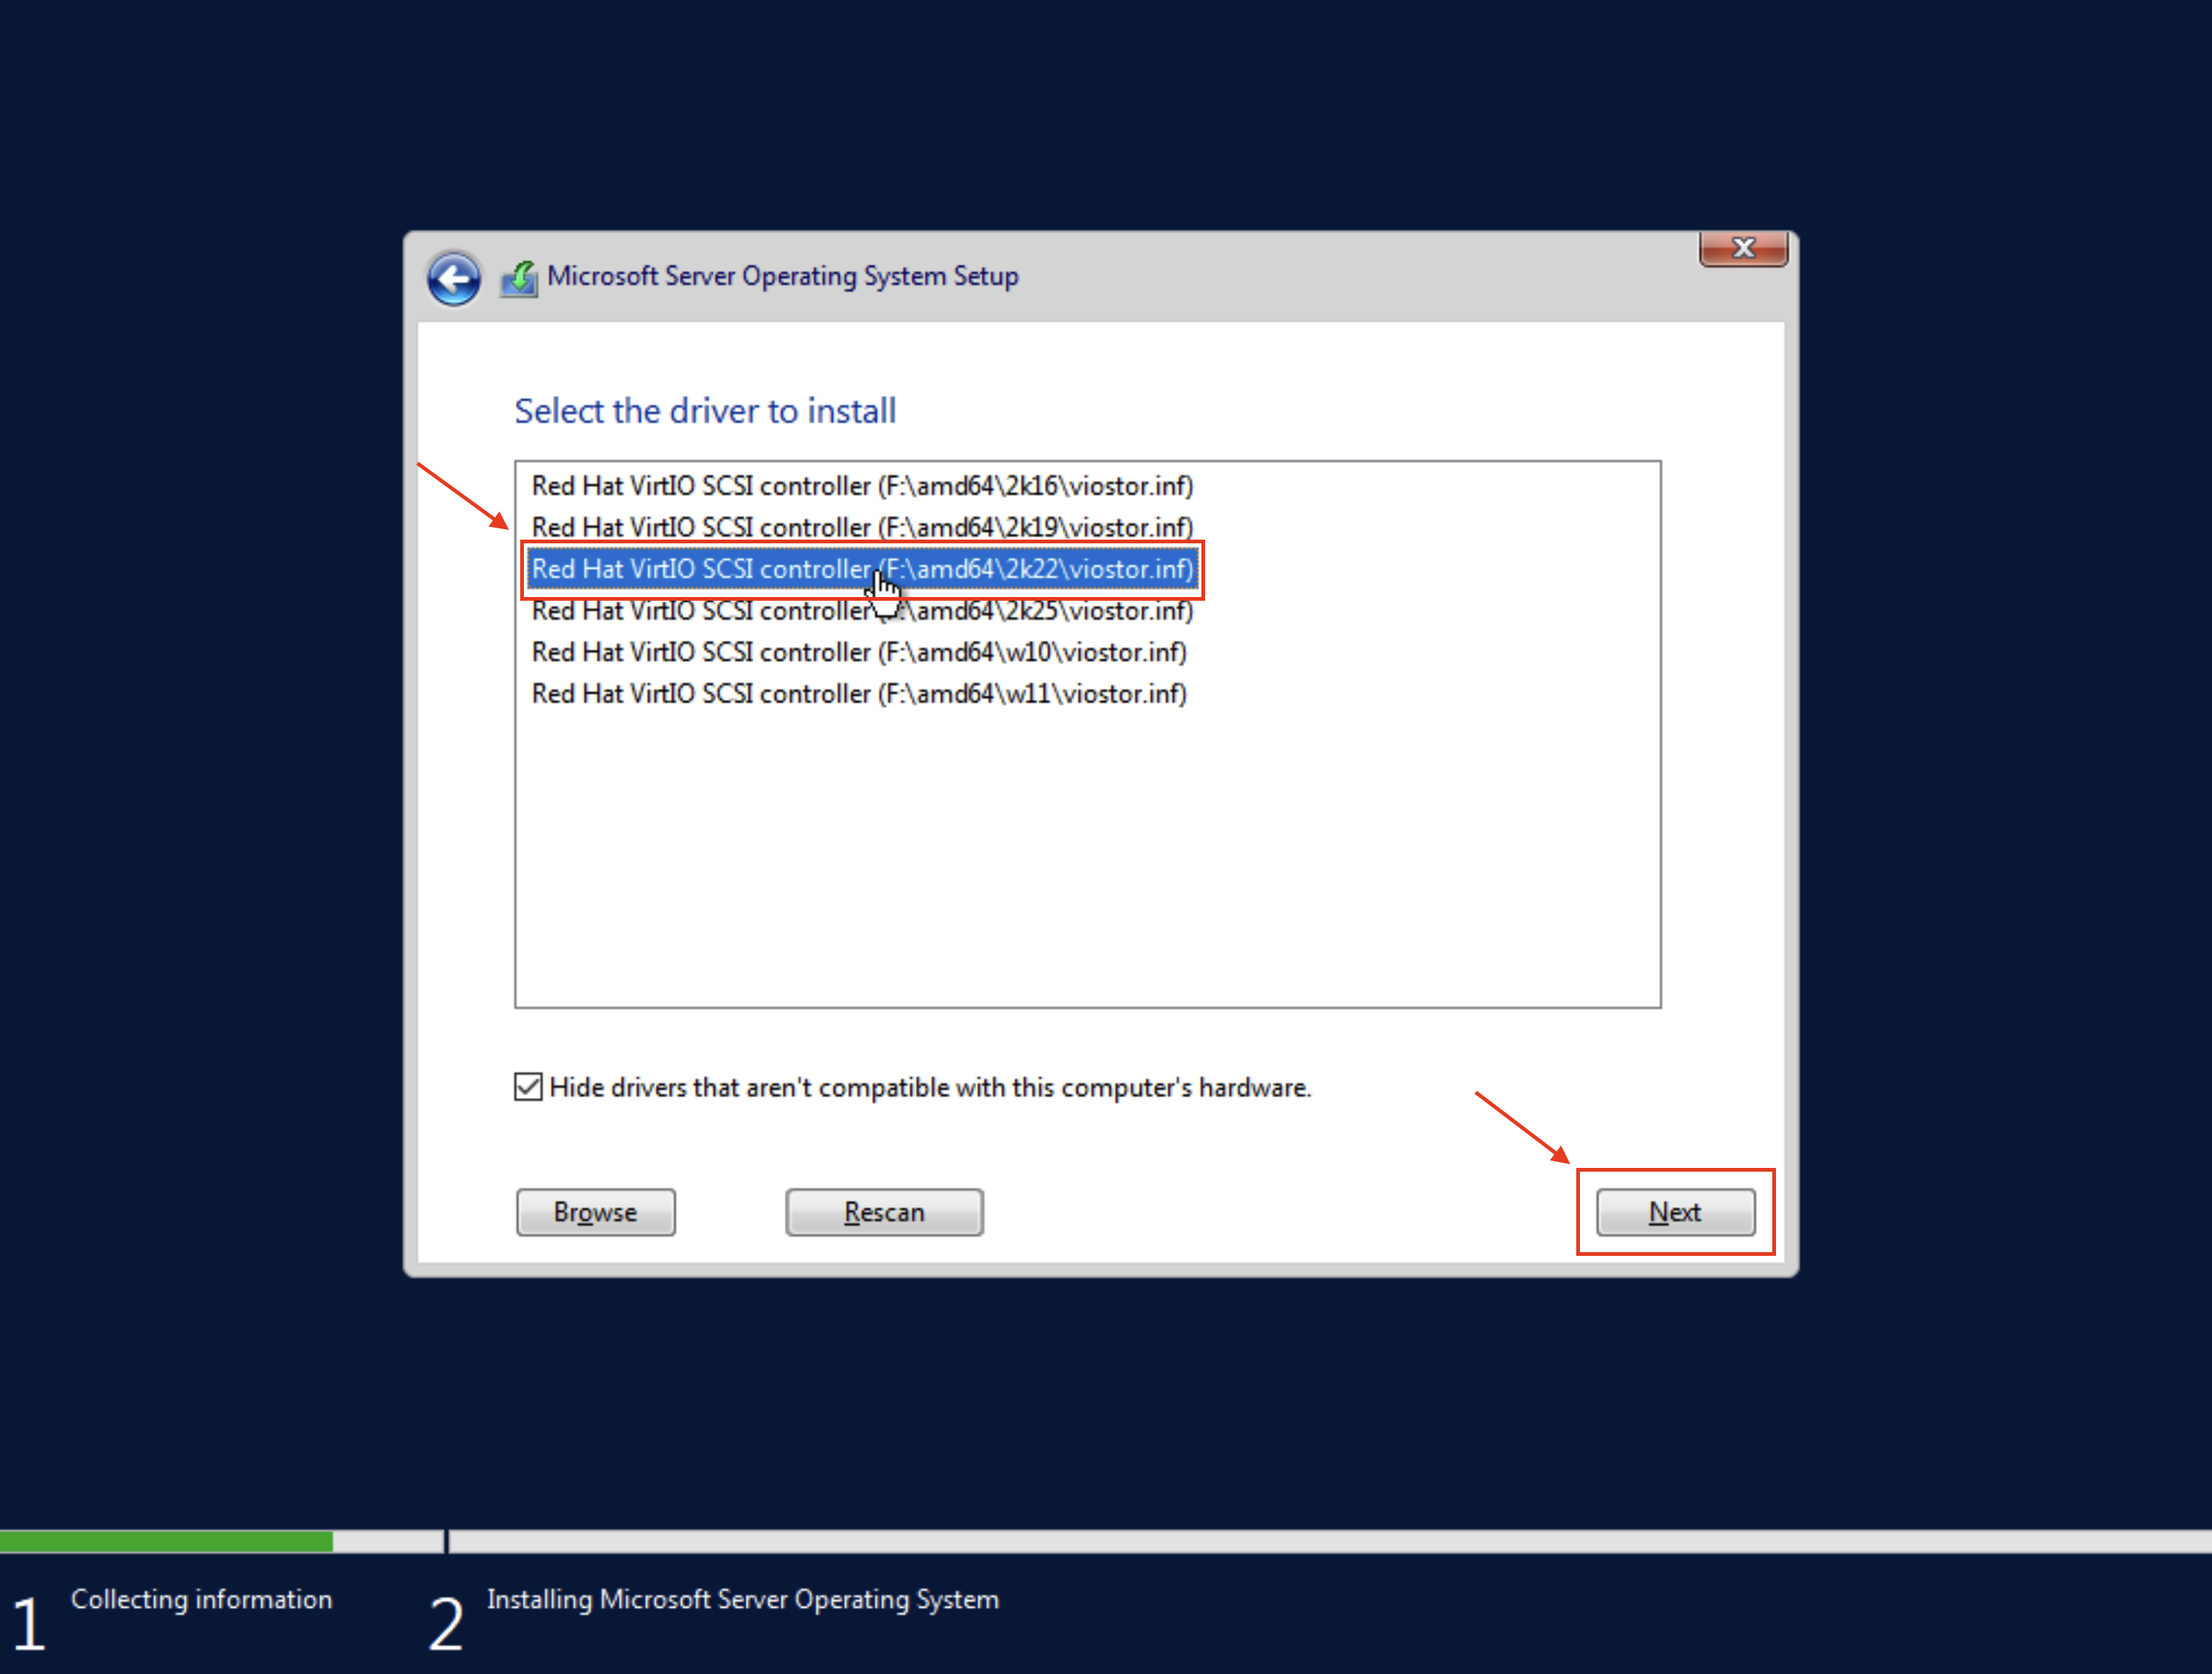
Our hypervisor automatically attaches a 2nd ISO image to your VM called virtio-win.iso where all of the necessary drivers are available, you can go on and select "Load driver" to the bottom left to install it at this step.
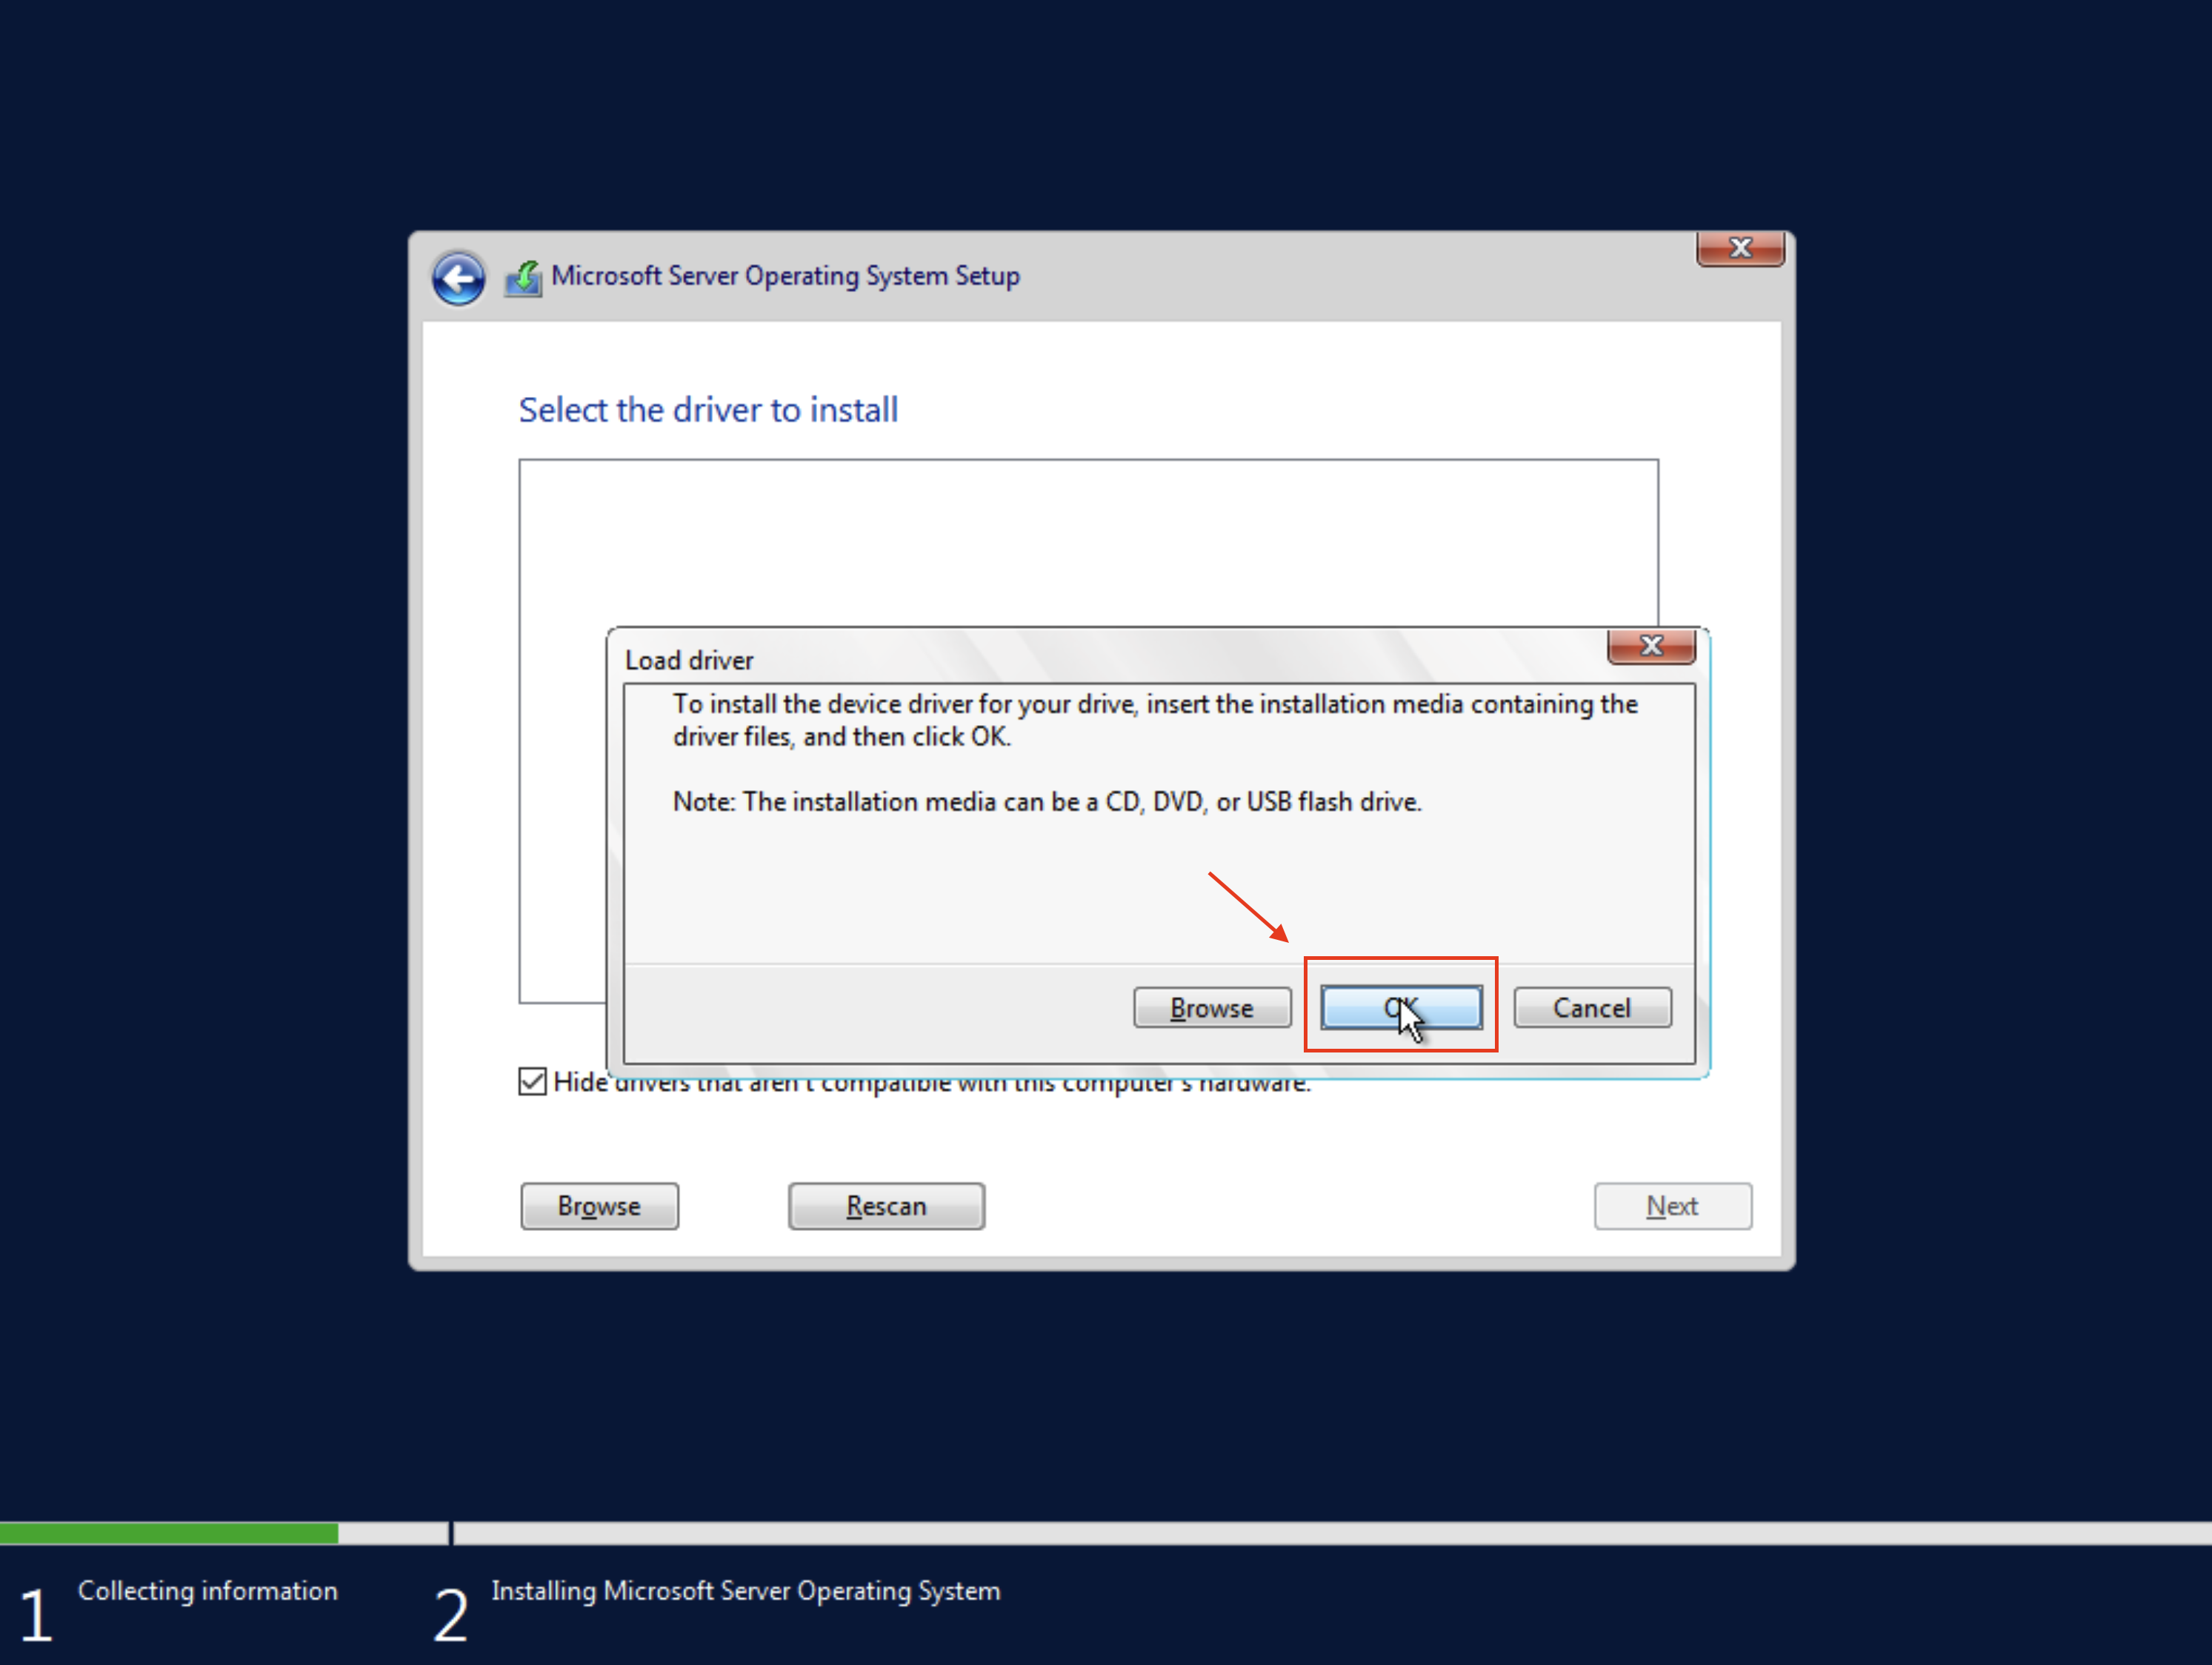
Once here, just select the driver appropriate for your Windows version; here we're installing Windows Server 2022 so we'll go ahead and select that (2k22)
Drive Partitioning
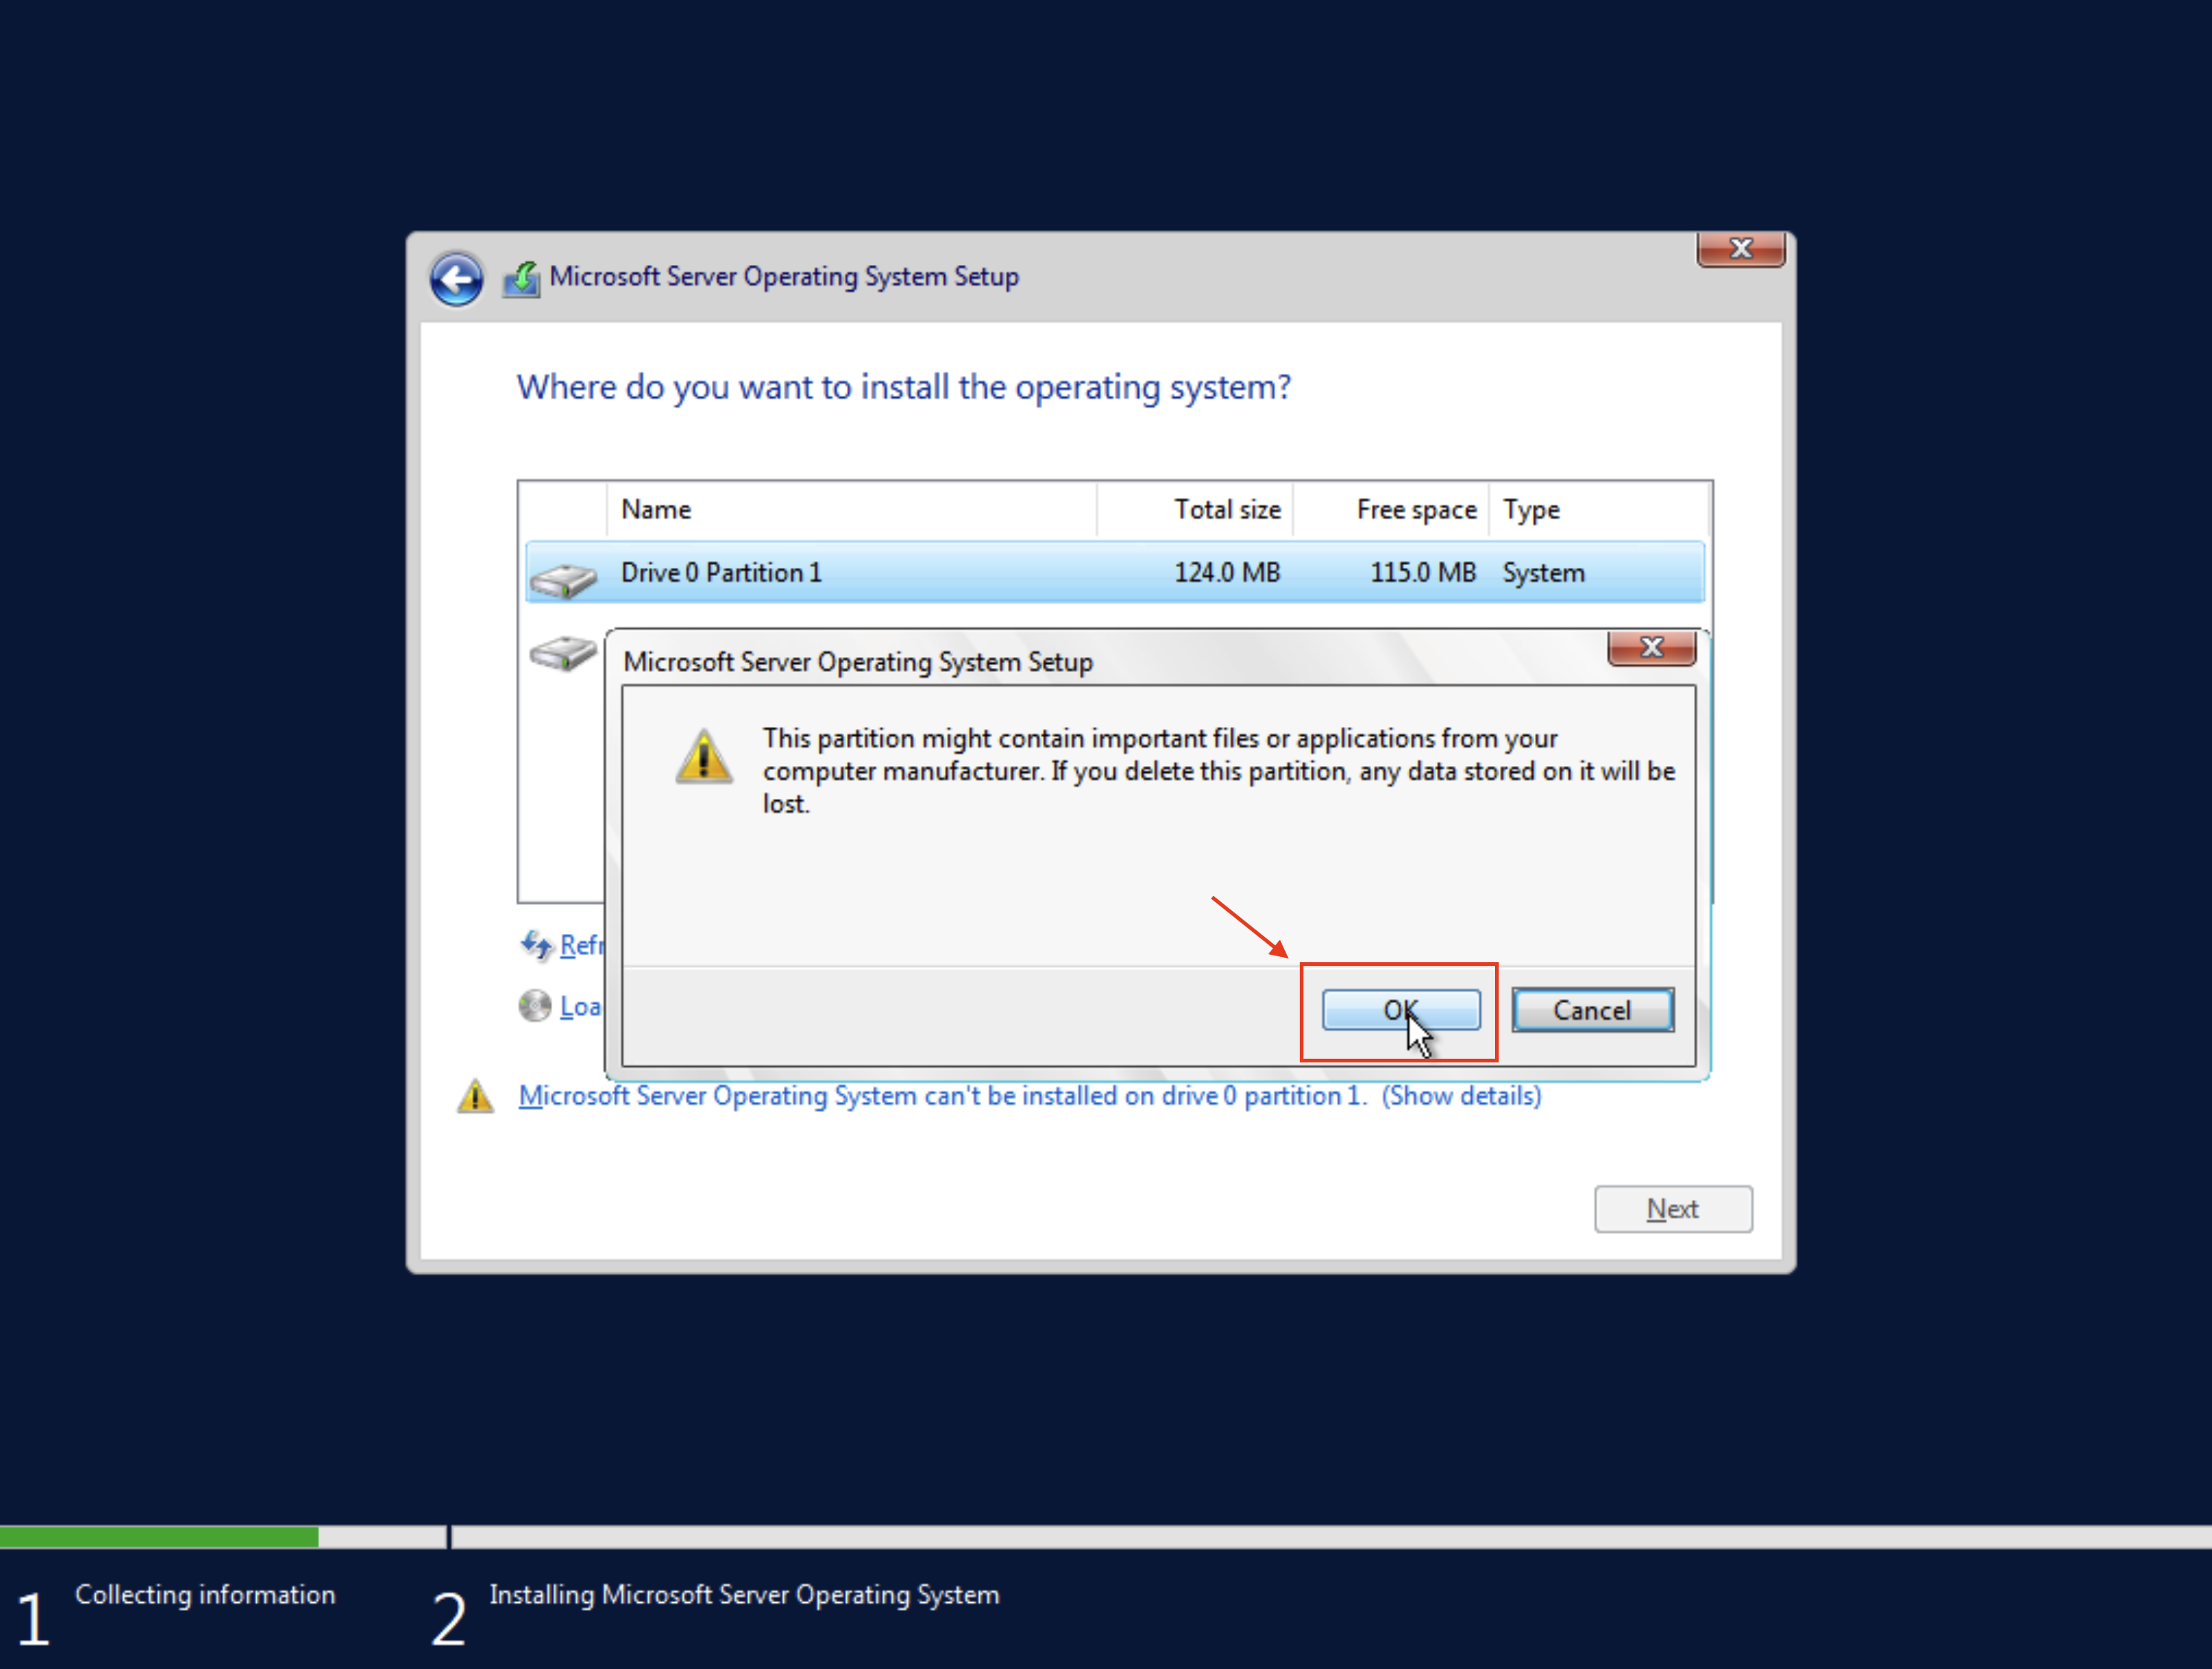
Now there's just one last roadblock, we had a Linux system previously installed on this VM, so the drive already contains partitions and Windows doesn't really like that, its pretty easy to fix though just do as follows and delete the partitions by selecting them one-by-one and using the "Delete" button
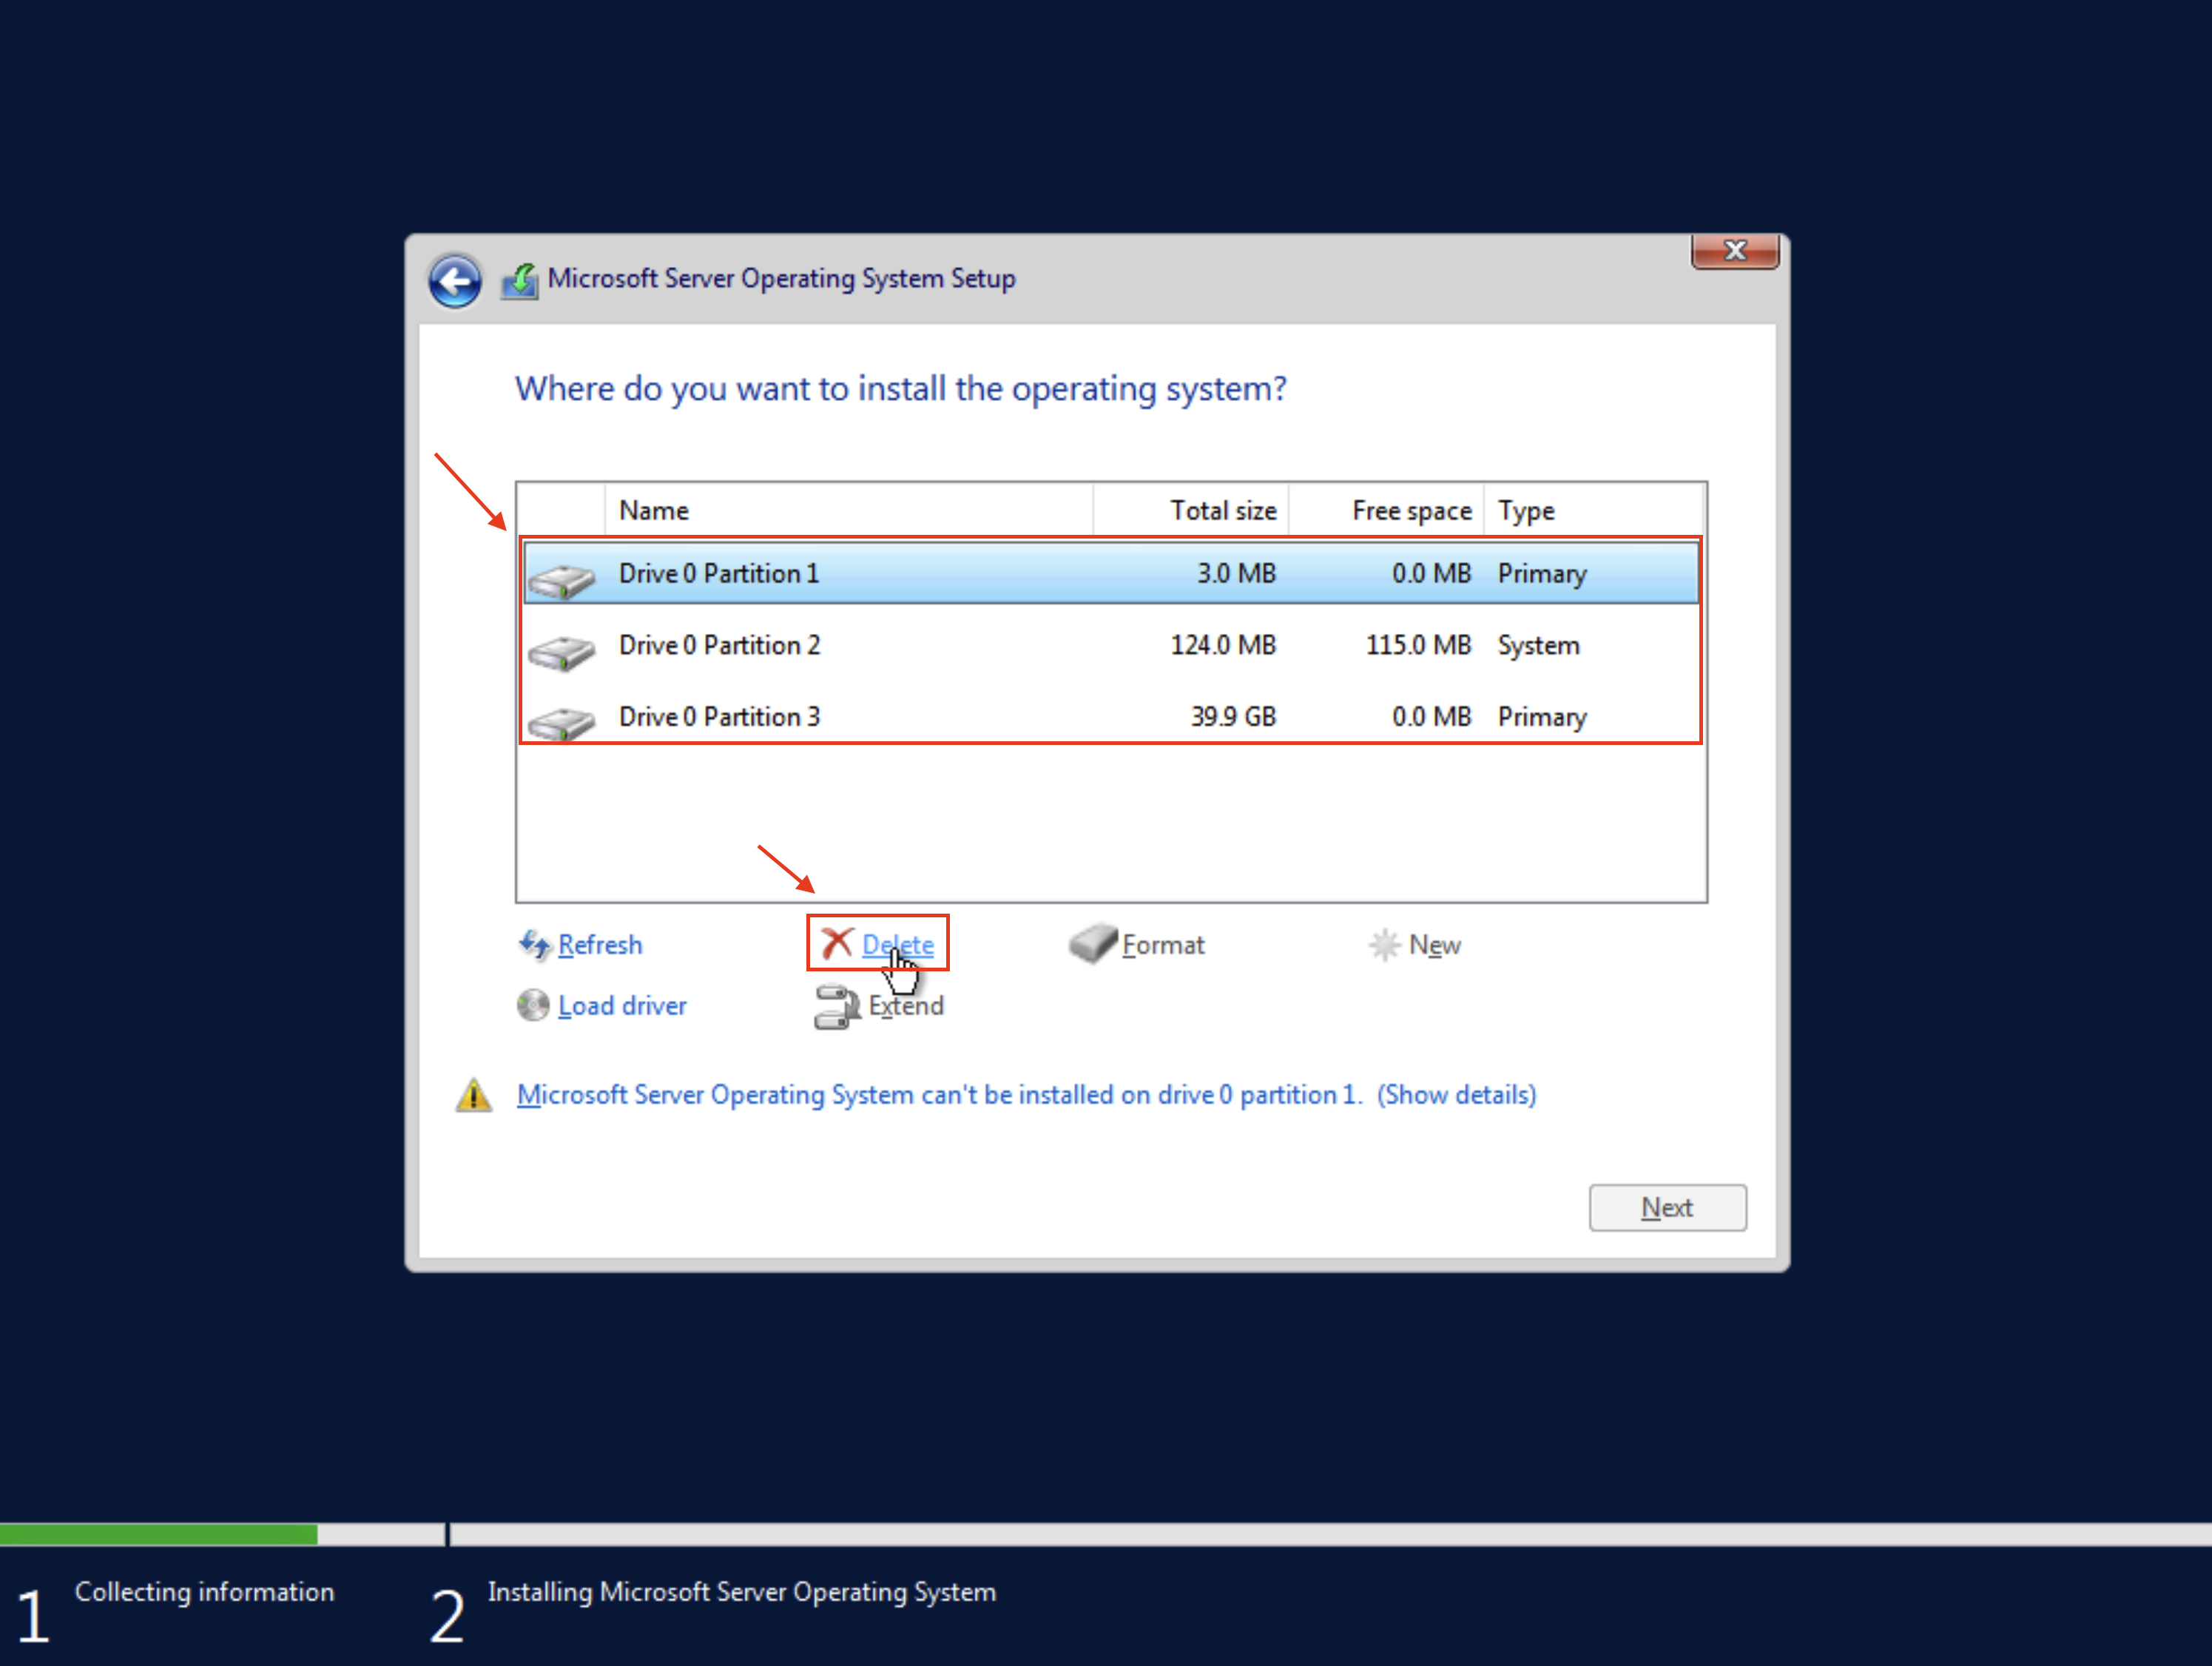
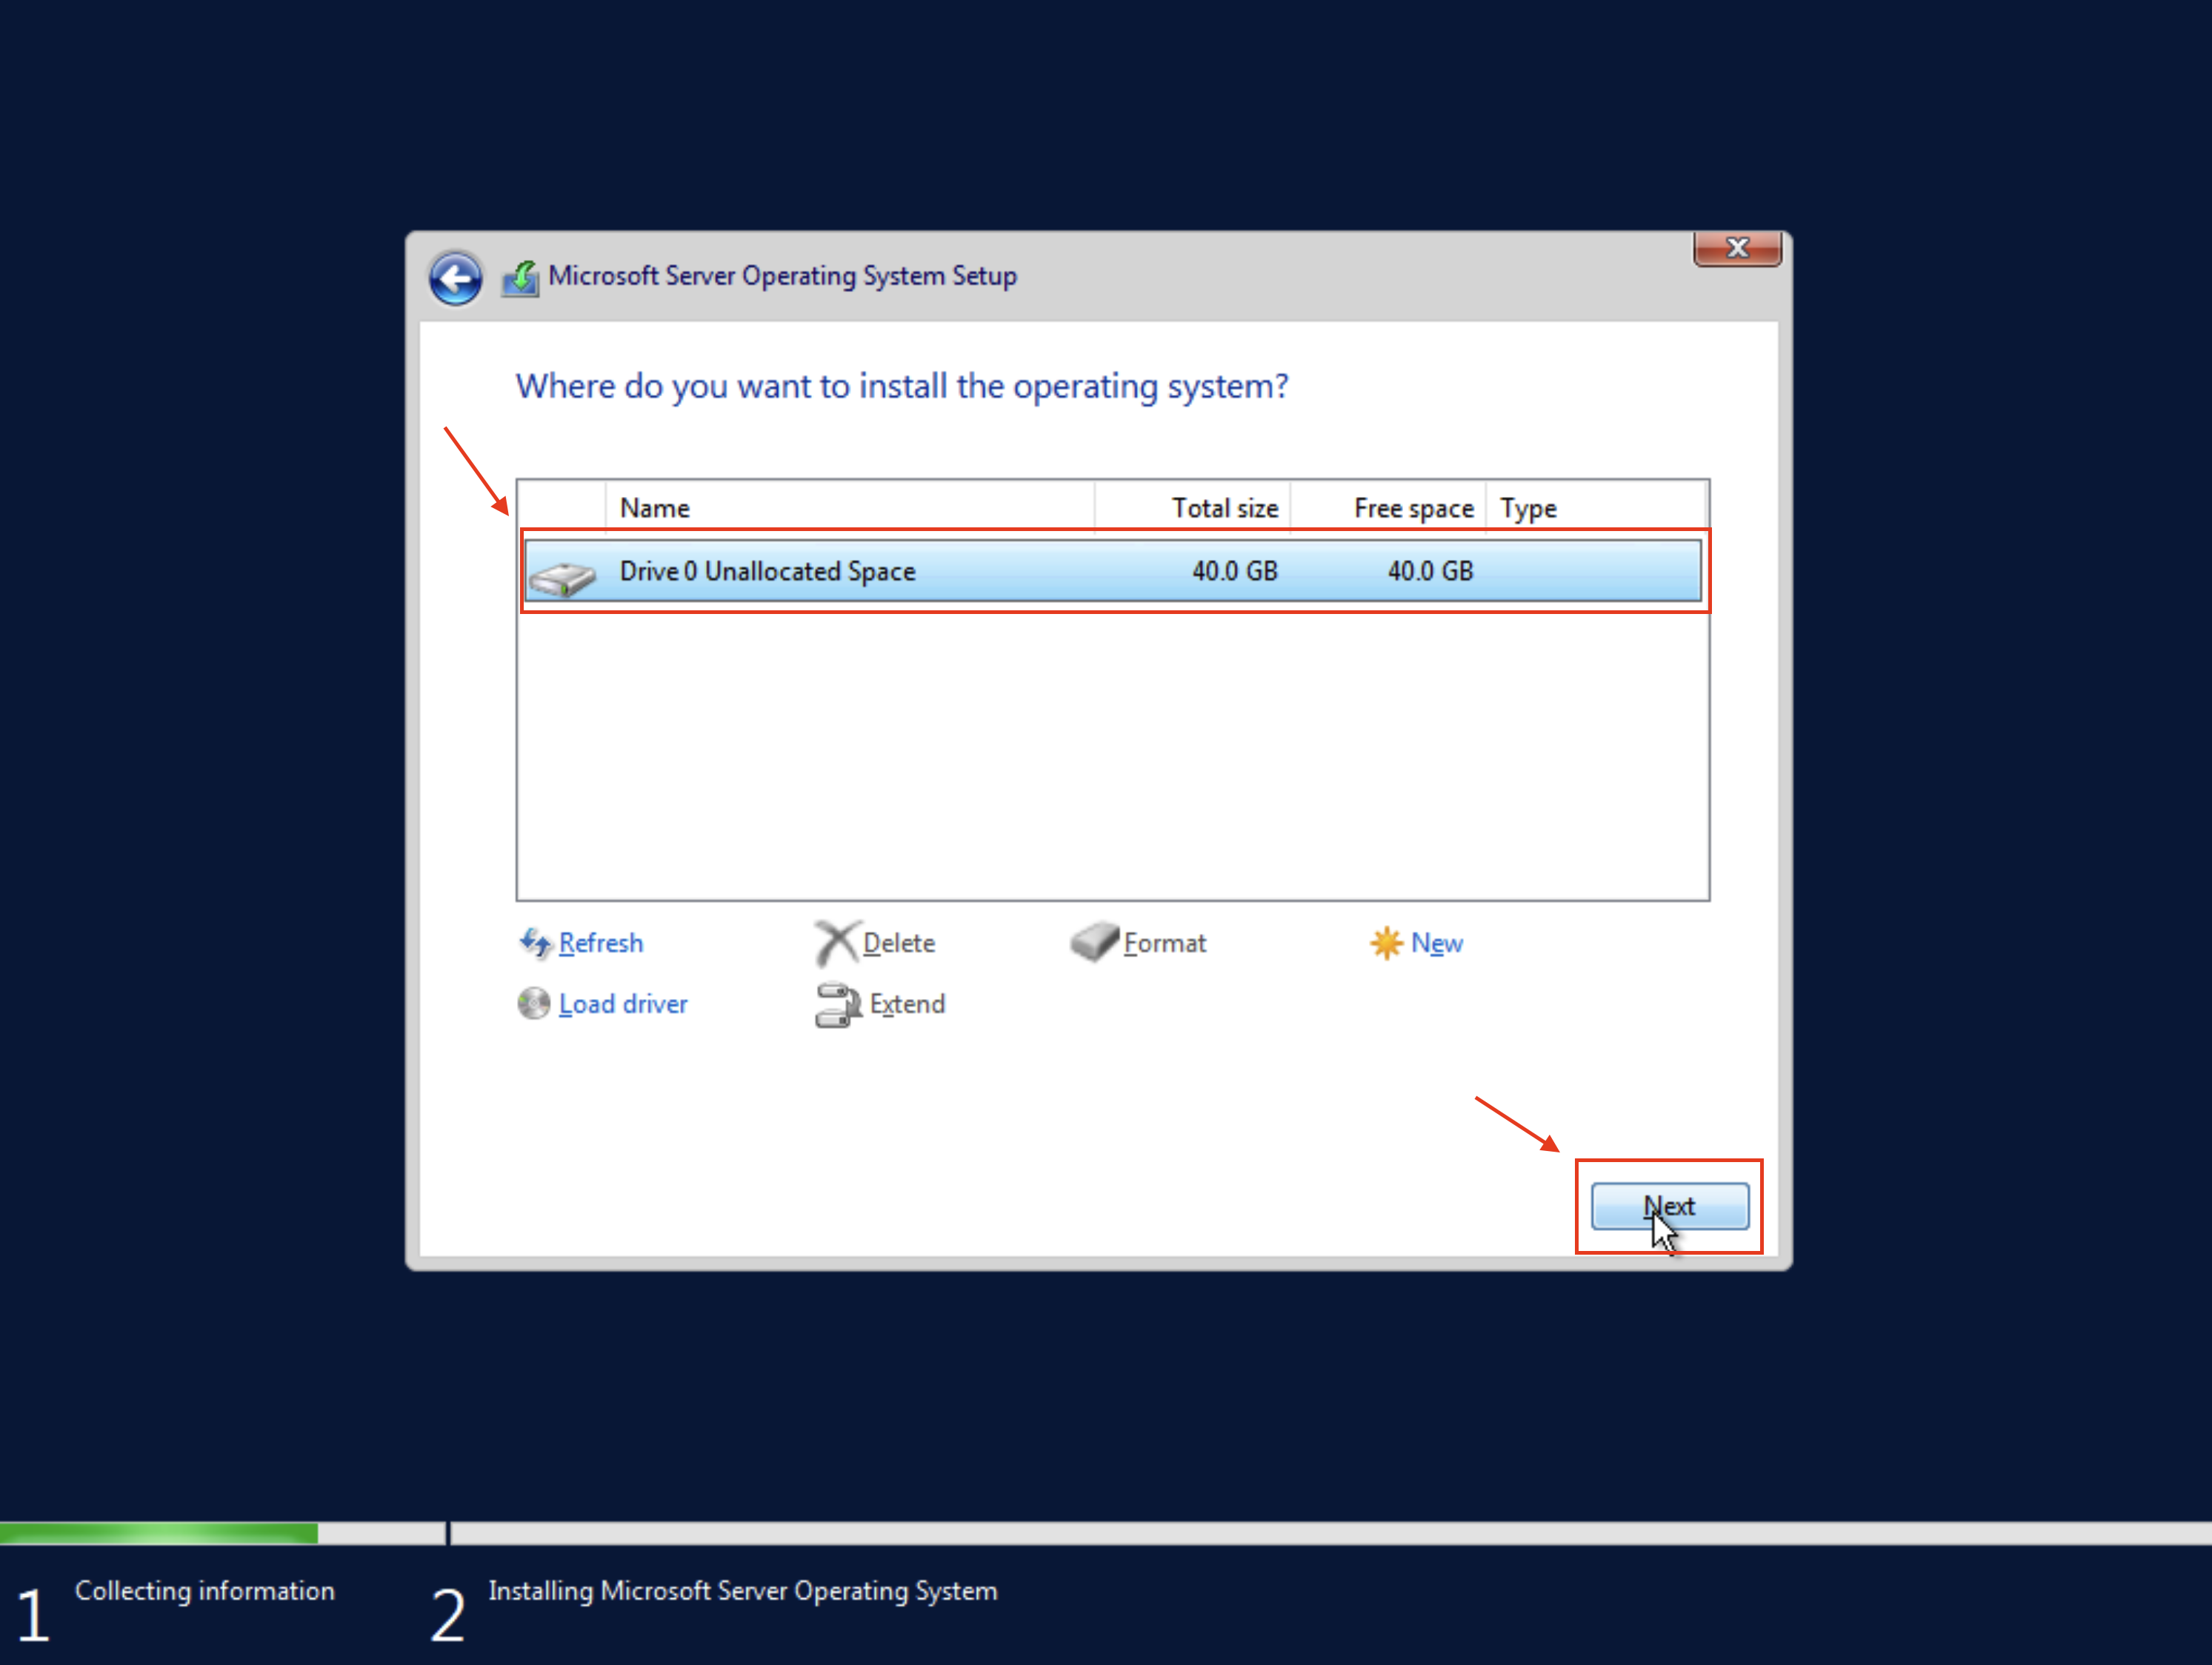
Do this for all of the partitions you see on screen, until you're only left with the Unallocated space. At this point, you can select it if it isn't already and click Next.
Final installation steps
The installation will now begin, this may take up to a few minutes so just sit back and relax, maybe enjoy a coffee in the meantime.
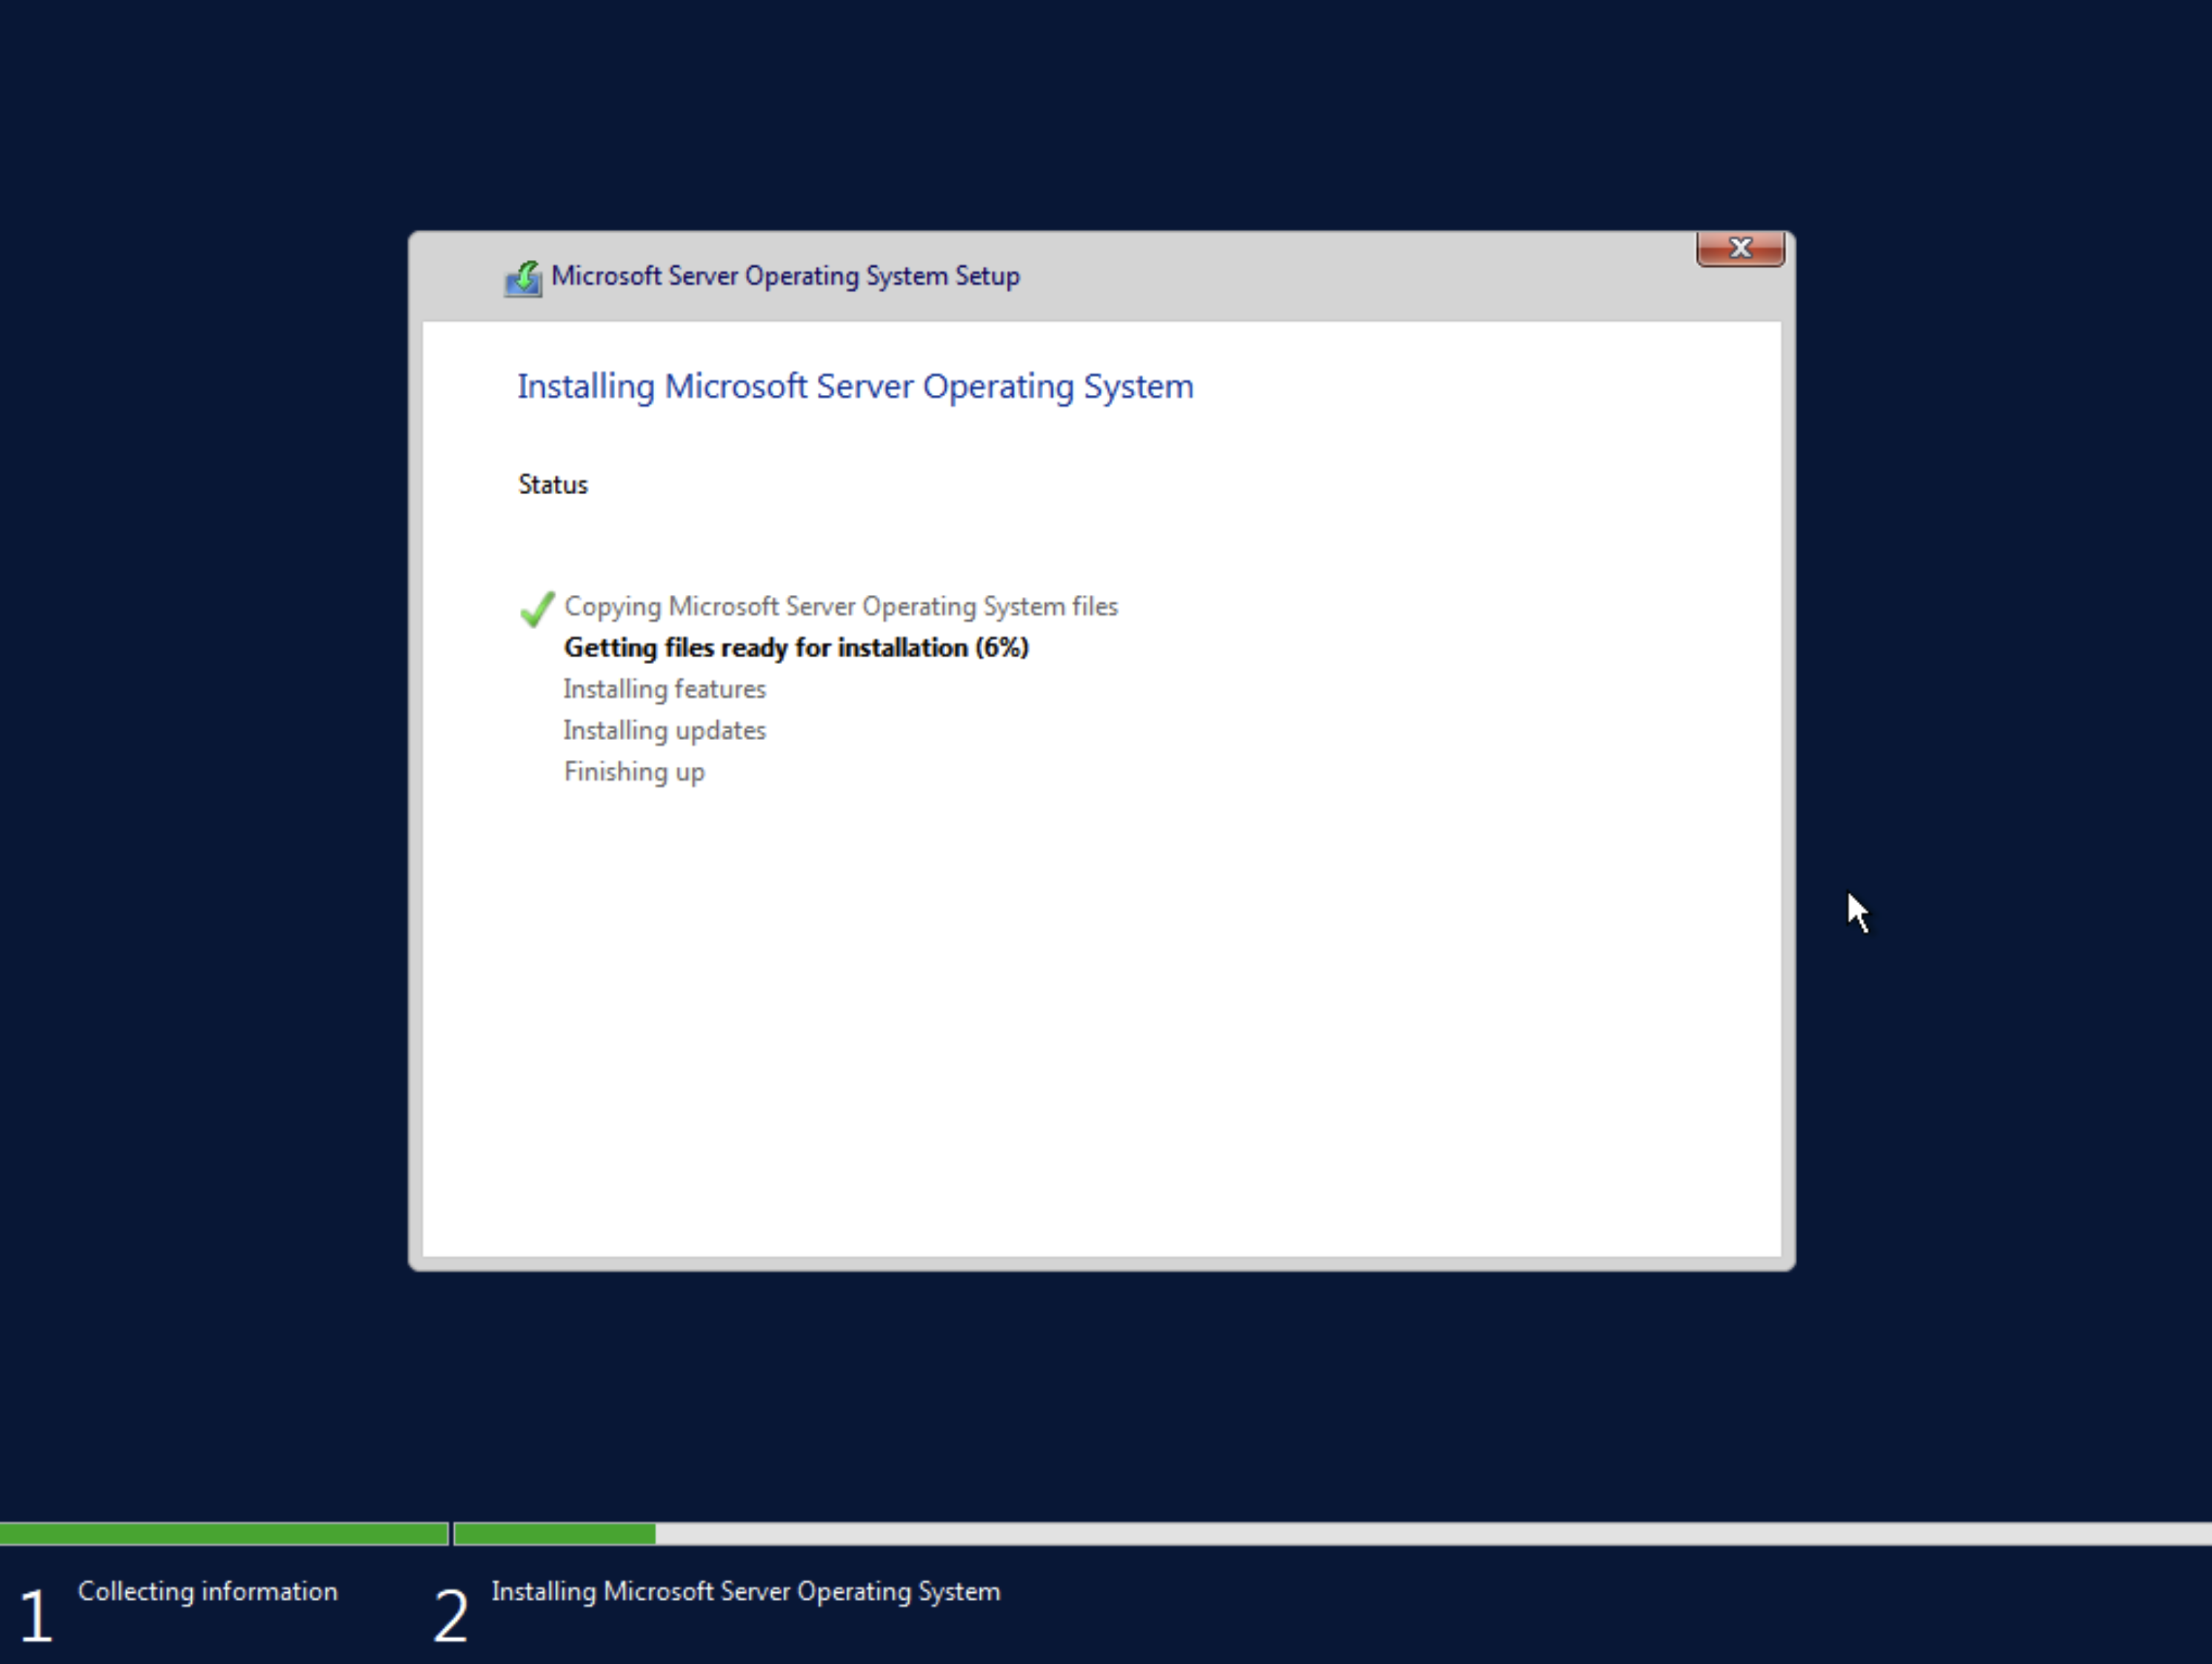
Once this is complete, the VM will now reboot itself a few times as it performs further installation steps required by Windows to get things going. Do not press any button otherwise you could end up back at the installation screen. If you do, you can just go back to the beginning of this page where we edit the VM properties, remove the ISO Image and set the 1st boot device to the Disk, and the 2nd to None.
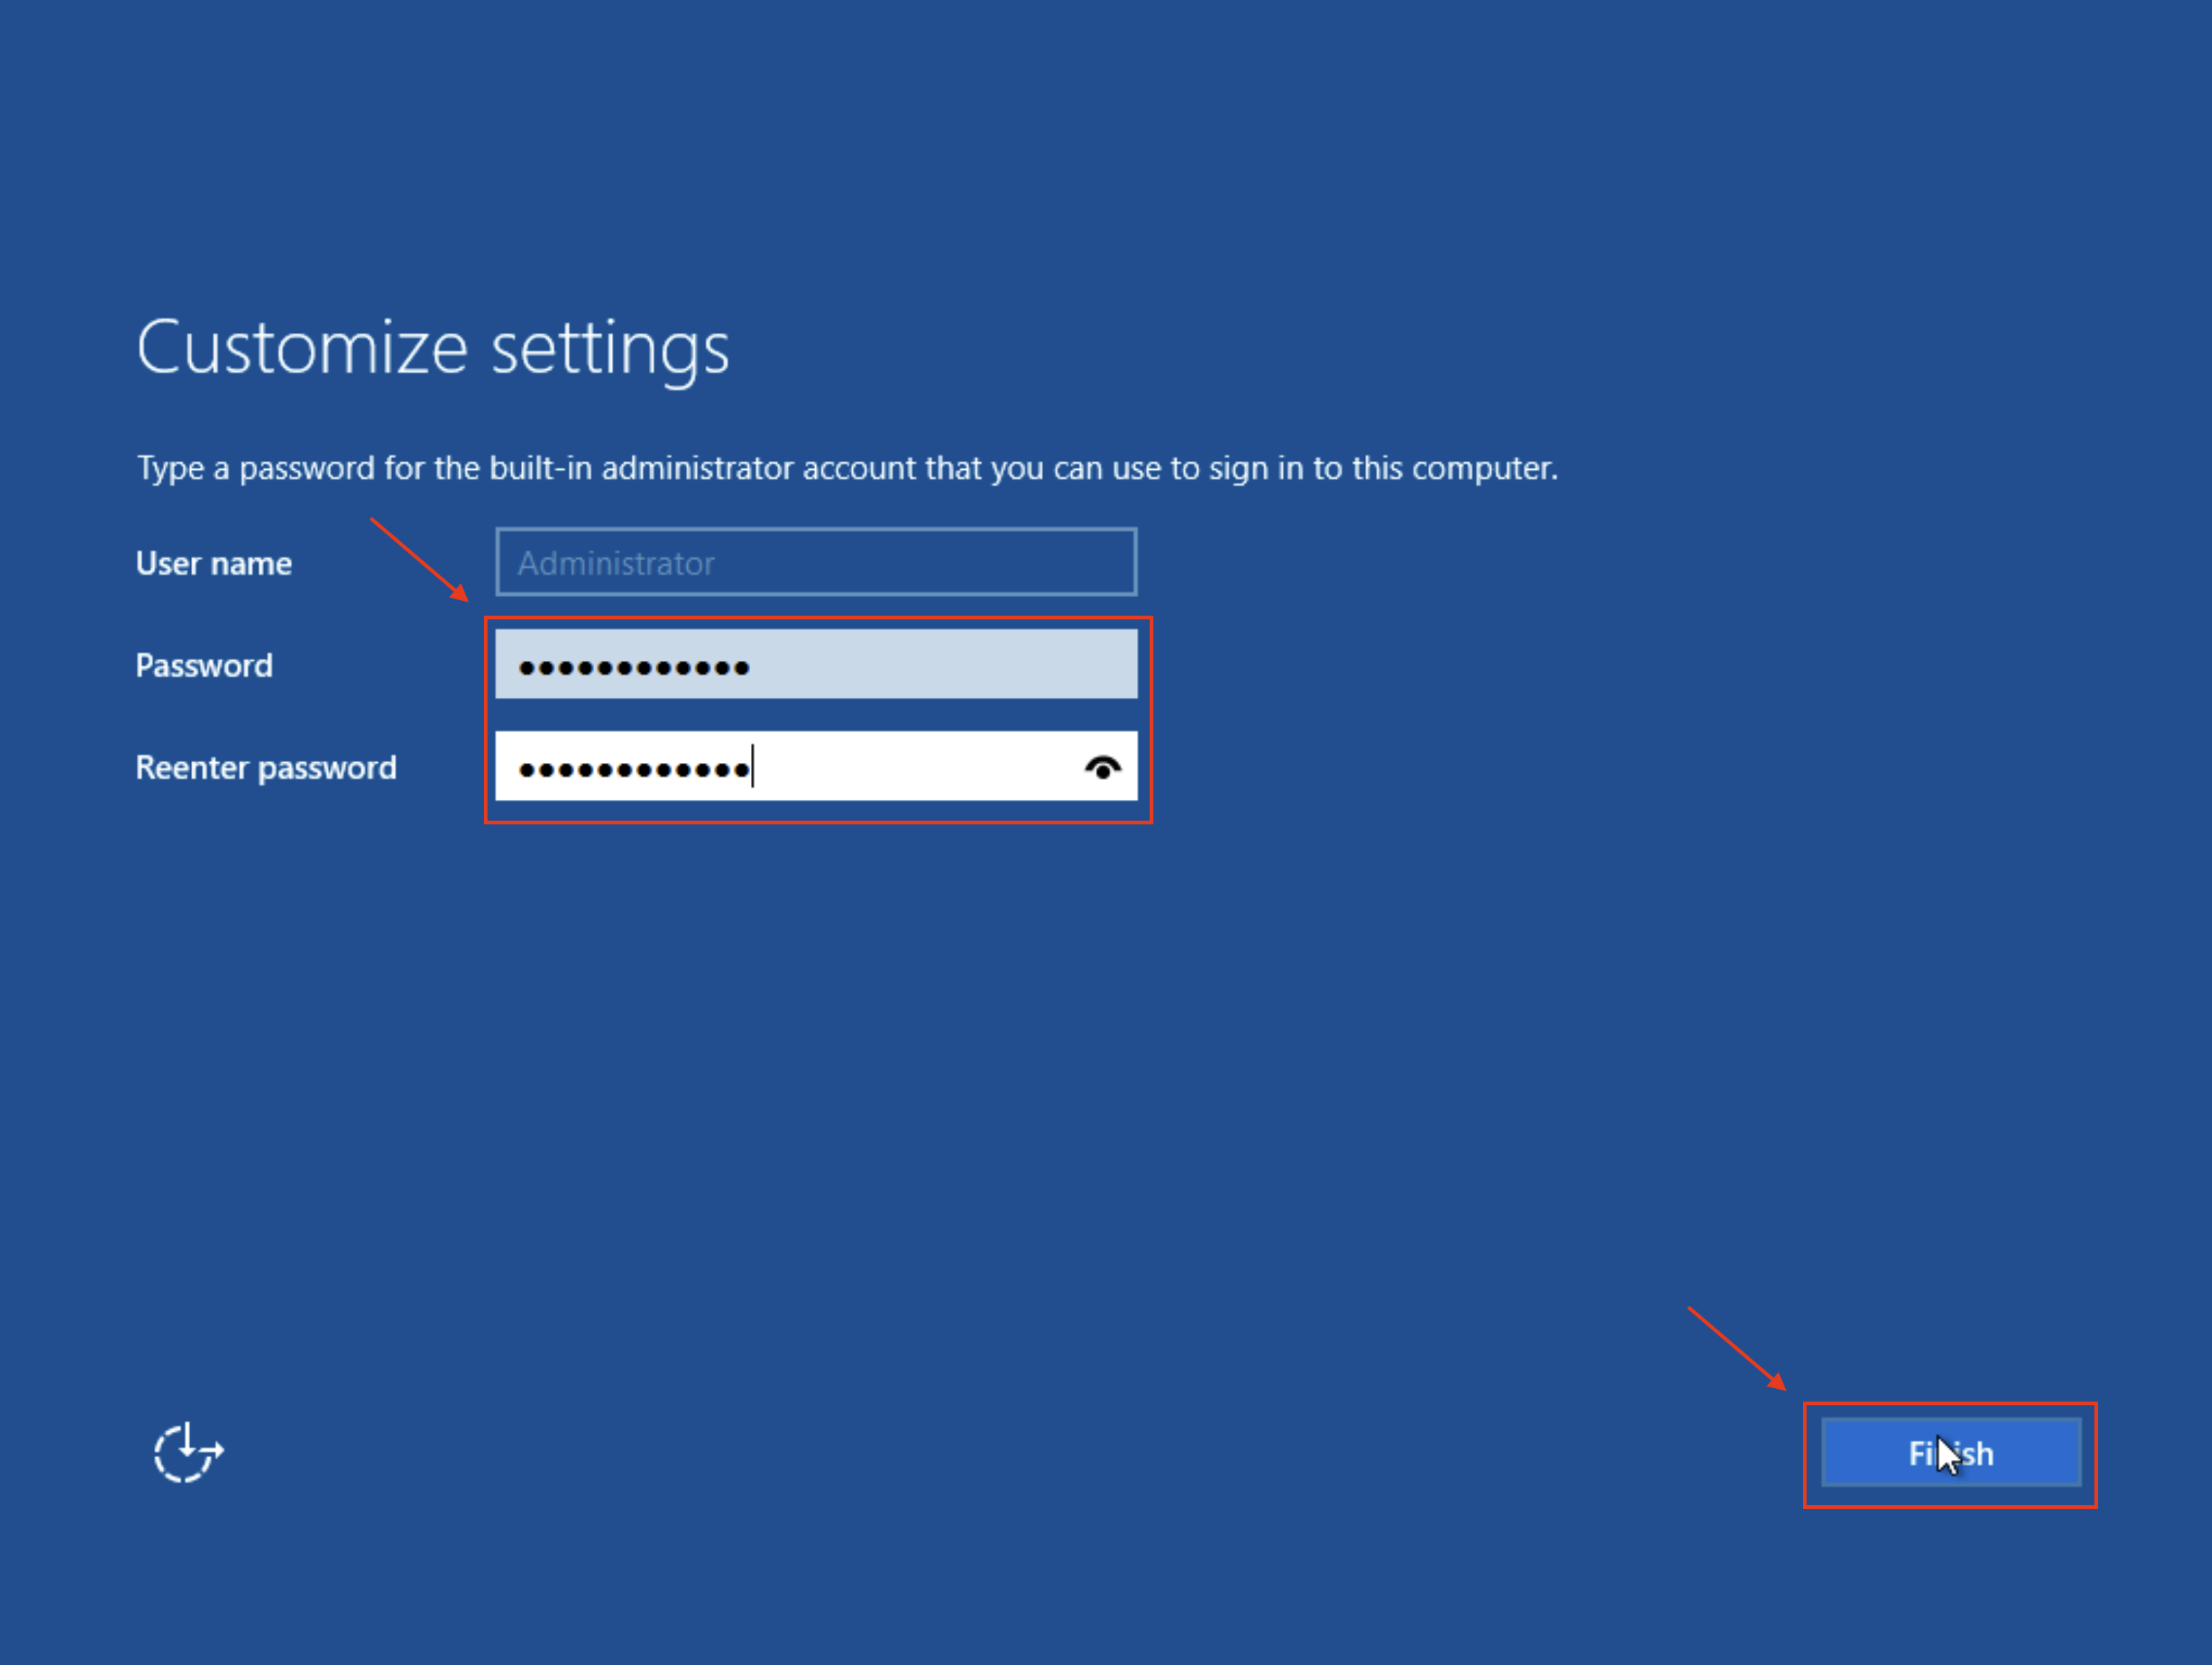
Password setup
After this process is completed, you'll be greeted by the password setup screen, here you can just input your preferred password (make sure you're actually typing the proper characters before proceeding!) and then proceed.
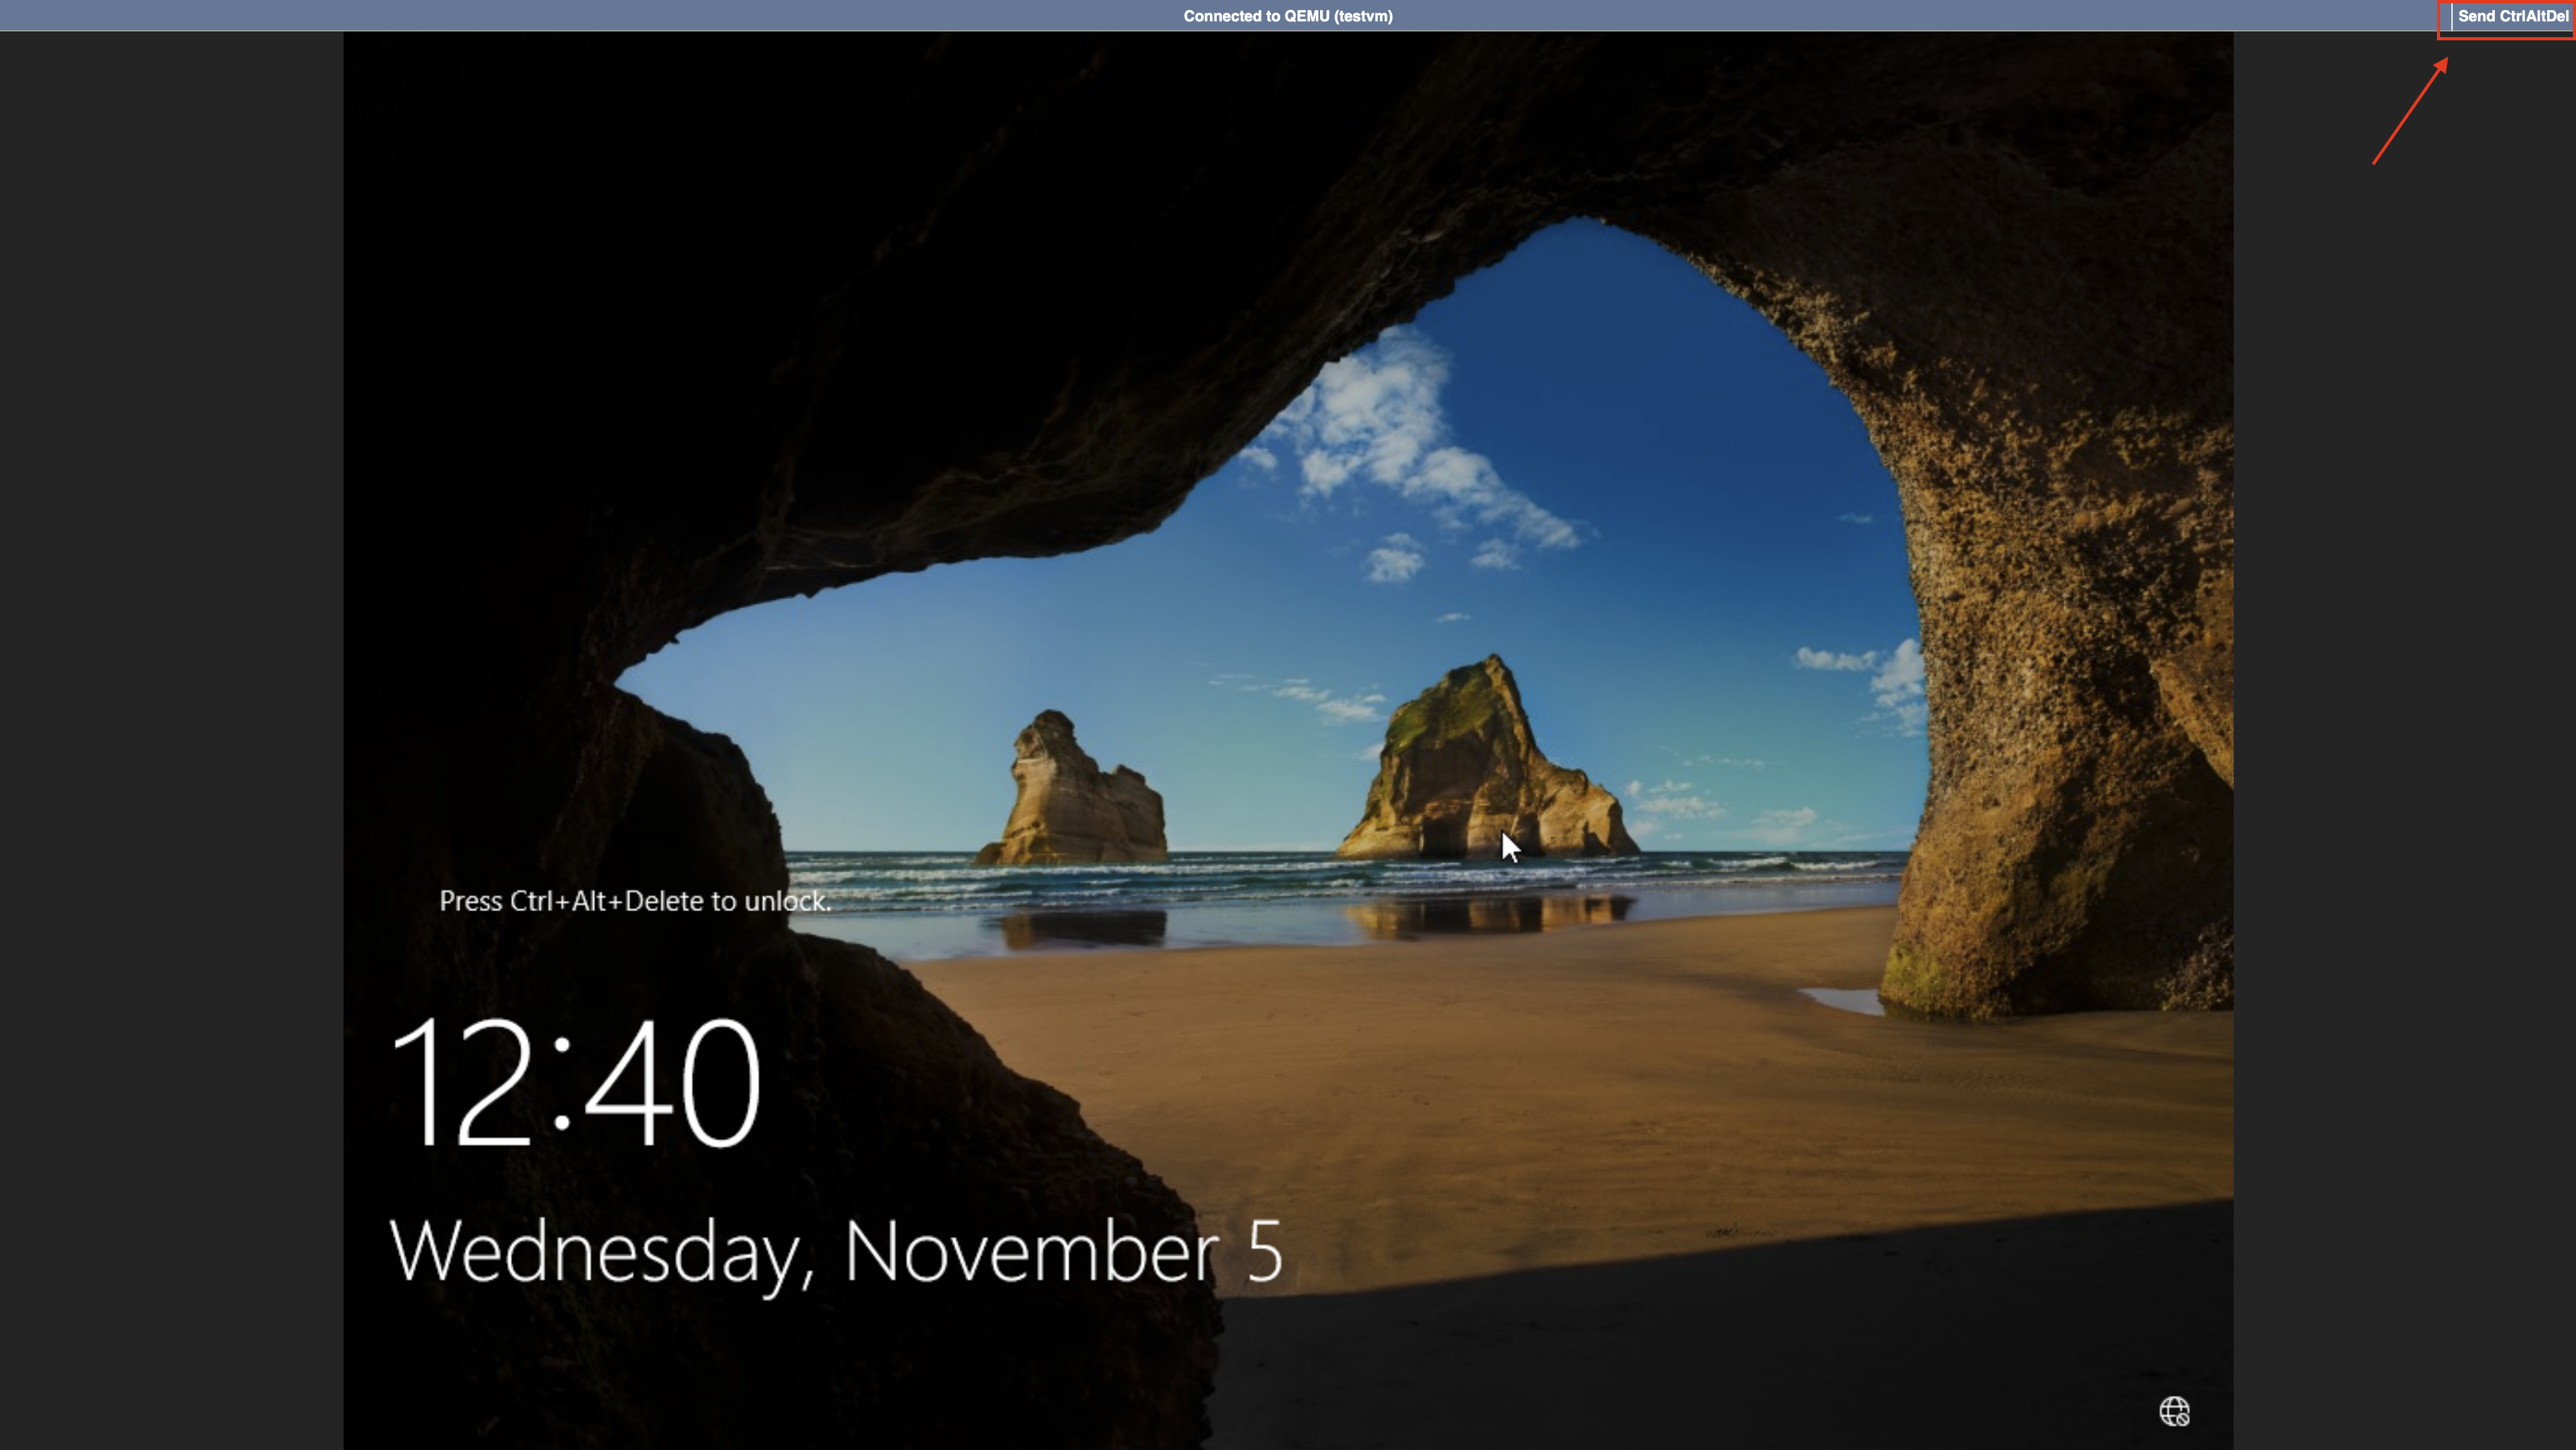
Now, you'll need to press CTRL+ALT+DEL to get to the login page. Do not do this on your keyboard you'll just perform the action on your own PC, instead, use the macro at the top right of your screen.
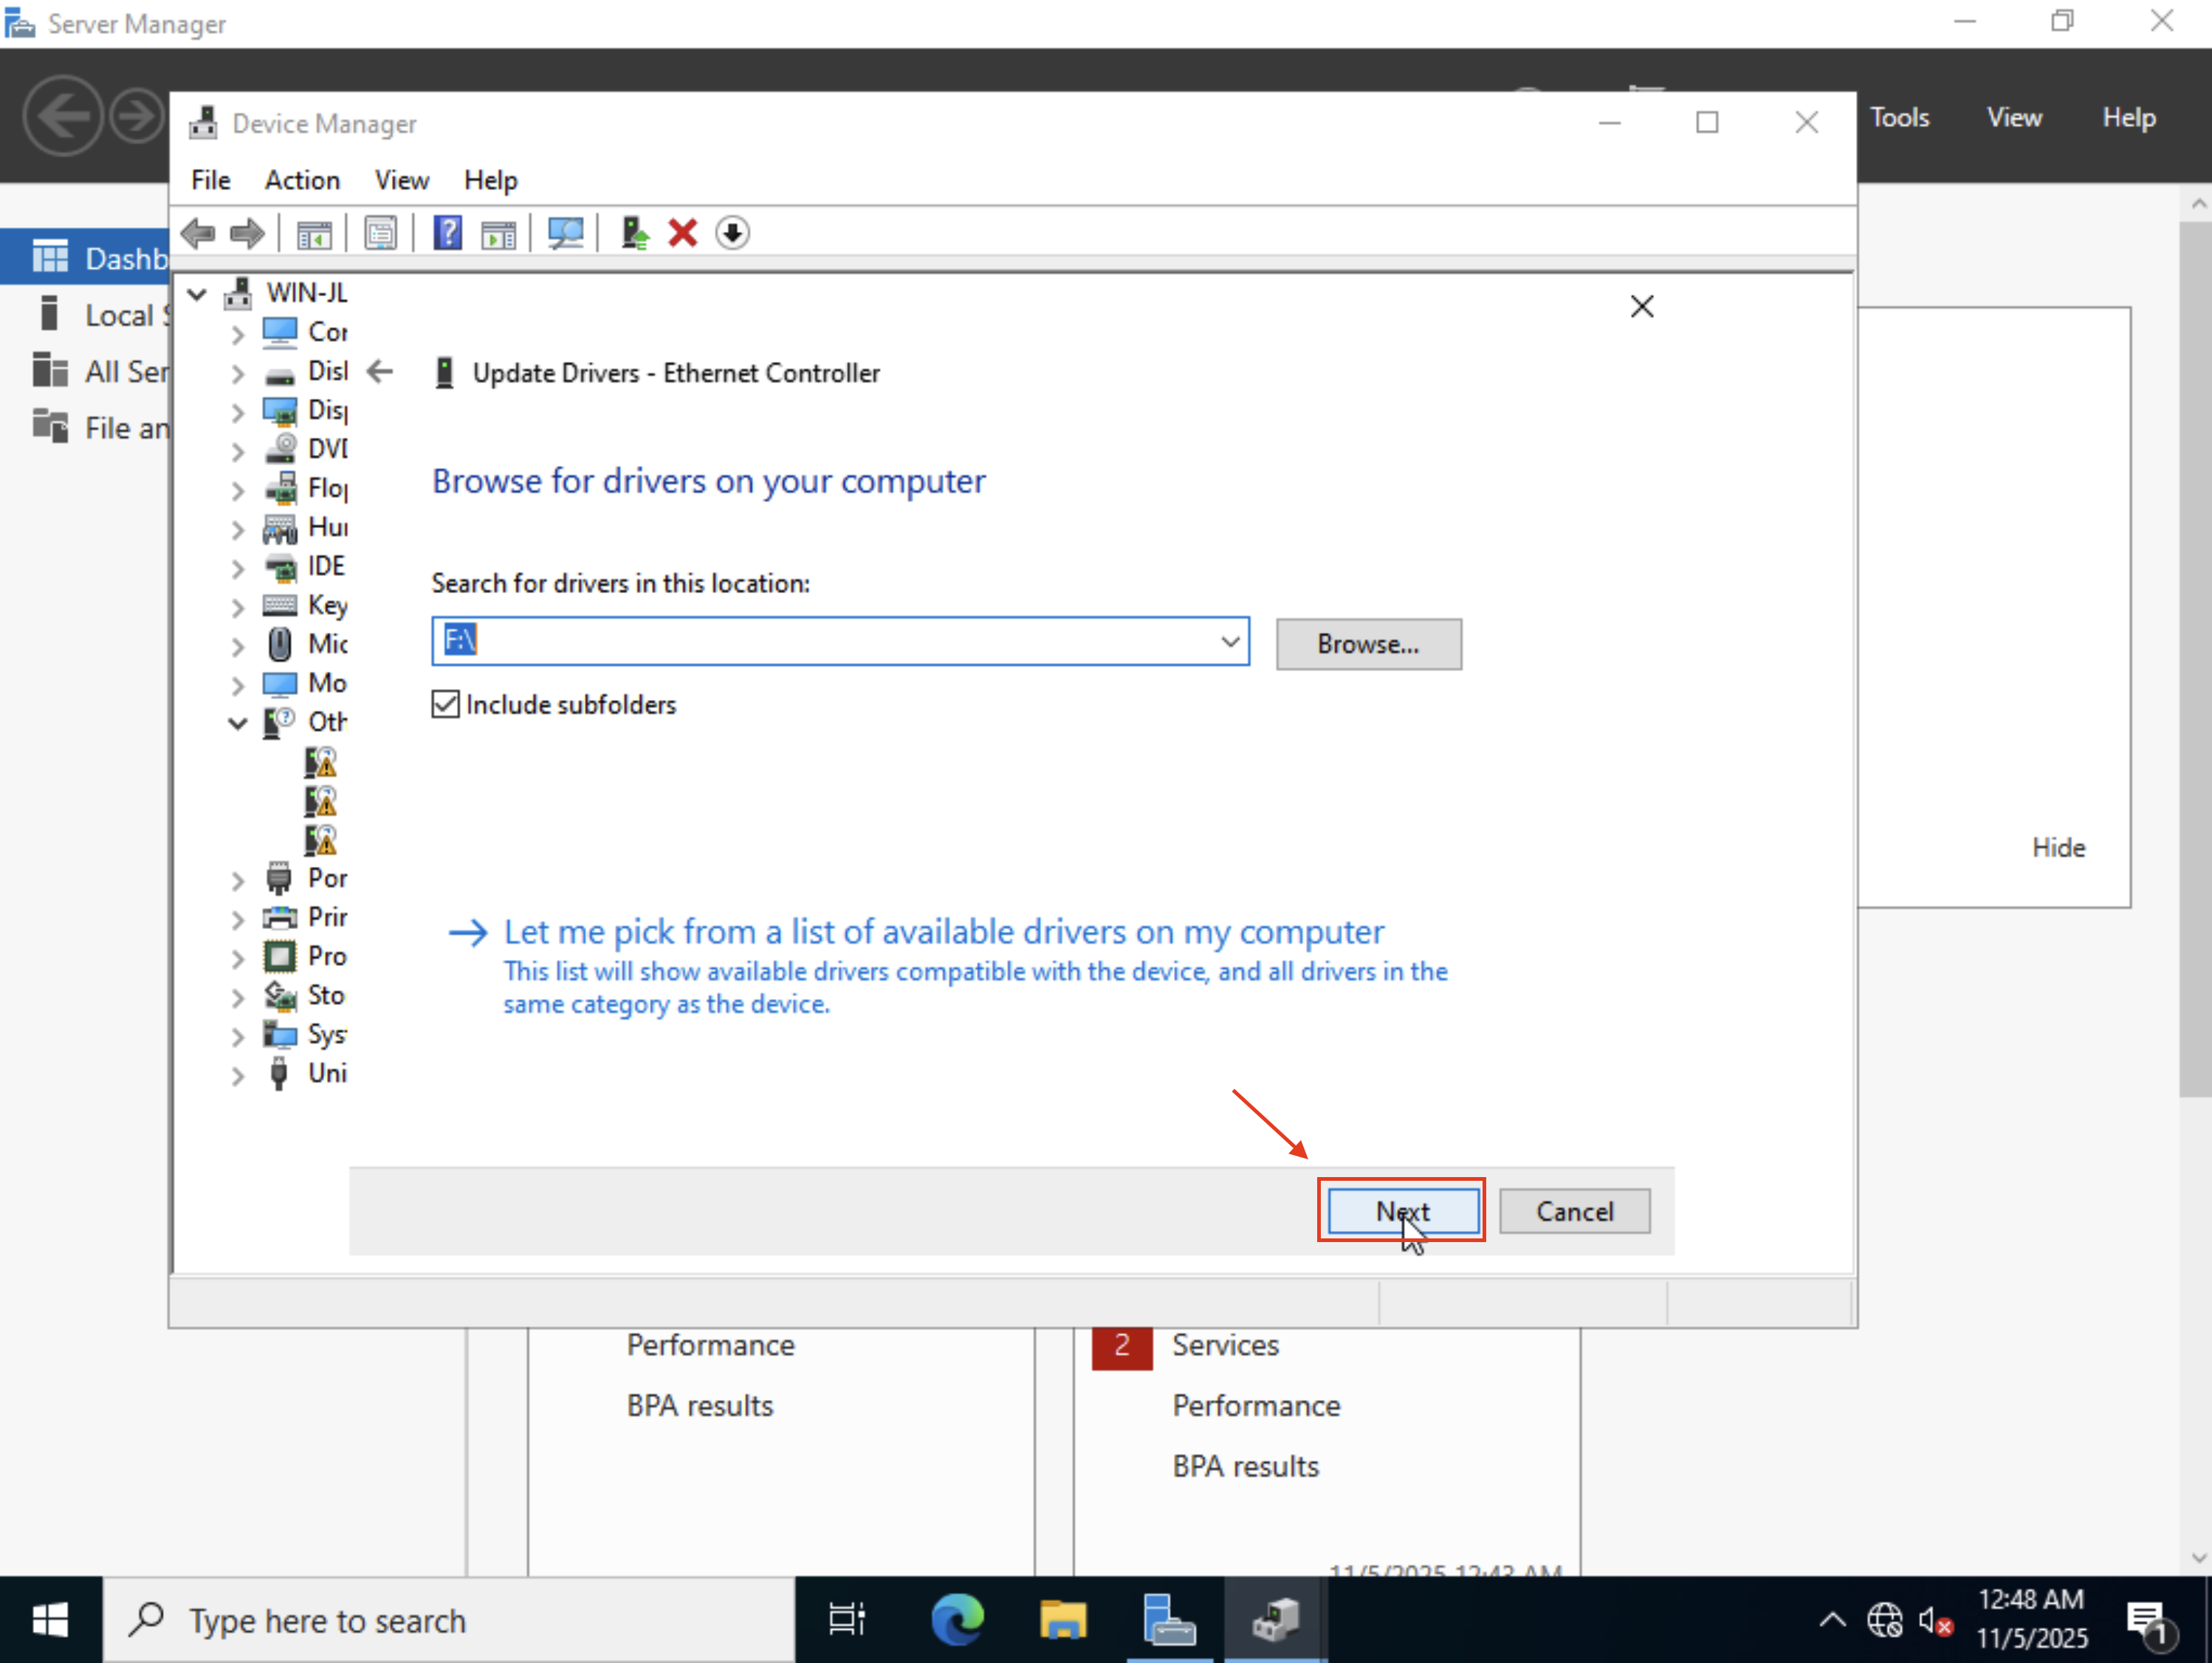
VirtIO Ethernet drivers installation
After logging in, you may notice that the VM is without any network connectivity, that's because the VirtIO network interface isn't recognized by Windows due to the missing drivers.
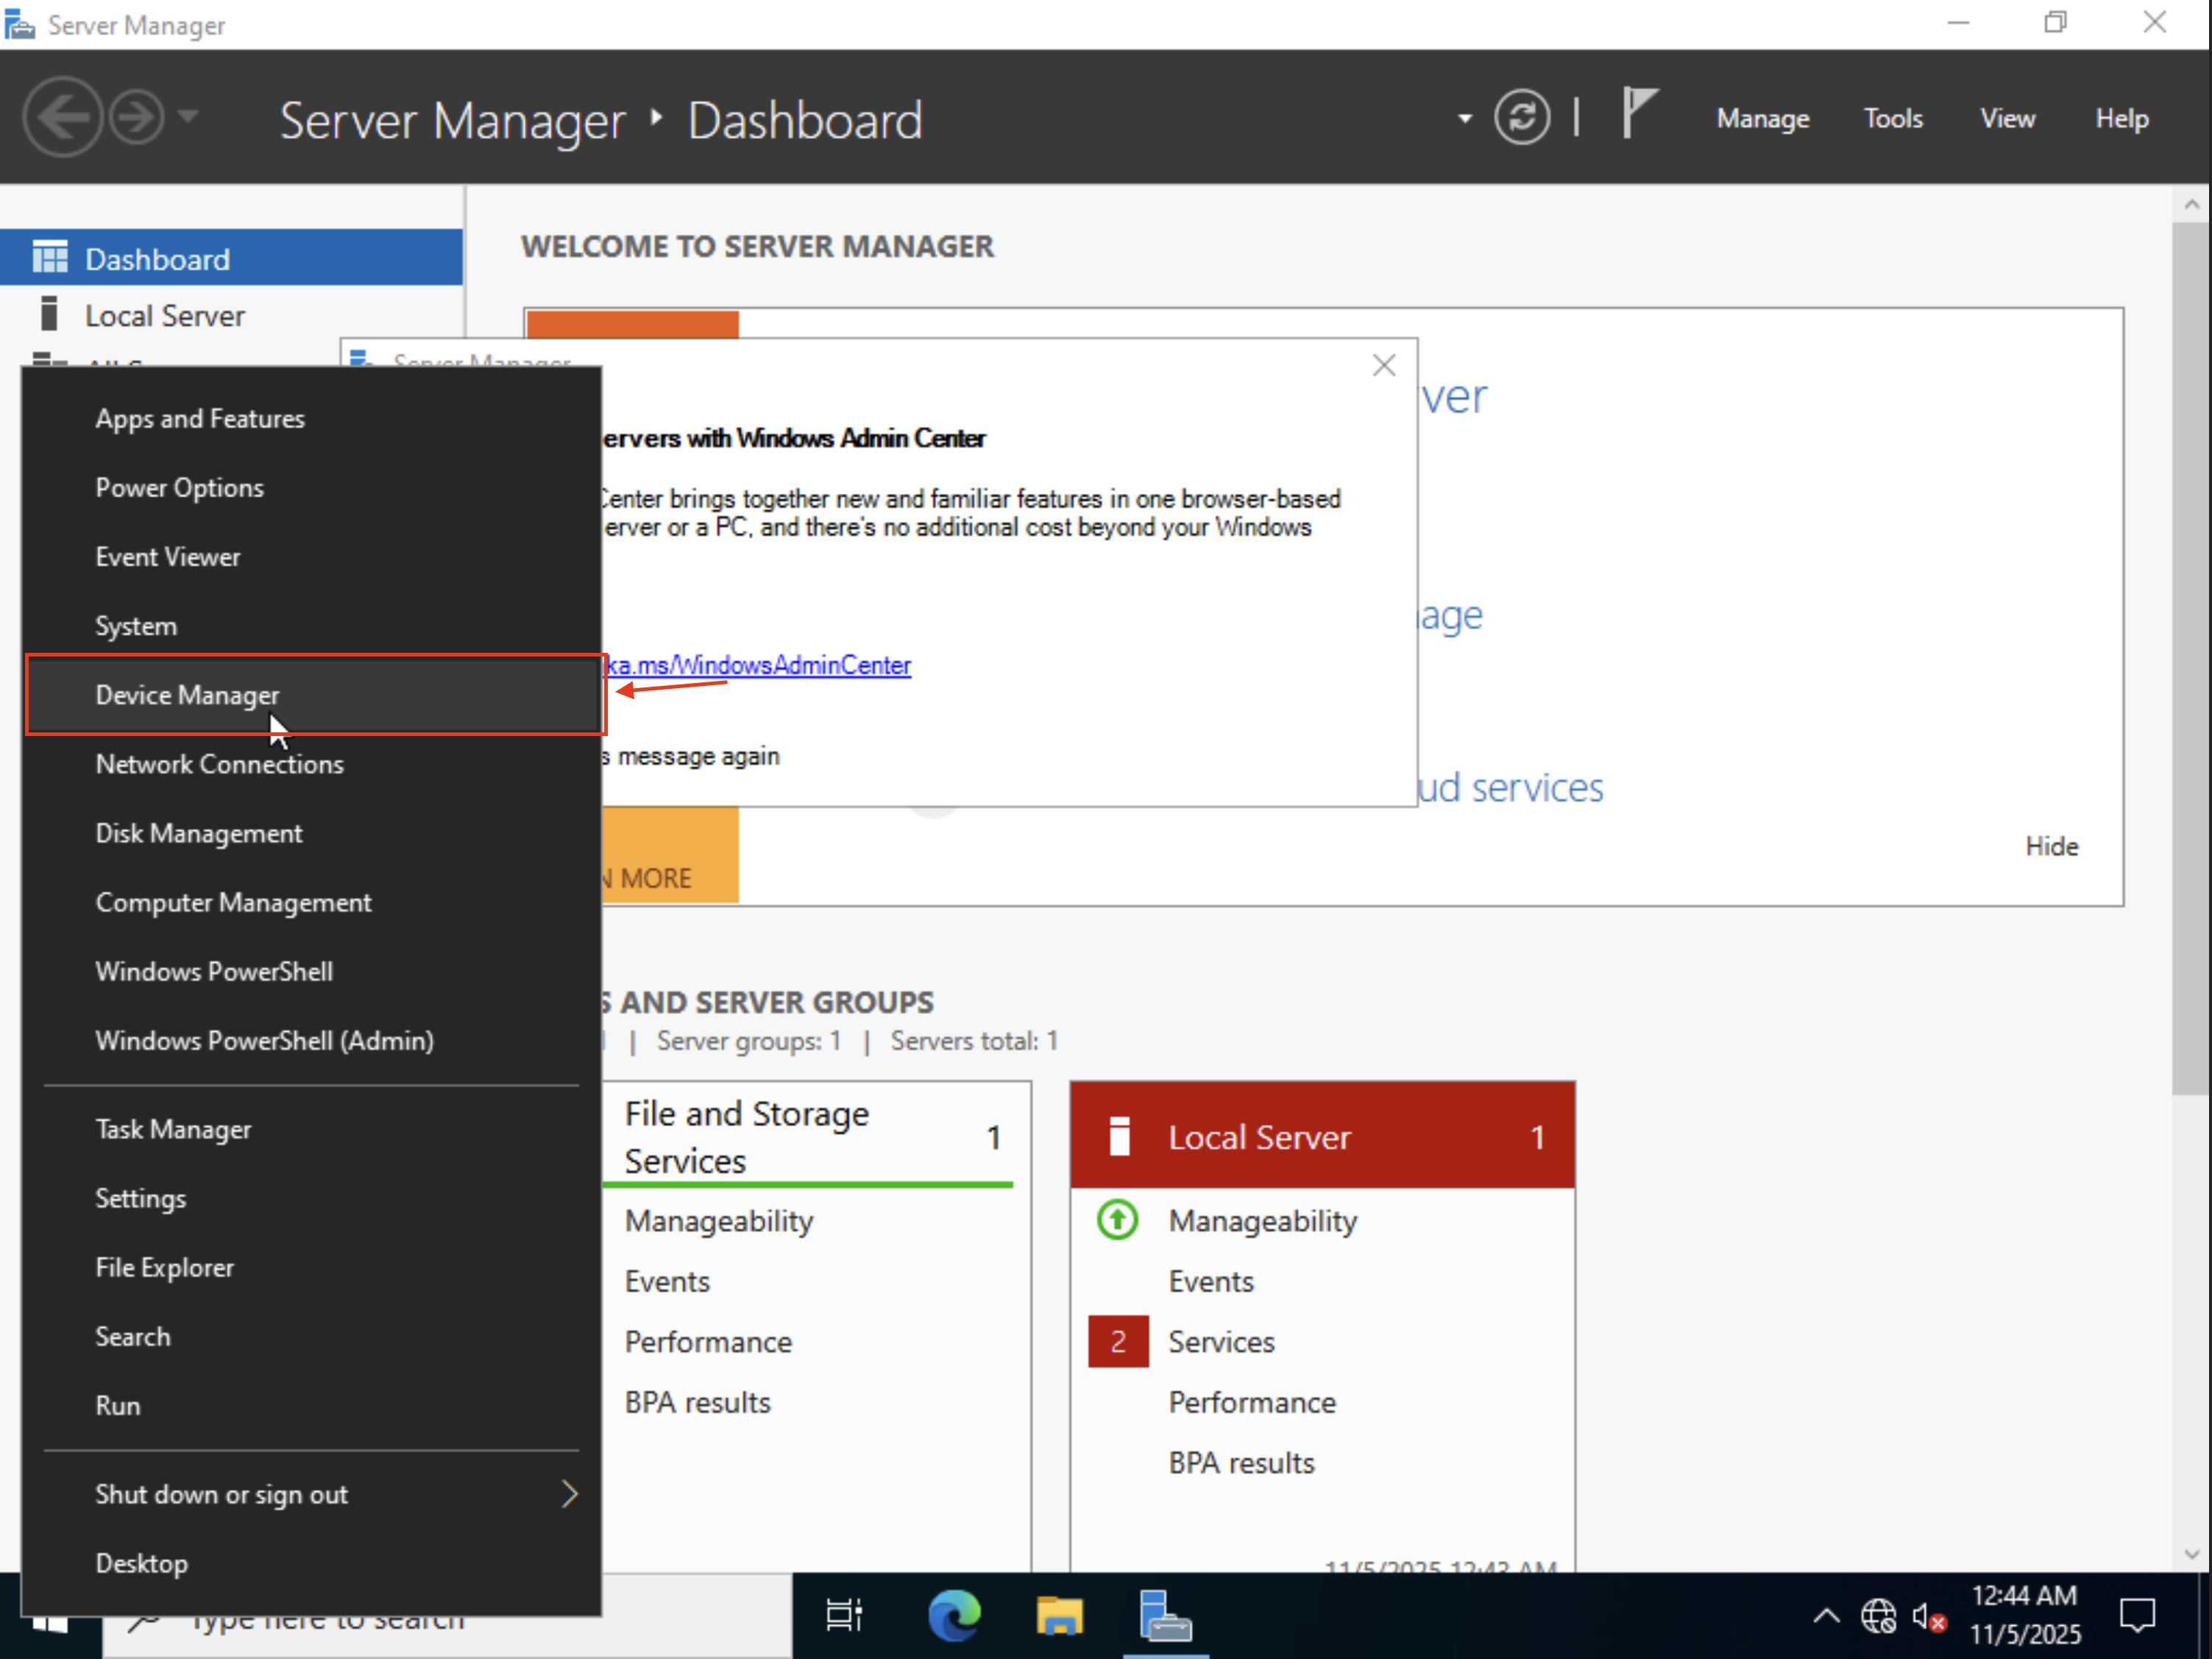
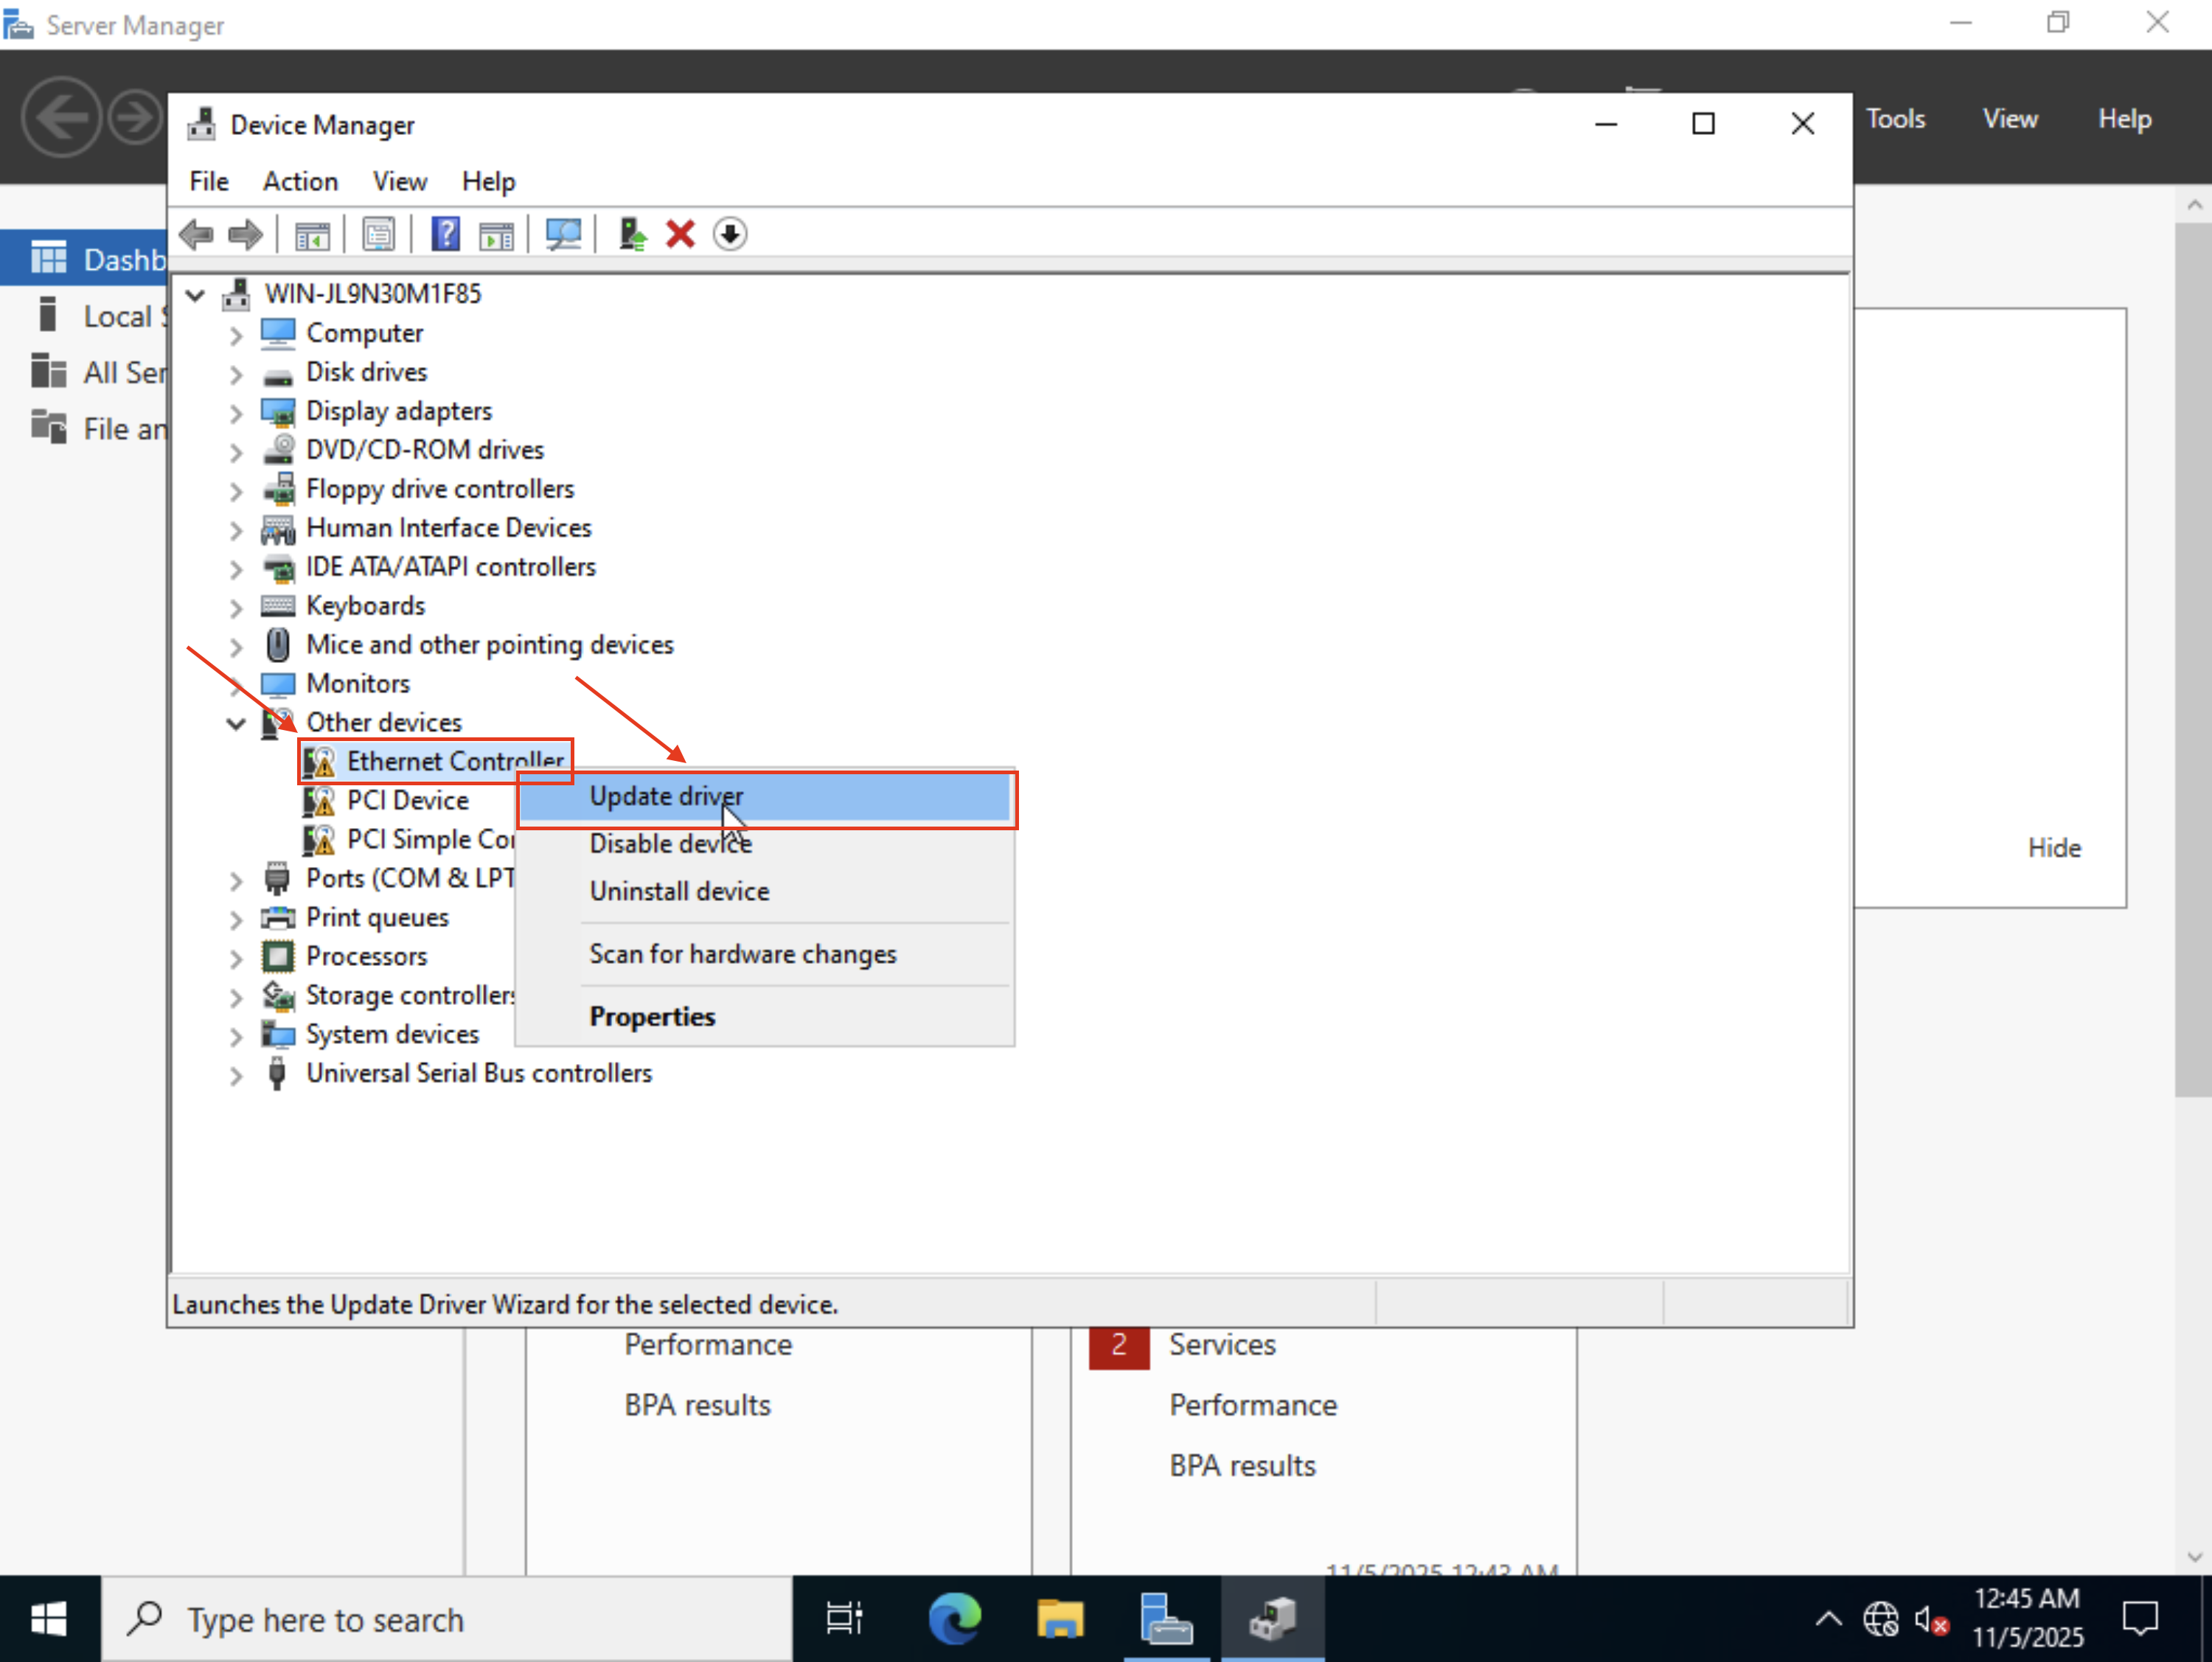
Just navigate to the Device manager by right clicking (you could inadvertently trigger the paste function from the console, just cancel that and try again) the Start button, and then install the drivers as follows
On the Device Manager, just right click the Ethernet Controller and select Update driver.
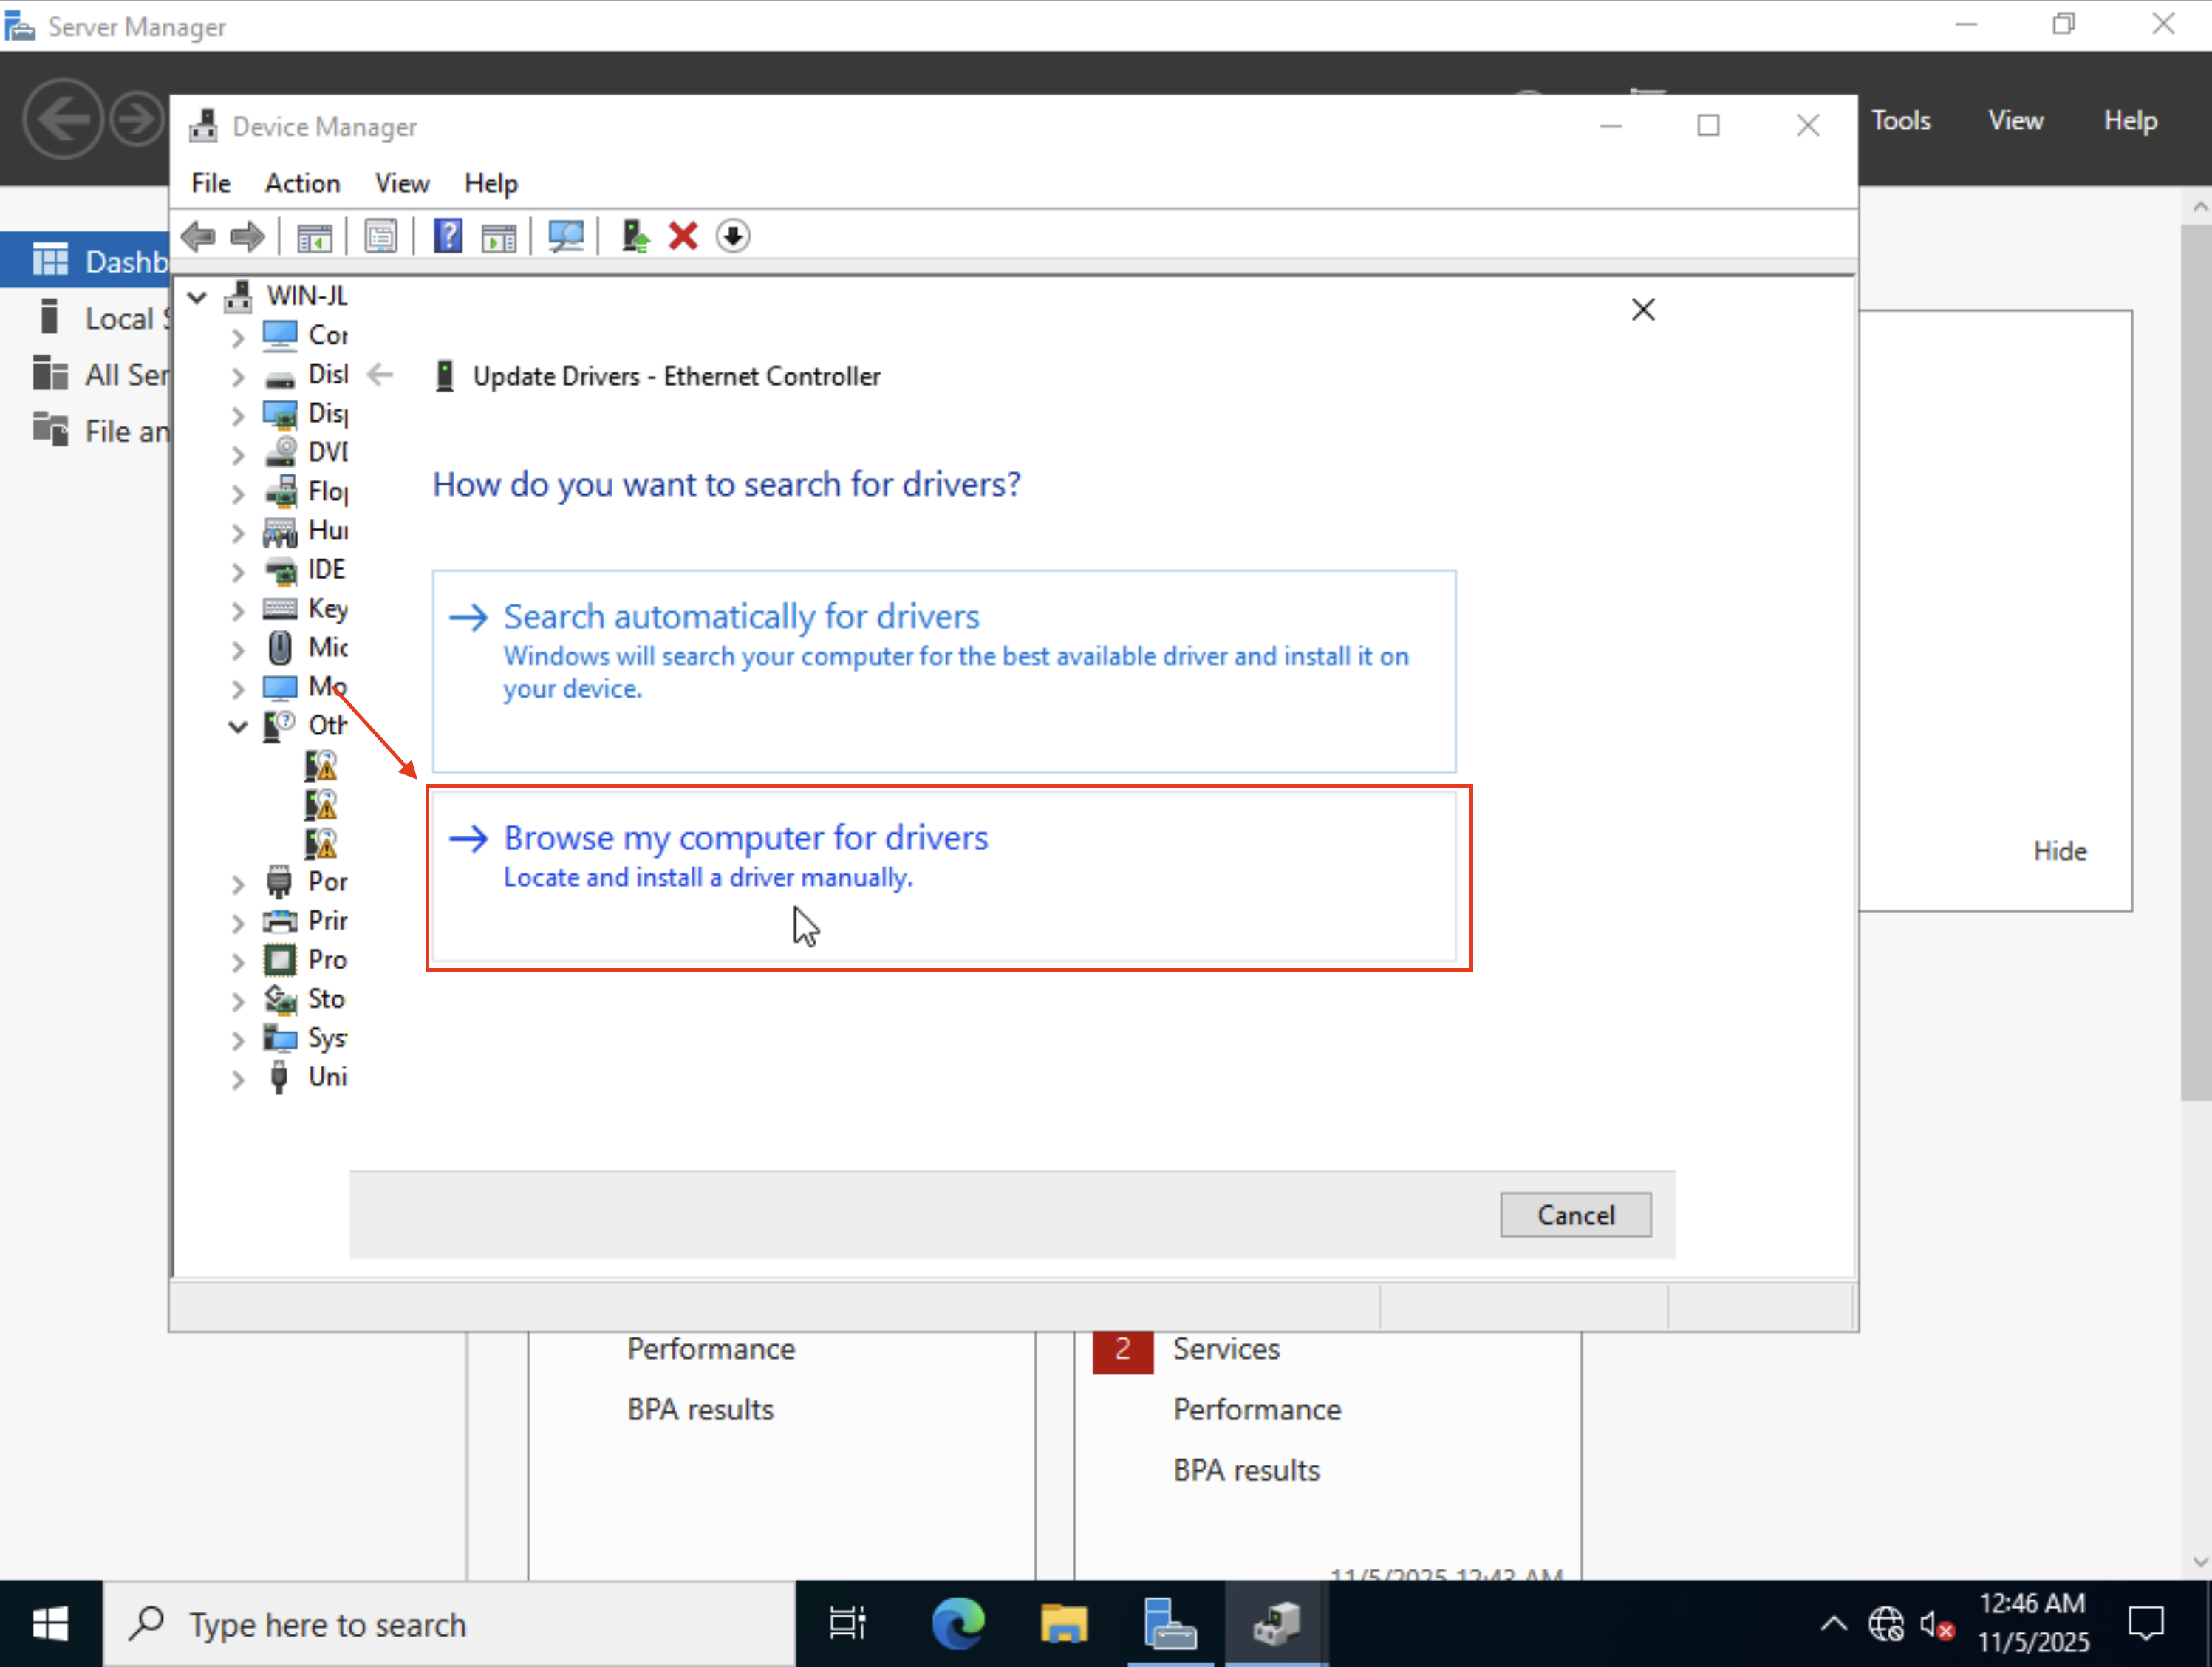
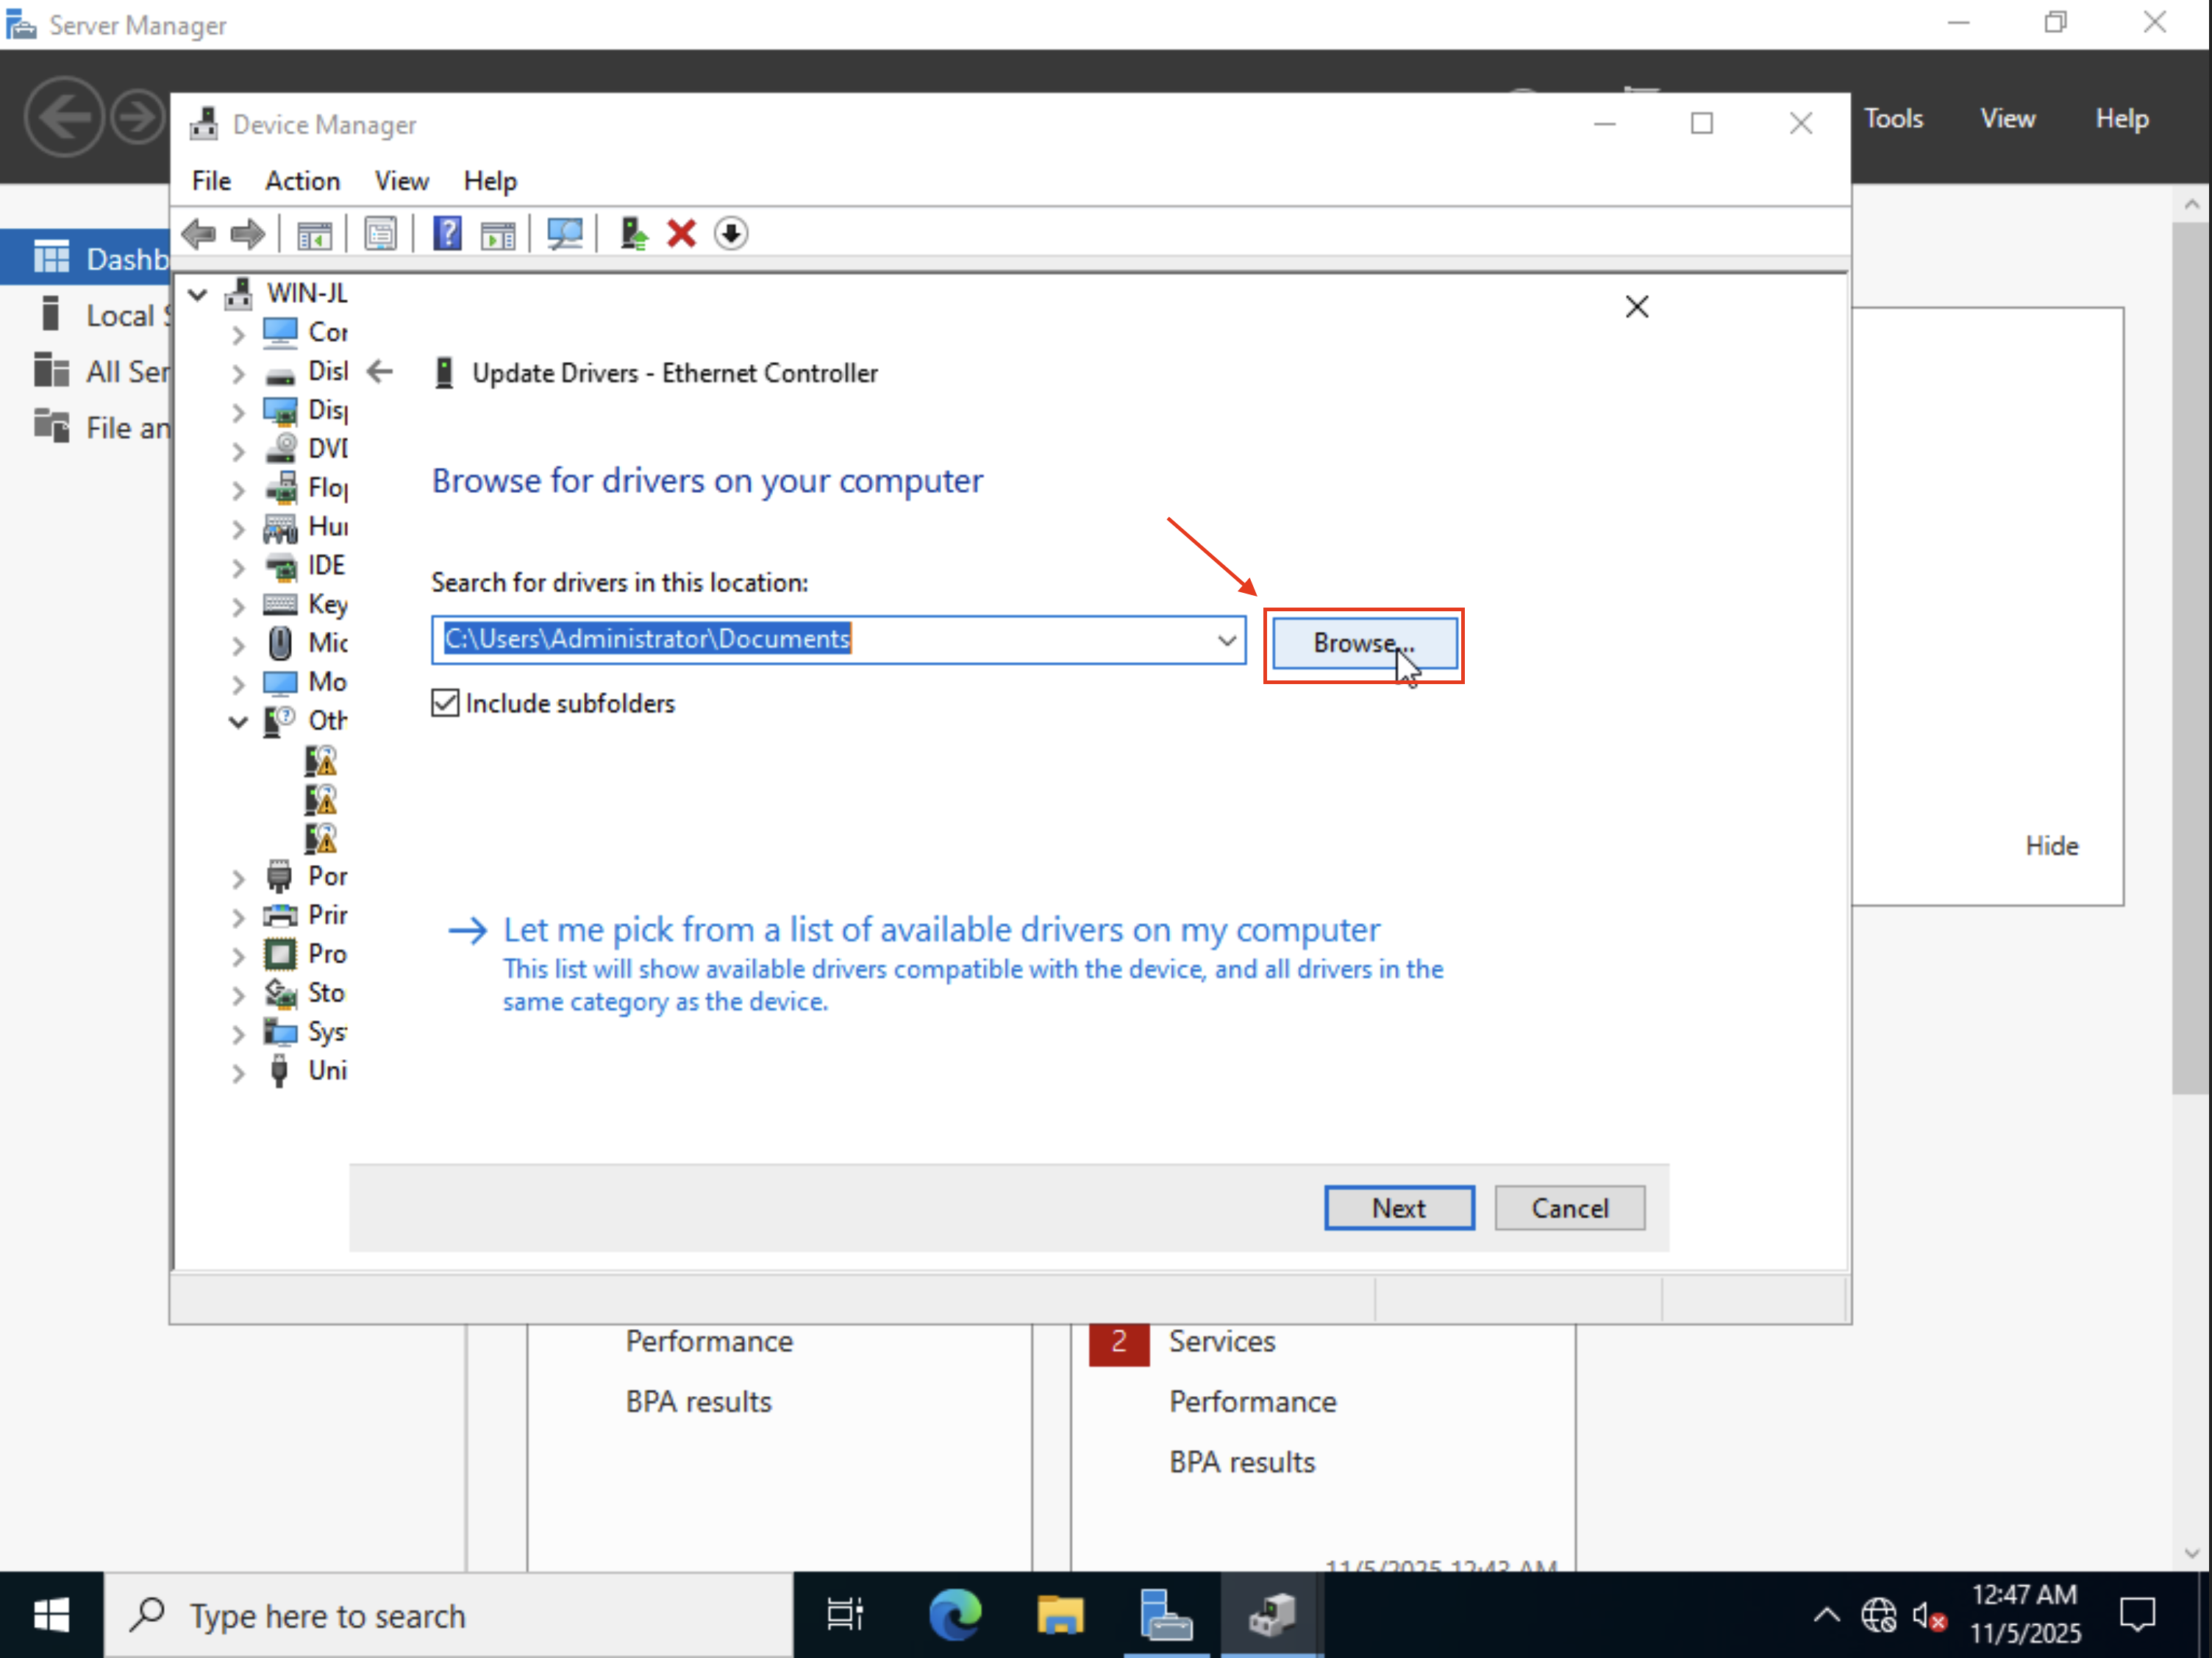
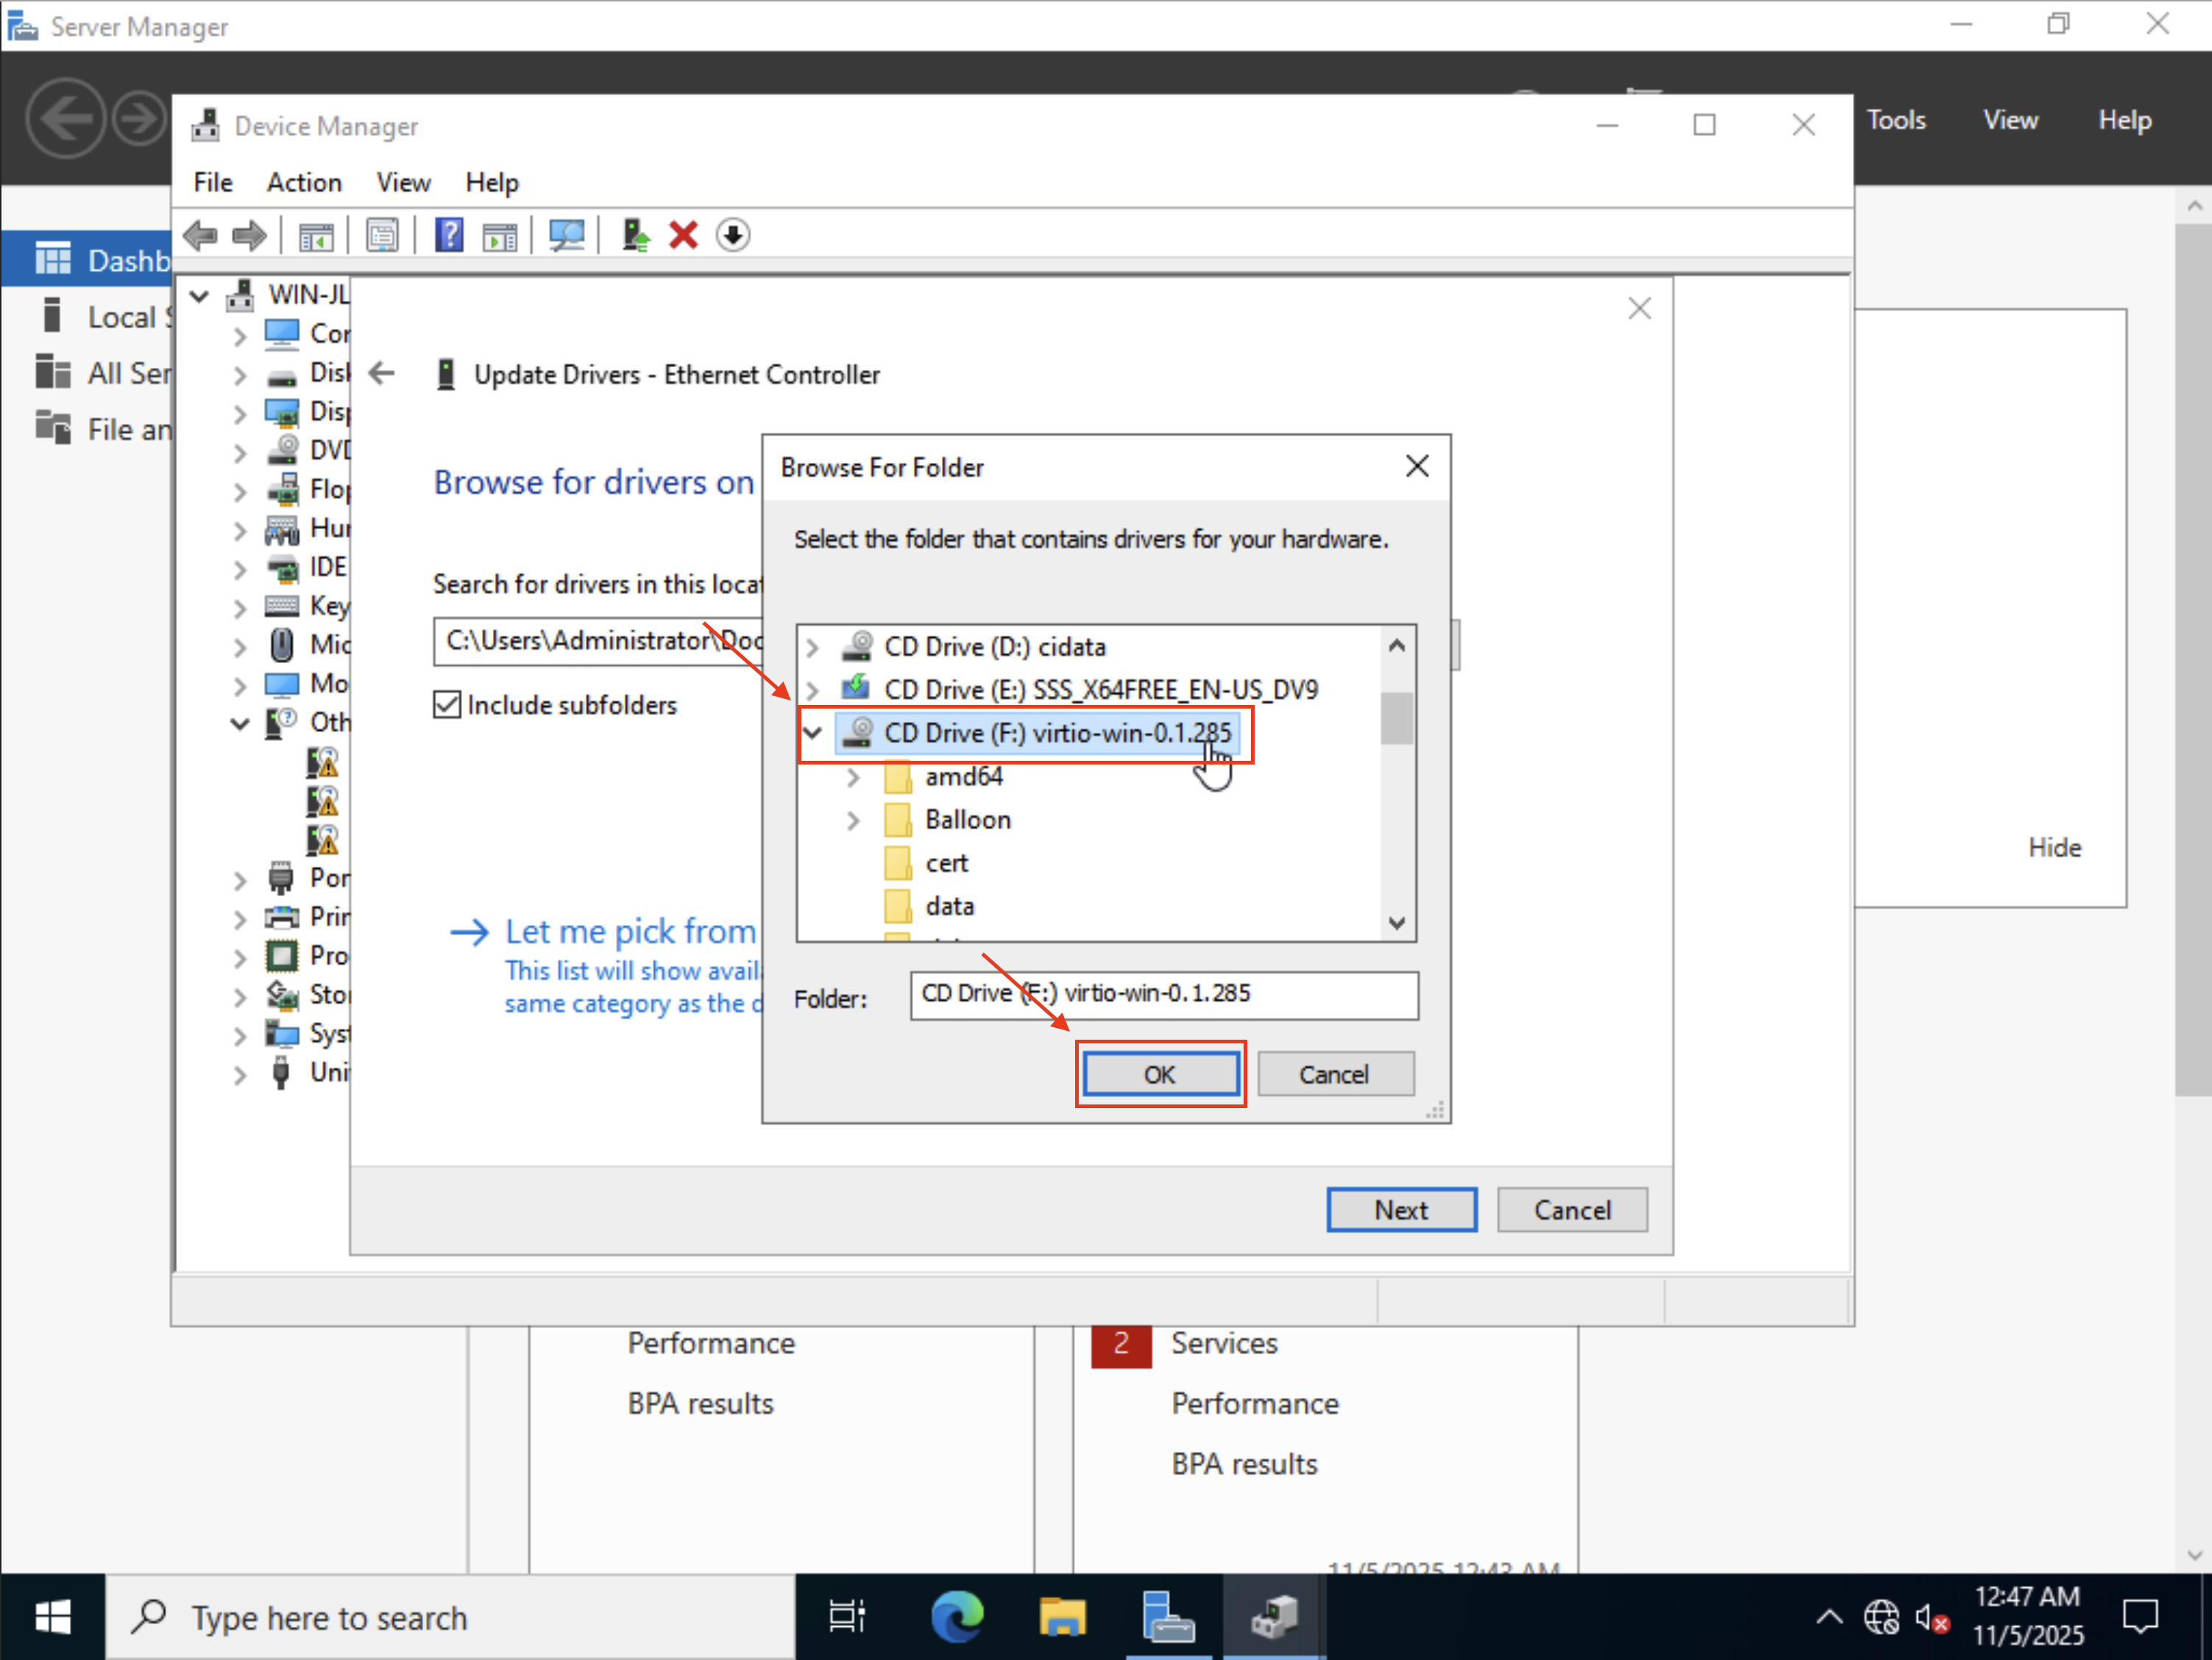
You will need to select the virtio-win additional drive here, and click ok.
After installing the the VirtIO drivers for the network interface you should already have network access as your VM can pull this through DHCP. Though, if you want you can also proceed with a static configuration but that's outside the scope of this guide.
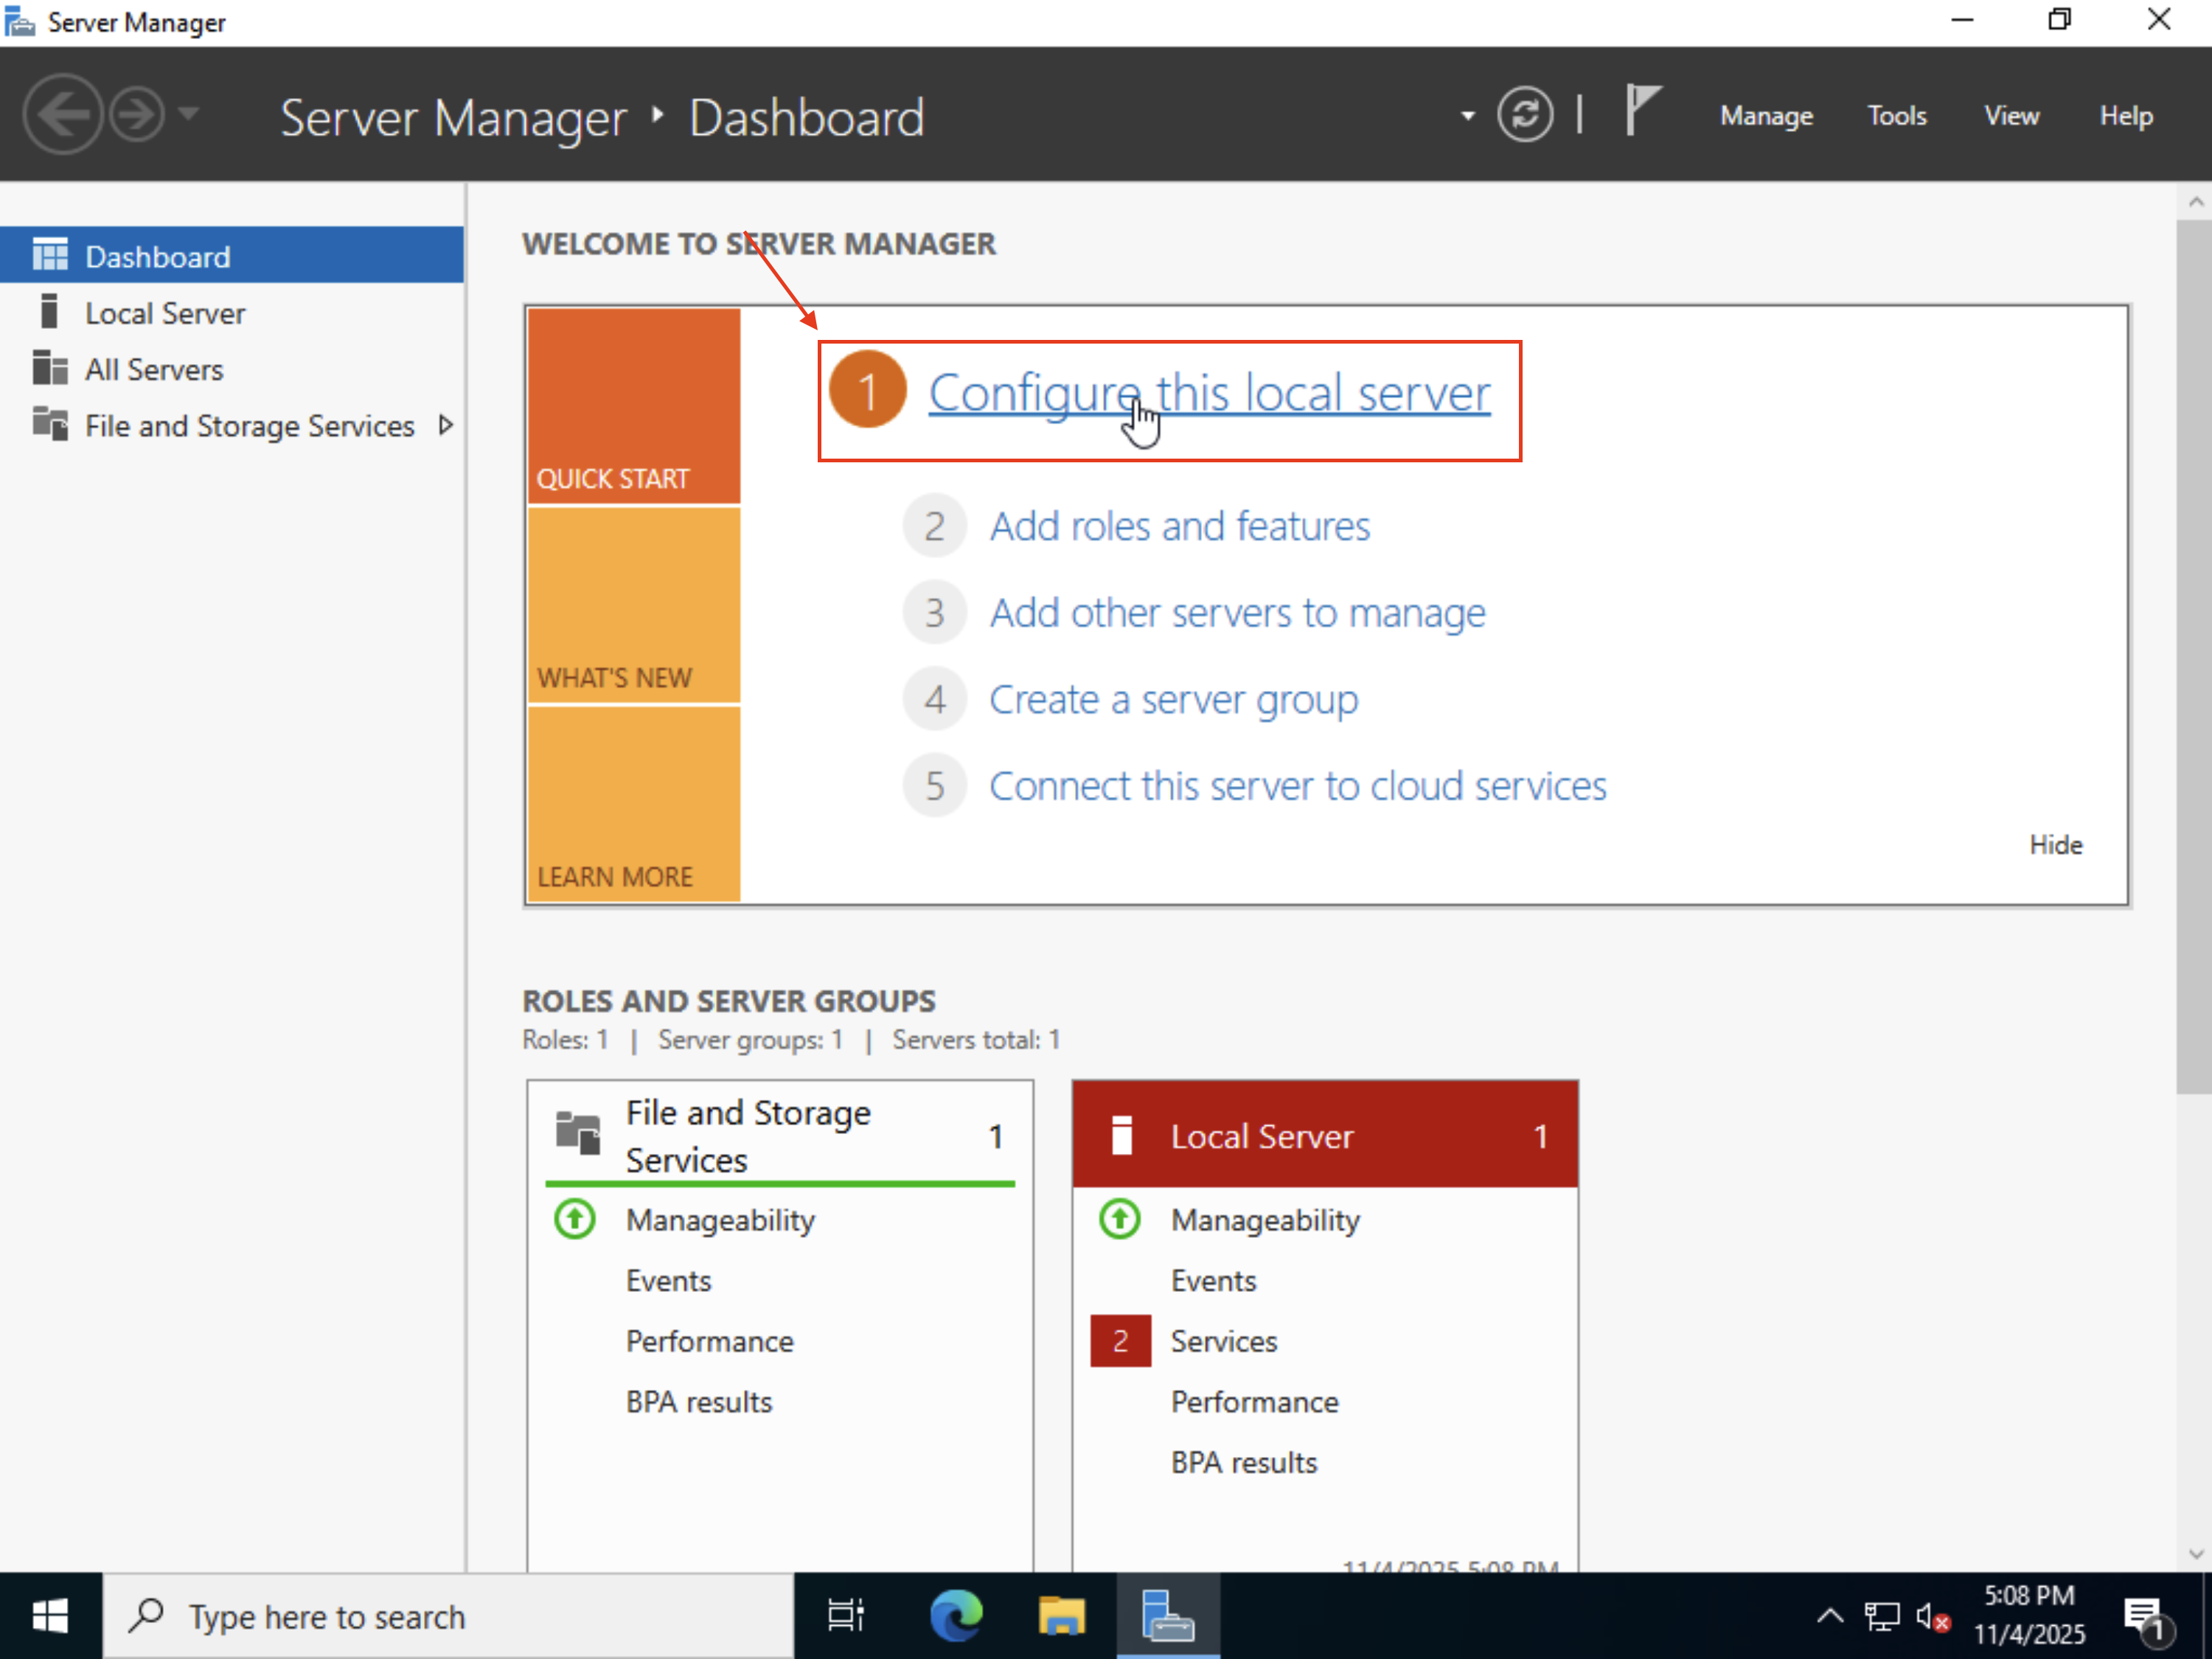
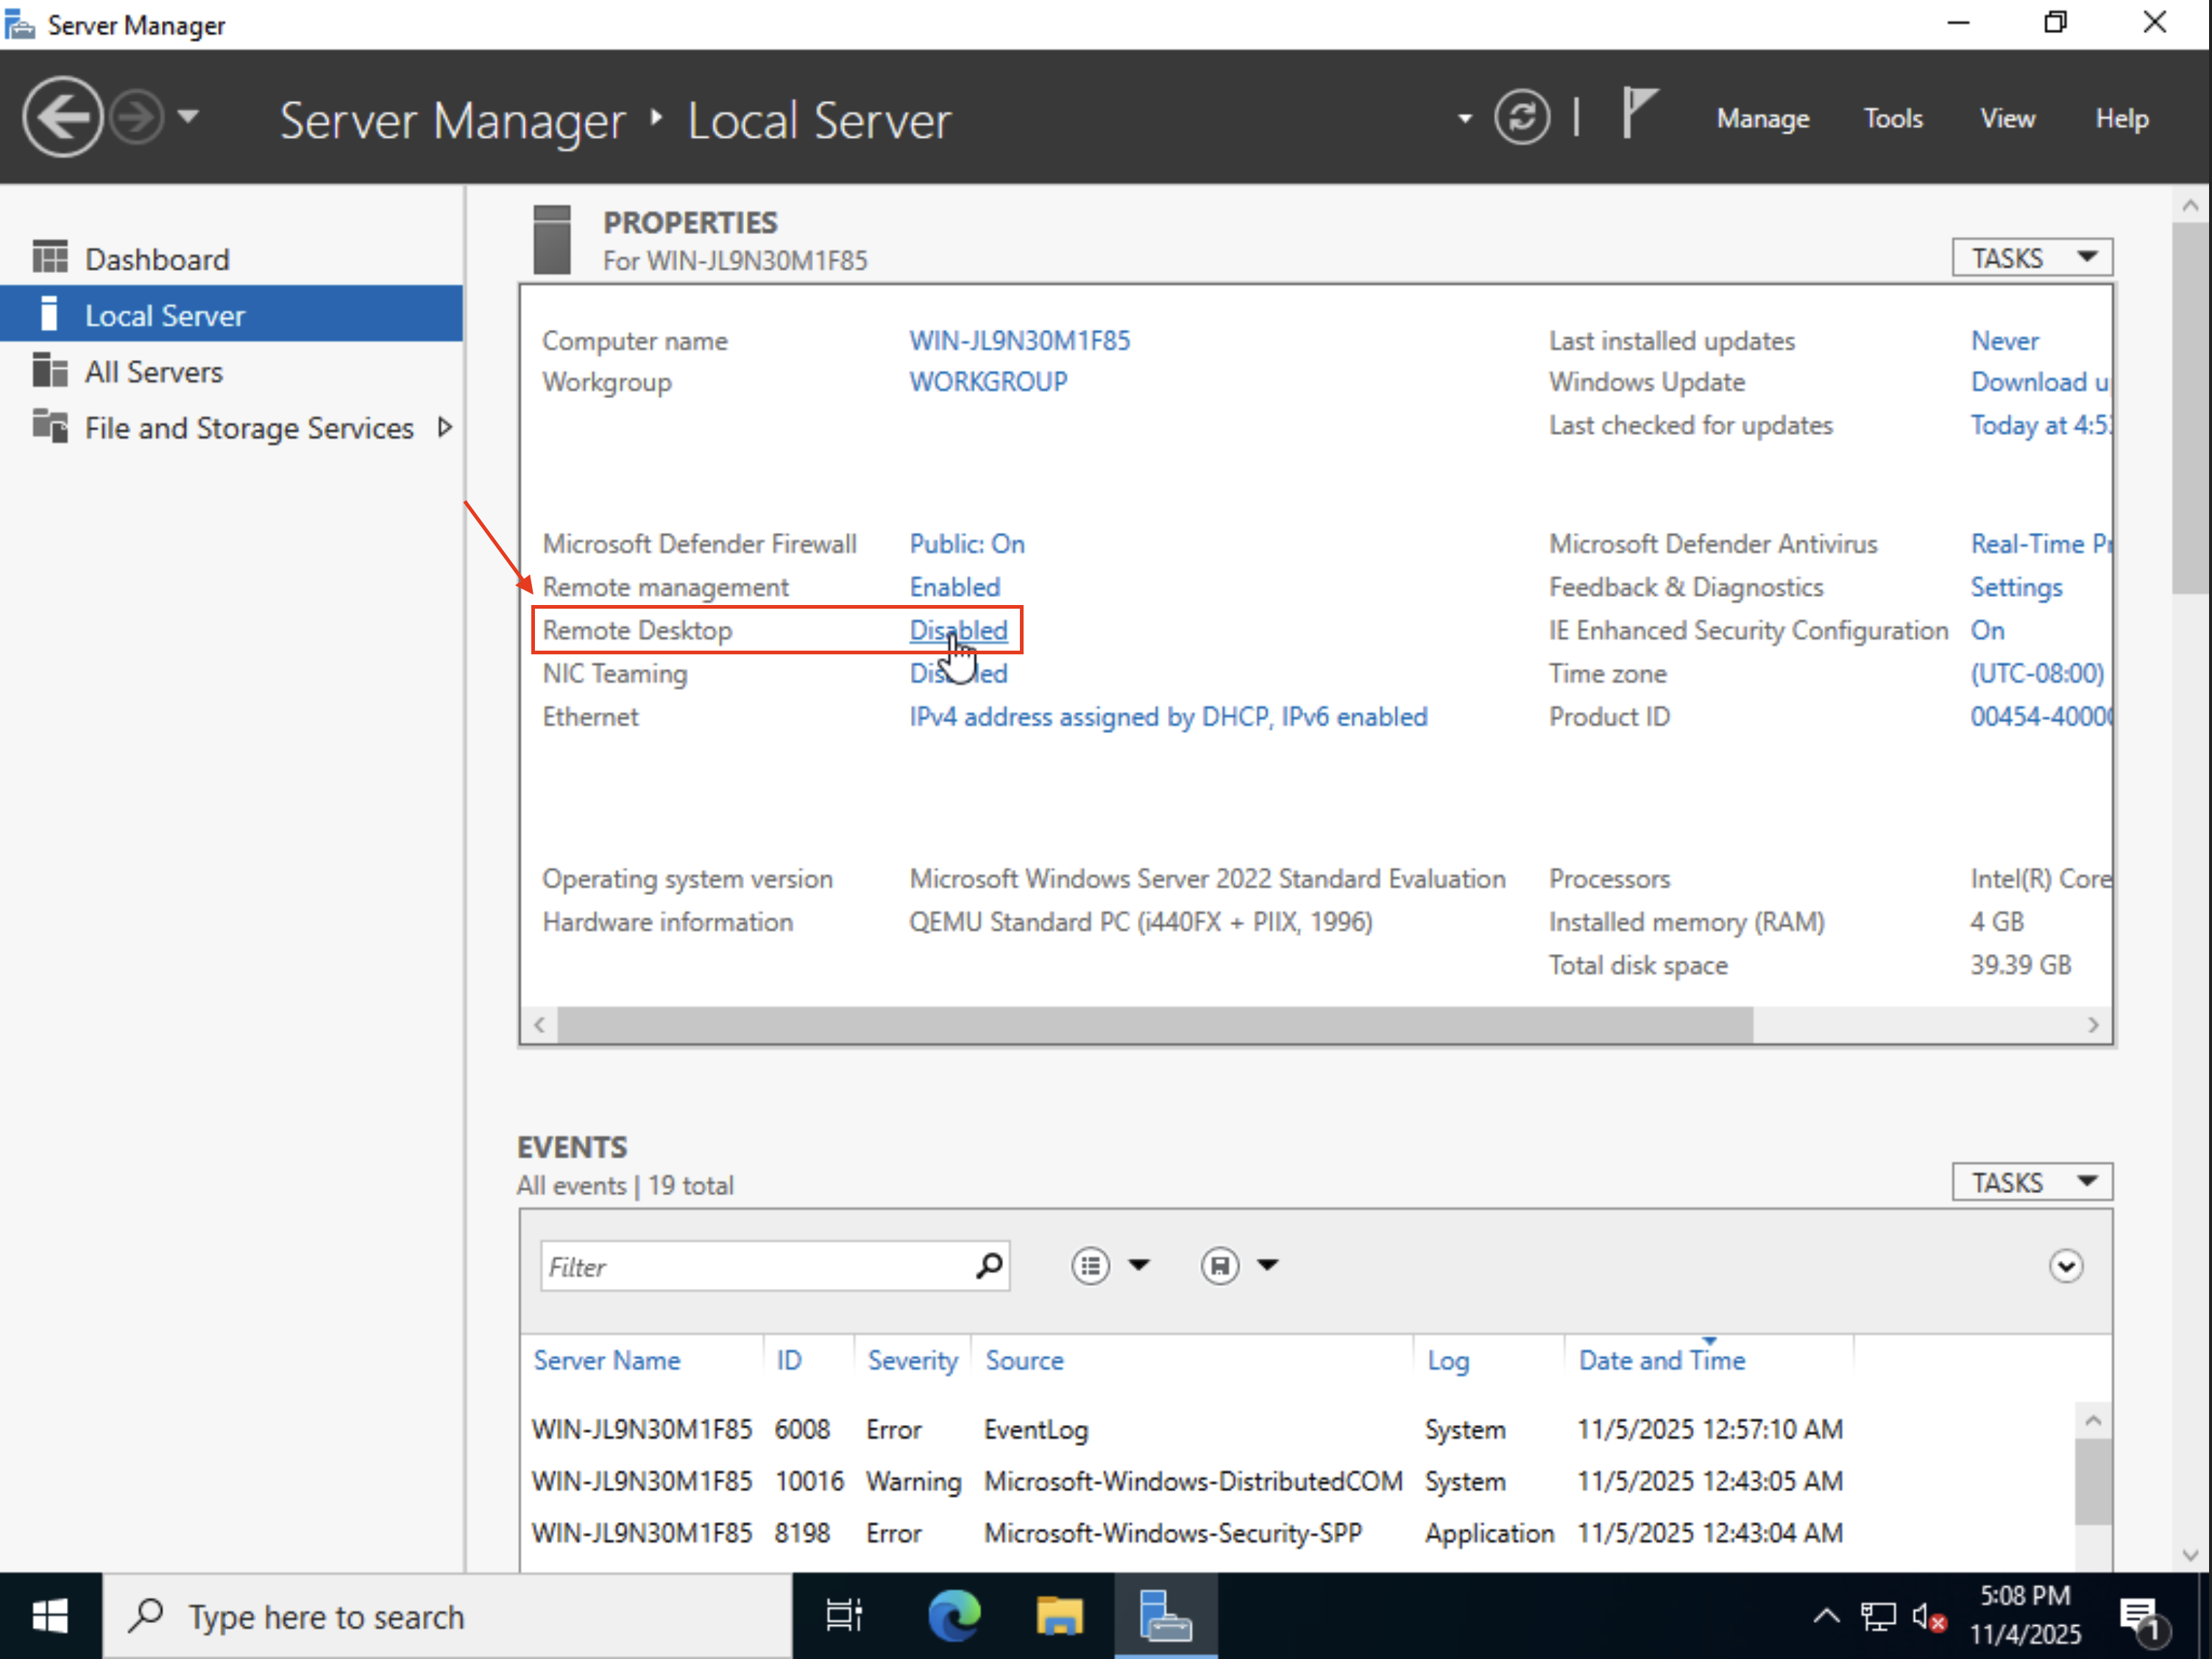
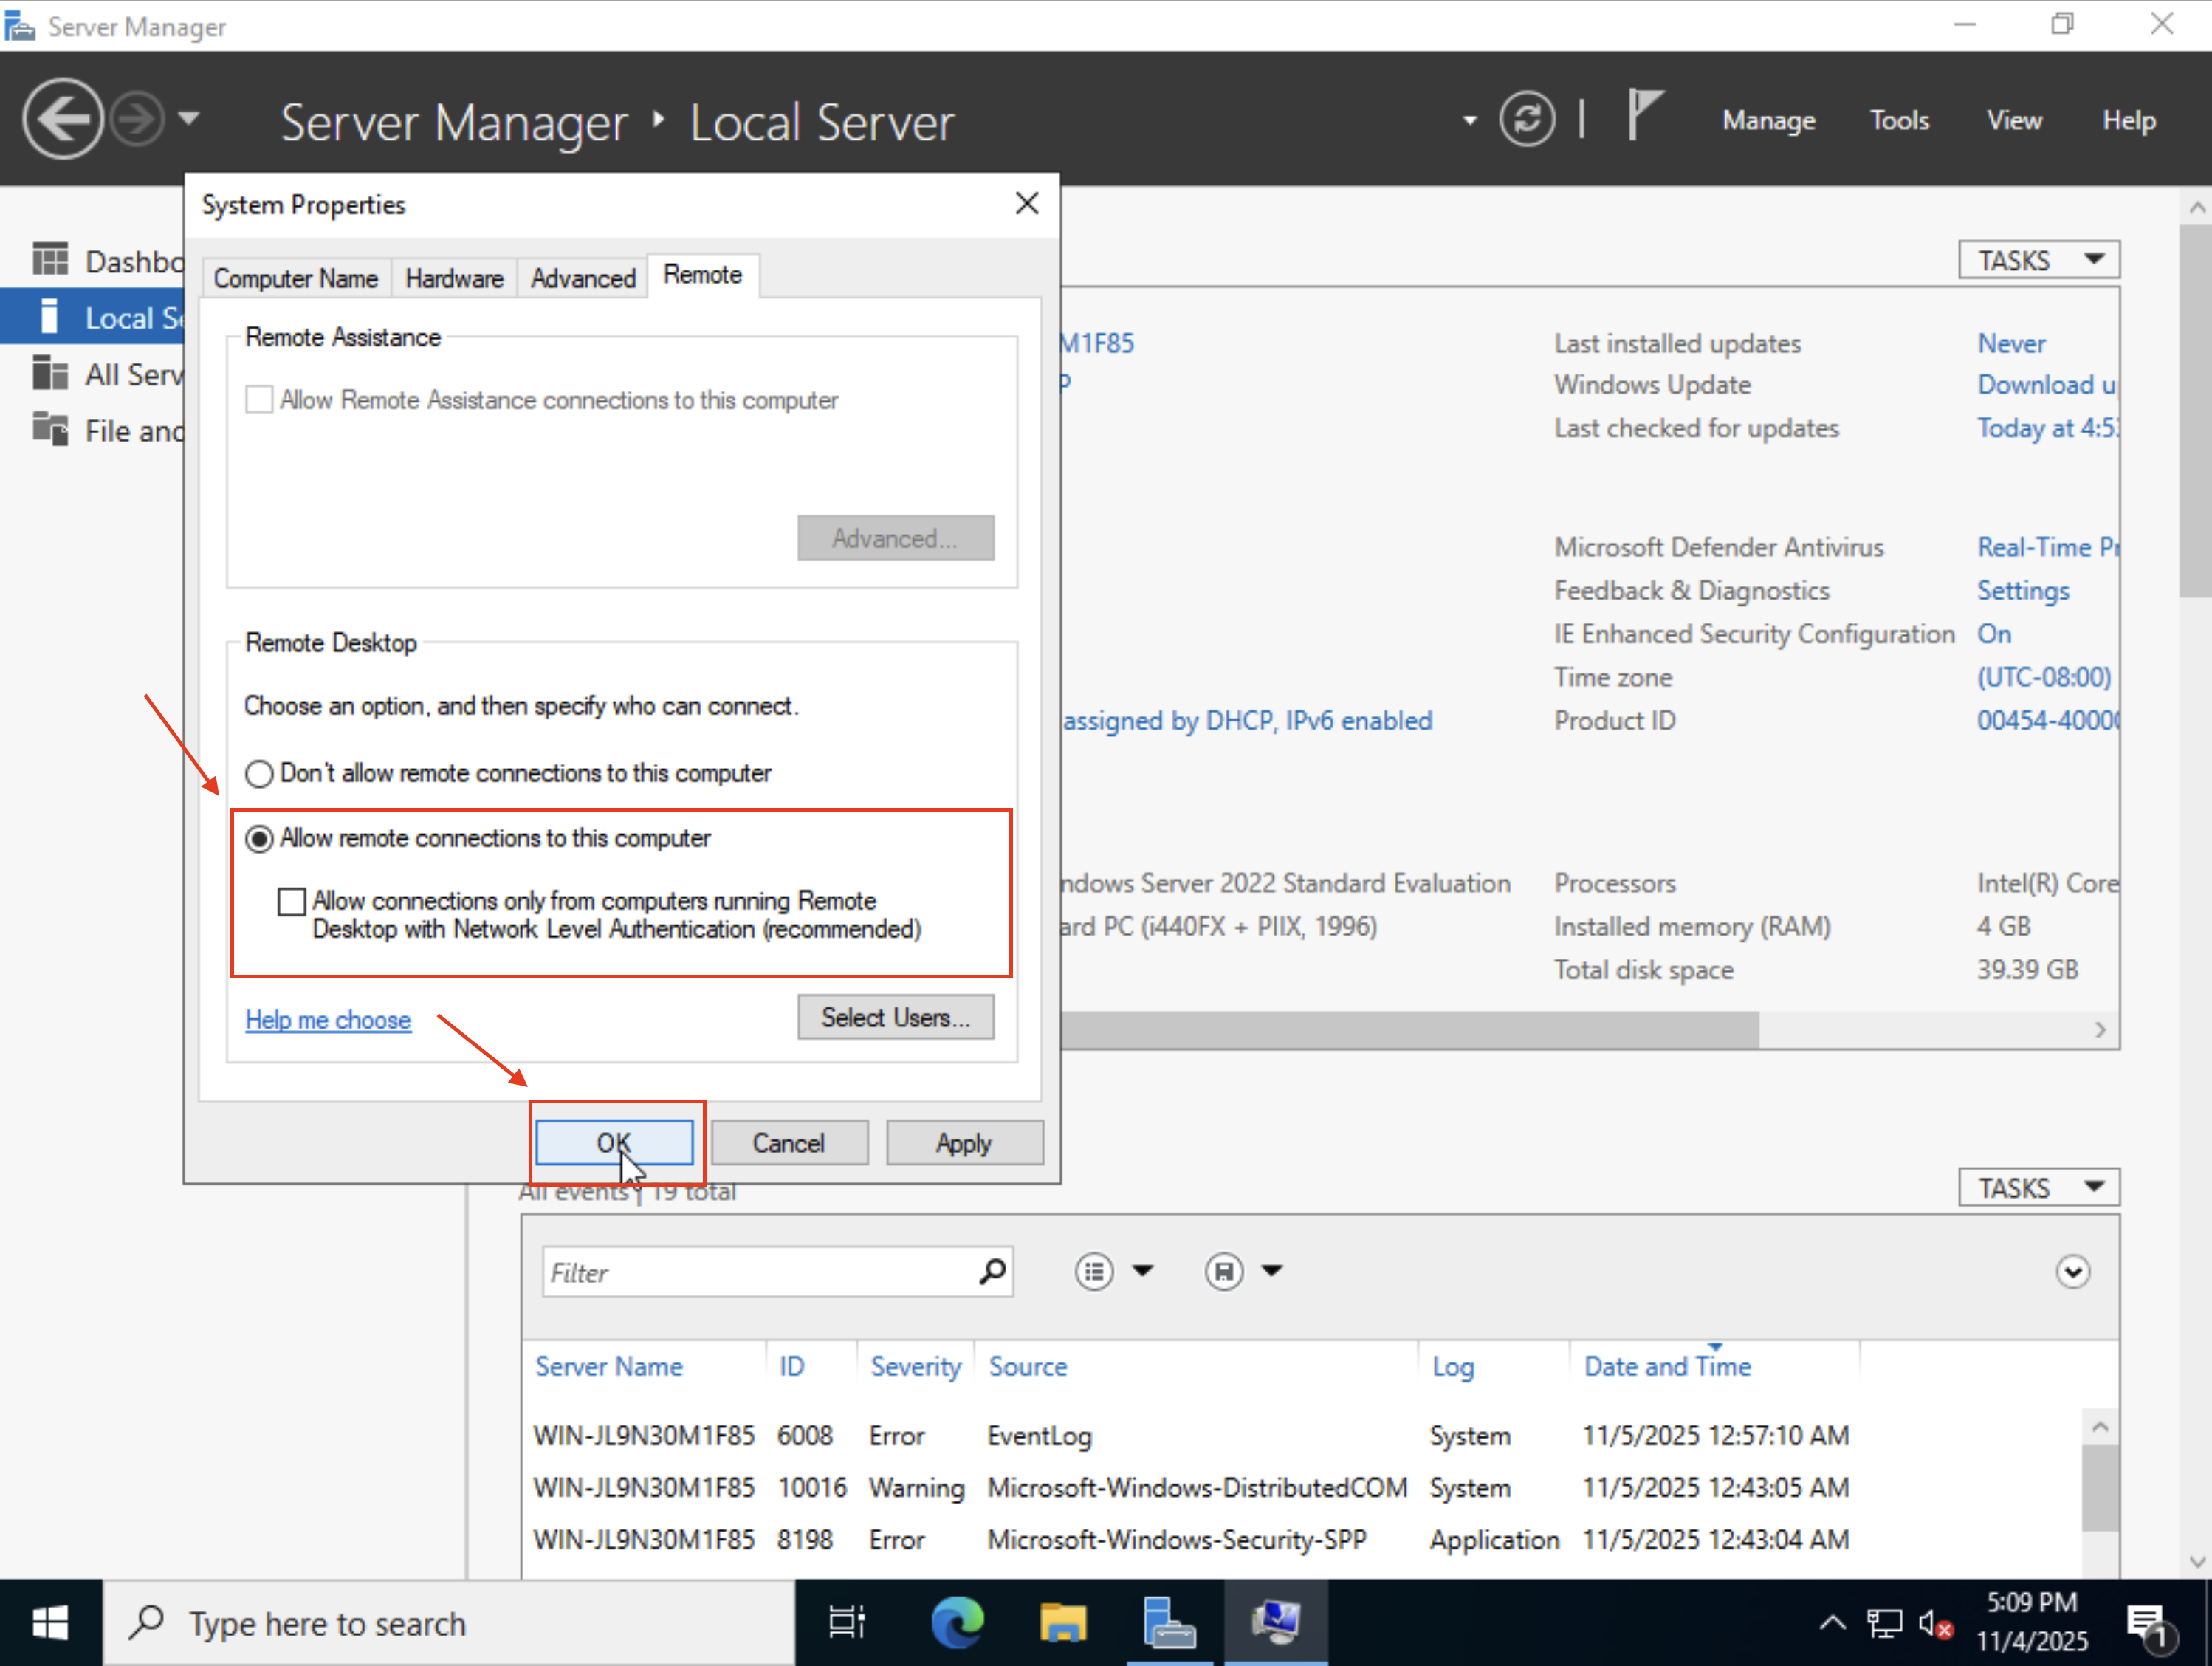
Enabling Remote Desktop
We now need to enable the Remote Desktop, to allow you to also access your VM remotely from a RDP client. Windows does not enable this by default when installed, let's go ahead and do that from the Server Manager
Then click on the Remote Desktop option
And match the settings as you see on screen below.
Finishing up
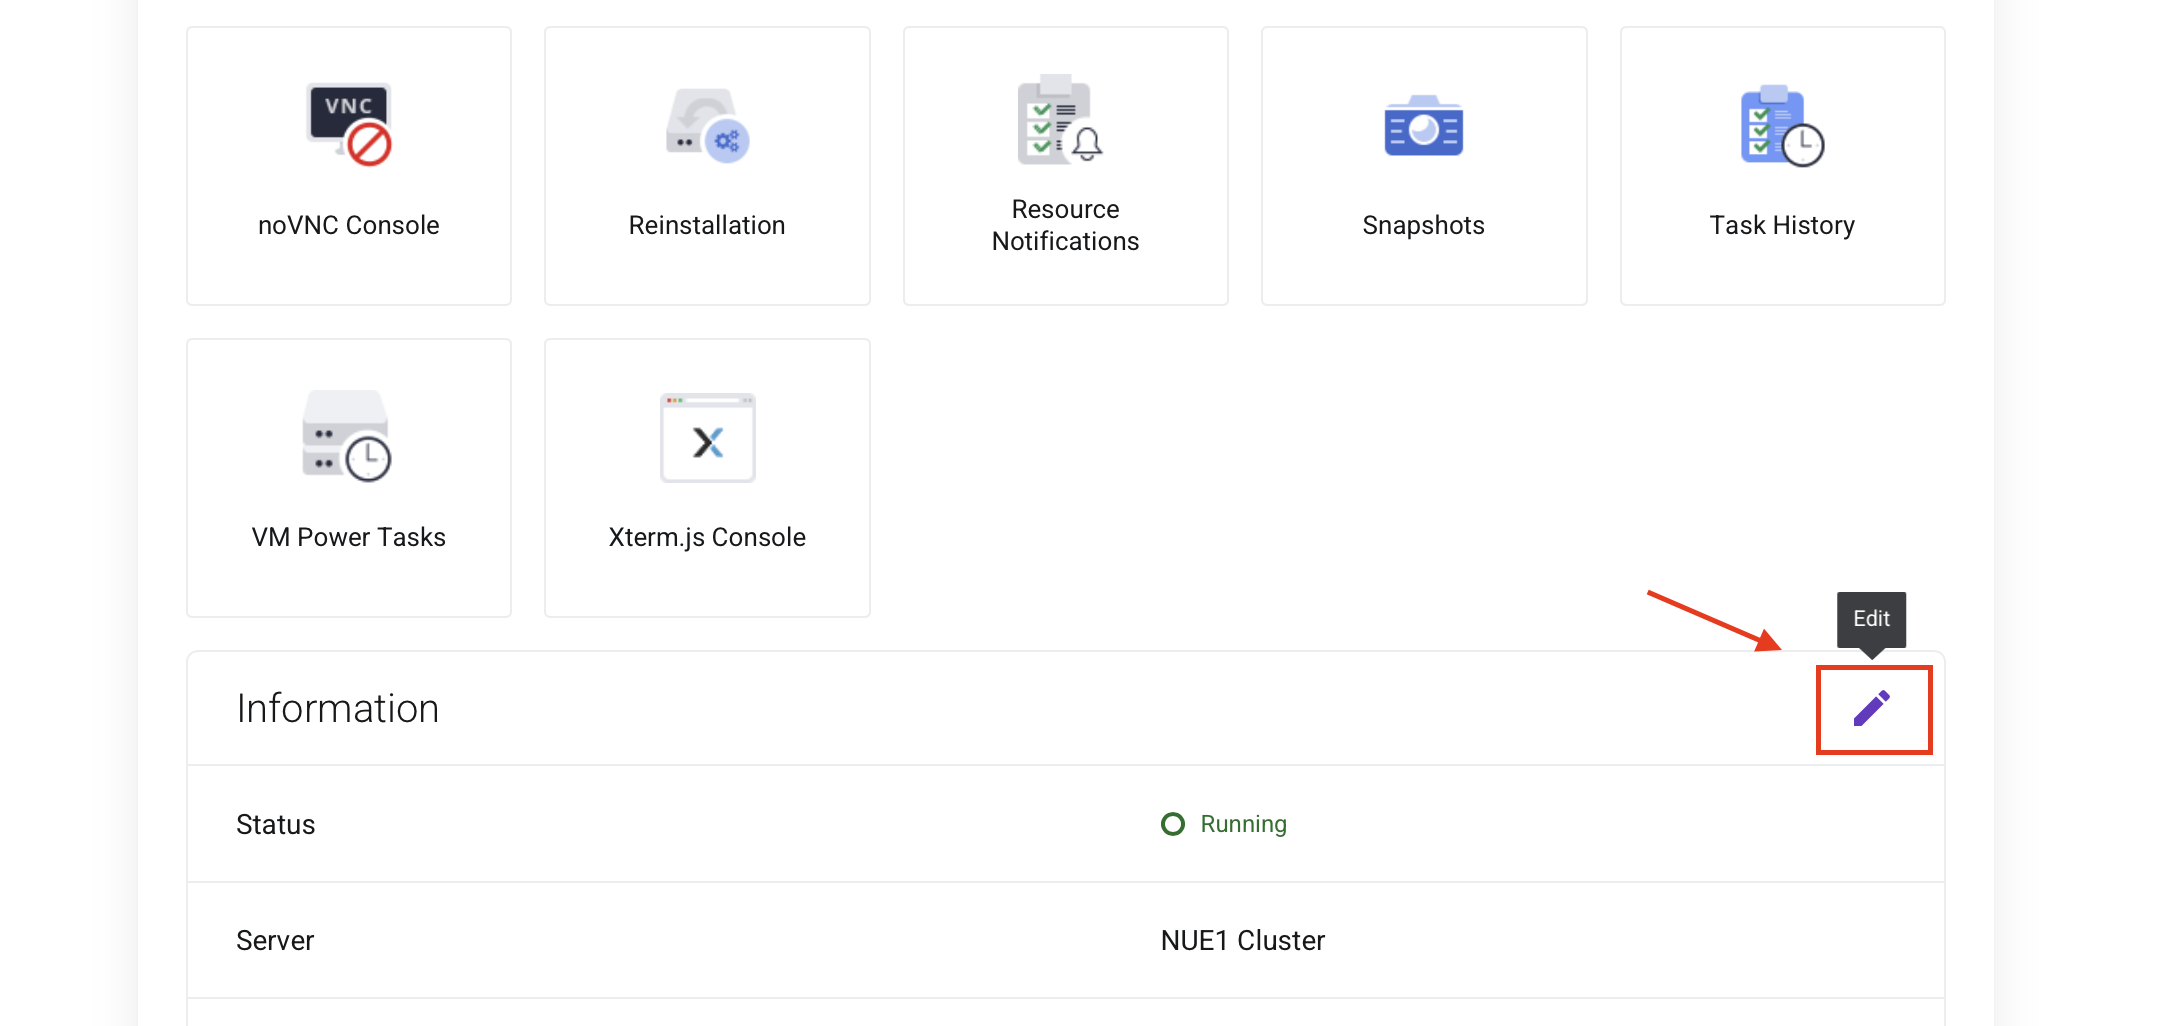
You can now edit the VM again and remove the ISO image, as well as setting back its normal boot order for future operation
Please note that the VM will now reboot another time, this may take up to 3 minutes so please be patient. After the VM boots up you're good to go, enjoy your new Windows installation!


